


8
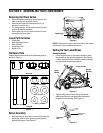
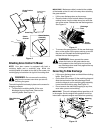
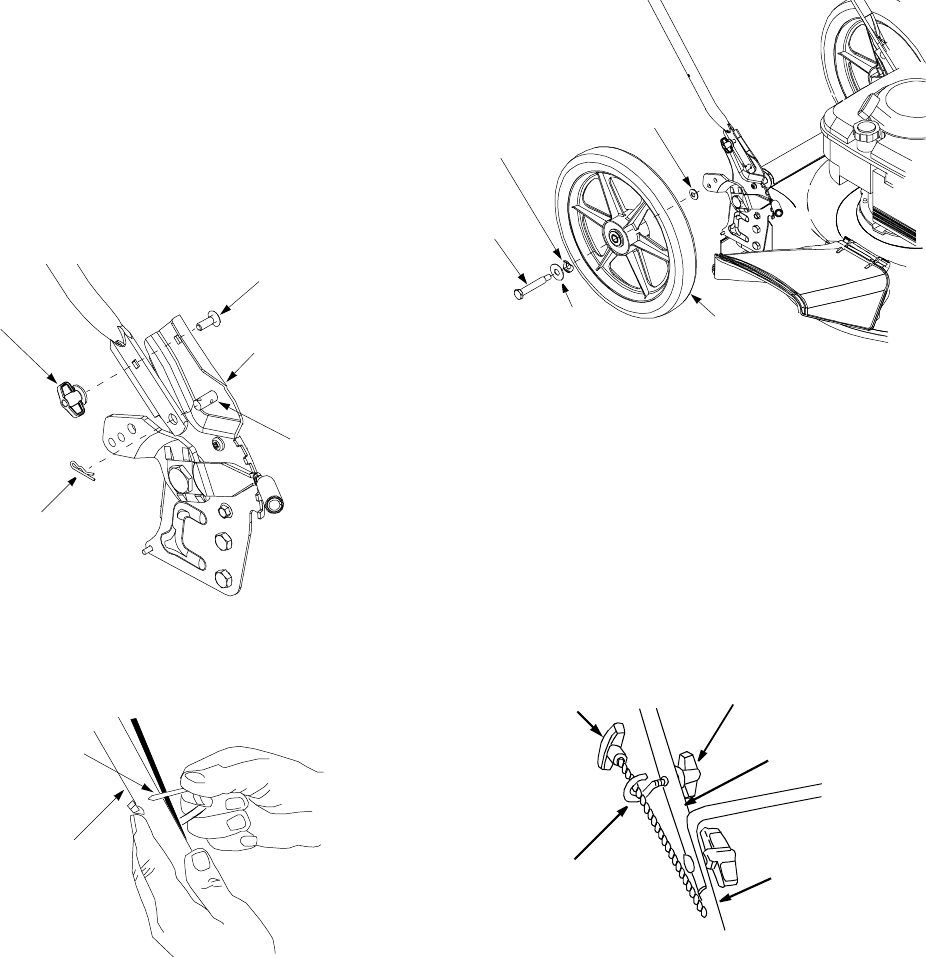
• Remove hairpin clip from the outer hole of the weld
pin on each handle brackets. Using a pair of pliers,
squeeze one leg of the lower handle against the
handle bracket. Insert the hairpin clip into the inner
hole on the weld pin. Repeat on the other side. See
Figure 5.
• After moving the hairpin clip, insert the carriage
bolt, from Group A of the hardware pack, in the
upper hole on the handle mounting bracket and
secure with plastic wing nut from the hardware
pack. See Figure 5. Repeat on the other side.
Figure 5
• Fasten the cable to the lower handle with the two
cable ties found on the lower handle. Pull the cable
ties tight and trim off the excess. See Figure 6.
Figure 6
NOTE: Your mower is shipped with the handle in the
higher position. If you wish to lower the height of the
handle, refer to the Adjustment Section at this time.
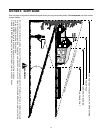
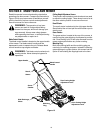
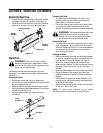
Attaching Rear Wheels
The necessary hardware is included in Group B of the
hardware pack. Refer to Figure 1 .
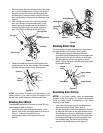
• Insert shoulder screw through flat washer, wave
washer, rear wheel, and spring washer as shown in
Figure 7 . Insert this assembly into the
corresponding hole on the rear pivot bar and
secure.
Figure 7
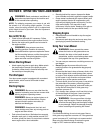
Attaching Starter Rope
The rope guide is already attached to the right side of
the upper handle of your mower. See Figure 8 .
• With the spark plug wire disconnected and
grounded, hold the blade control handle against the
upper handle, and pull the rope out of the engine.
• Slip the rope through the rope guide as shown
below. Tighten the wing nut holding the rope guide
to the upper handle.
Figure 8
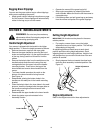
Assembling Grass Catcher
NOTE: If the grass catcher came pre-assembled,
proceed to the next section. If it came un-assembled,
follow the steps below to assemble it first, before
attaching to the mower.
• Insert frame into grass bag with the black plastic
side on the bottom of bag. See Figure 9.
• Slip the openings in the side of the plastic channel
on bag over the hooks on the grass catcher frame.
Secure bag to the frame by working the six plastic
channels on bag over frame. All of the plastic chan-
nels except the center top of the bag attach from
the outside of bag. The center top of the bag
attaches from inside the bag. See Figure 9.
Wing Nut
Carriage Bolt
Hairpin Clip
Weld Pin
Handle
Mounting Bracket
Cable Tie
Lower
Handle
Spring Washer
Wave Washer
Rear
Flat
Shoulder
Screw
Washer
Wheel
Wing Nut
Starter
Rope Guide
Upper Handle
Lower Handle
Rope