


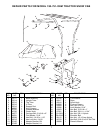

5
12. Assemble the top tubes to the upright tubes using two
1/4" x 1-1/2" hex bolts (from outside) and two 1/4" hex
lock nuts (inside). Do not tighten yet. See figure 7.
13. Fit the front U-tube onto the top tubes. Fasten the
tubes together using two 1/4" x 1-1/2" hex bolts (on
outside) and two 1/4" hex lock nuts (on inside).
Tighten all loose bolts. See figure 7.
14. Fit the three support rods into the holes in the top
tubes, with the rods arching upward. Do not over
bend the rods when installing. See figure 7.
STANDARD FRAME TRACTORS
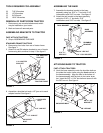
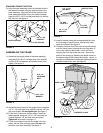
10. Hook the base assembly under the shoulder bolts in
the adapter brackets using the second notch in the
base assembly. Align the hole in the bottom of the
base assembly with the hole in the tractor drawbar.
Insert the 5/8” x 1-3/4” hex bolt and secure it with the
5/8” hex nut. See figure 5.
FIGURE 5
FIGURE 6
FIGURE 7
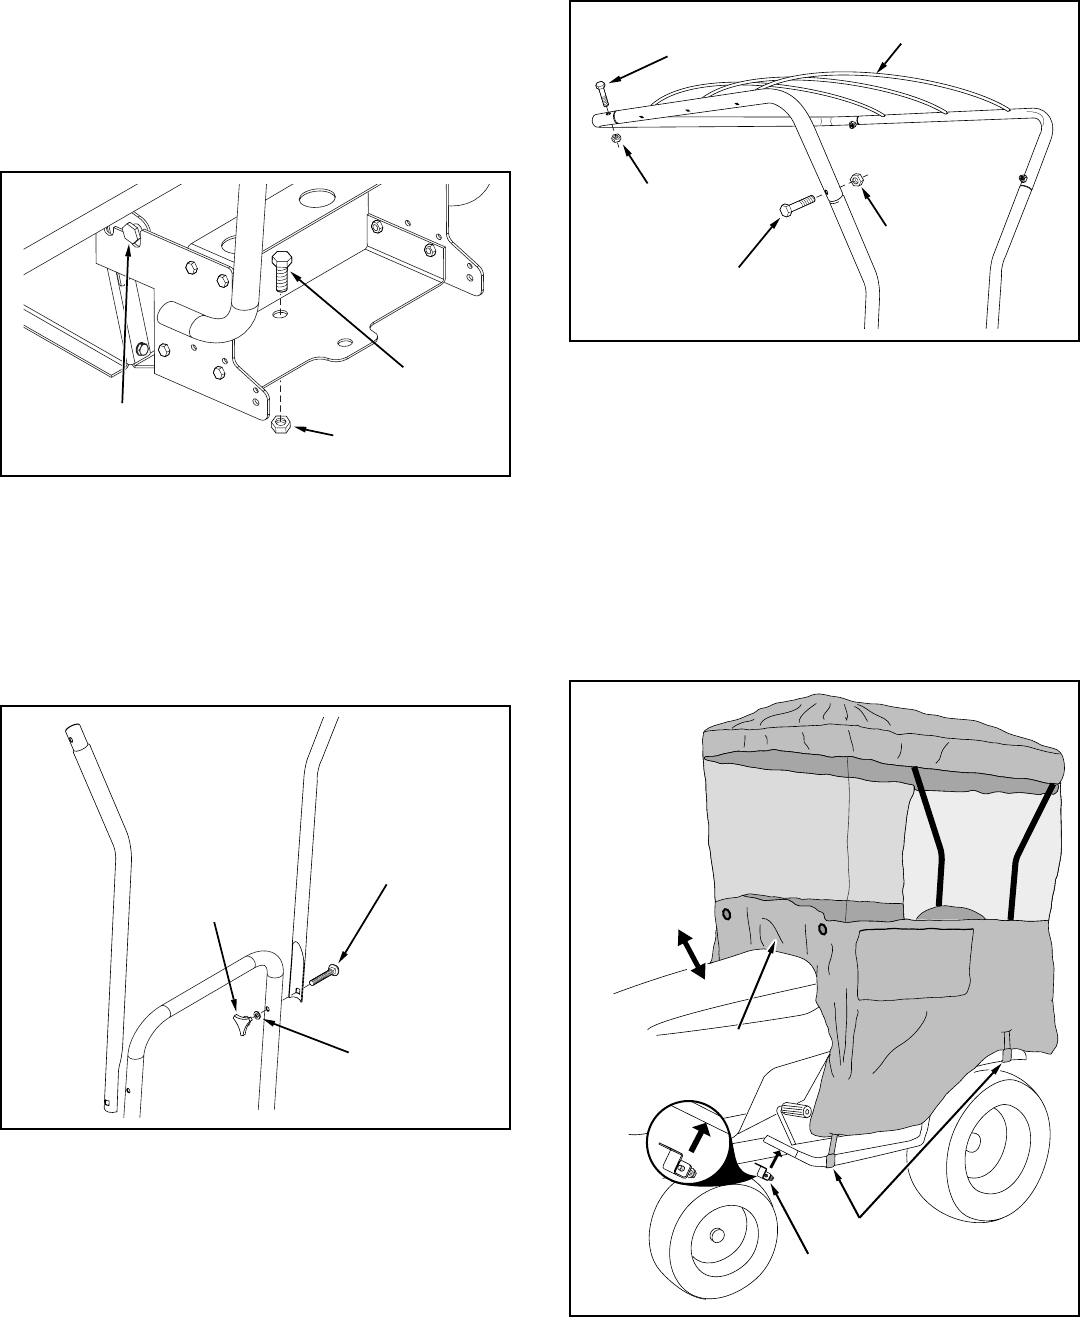
15. Install a footrest clamp with preassembled bolt onto
the front edge of each footrest, with the bolt under-
neath the footrest. See figure 8.
16. Raise the tractor's hood. Place the snow cab canopy
onto the tubing frame, draping the front flap down in
front of the tractor's dash panel. Lower the hood,
trapping the front flap under the hood. Secure the
sides of the canopy by fastening the elastic hooks to
the bottom edge of the footrest and fender. Levers or
handles on snowthrowers and snow blades should be
located outside of the cab. See figure 8.
FIGURE 8
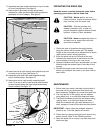
ASSEMBLING THE FRAME
11. Assemble the upright tubes to the base assembly
using two 5/16-18 x 2" carriage bolts (from outside)
and two 5/16" flat washers and plastic knobs (from
inside). See figure 6.
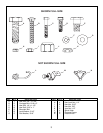
5/8" HEX NUT
5/8" x 1-3/4"
HEX BOLT
SHOULDER BOLT
5/16" x 2"
CARRIAGE
BOLT
5/16" FLAT
WASHER
PLASTIC
KNOB
1/4" HEX
LOCK NUT
1/4" x 1-1/2"
HEX BOLT
SUPPORT ROD
1/4" x 1-1/2"
HEX BOLT
1/4" HEX
LOCK NUT
ELASTIC HOOKS
FRONT FLAP
RAISE HOOD
FOOTREST CLAMP