


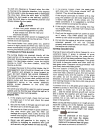
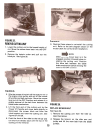

The seat spring has three holes to provide a
forward or backward adjustment of the seat. To
check for the best seat position, sit in the seat and
work the foot pedal. If adjustment is needed,
unfasten the seat and replace it in a forward or
backward hole. See figure 3.
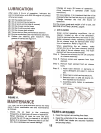
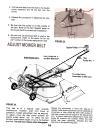
Place seat on spring and secure with lockwasher
(8) and hex nut (C). See figure 4.
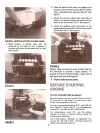
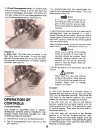
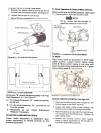
STEERING WHEEL
First, place the steering shaft cover over the
steering shaft. Then position the steering wheel
on top of the steering shaft. You will note there is
a hole in the steering wheel hub, in the steering
shaft cover and in the steering shaft. Align these
three holes and secure the three parts by driving a
spring pin (A) through the three aligned holes.
(Alignment can be simplified by inserting a punch
or small rod through the three holes from the side
opposite the spring pin insertion side.) See figure
2.
FIGURE 4. SEAT ASSEMBLY
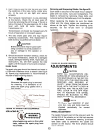
NOTE
Check ALL nuts and bolts for cor-
rect tightness.
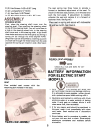
BATTERY INFORMATION
FOR ELECTRIC START
MODELS
FIGURE 2. STEERING WHEEL ASSEMBLY
SEAT
Your molded seat comes with the
mounting bolt molded in the seat.
A.
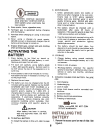
Battery acid must be handled with great care
as it will blister tne skin and damage clothing.
It is advisable to wear goggles, rubber gloves.
and a protective apron when working with it.
B. Neutralize acid spilled on clothing with dilute
ammonia water or a water solution of baking
soda. If acid gets on clothes,. dilute it with
clean water first, then neutralize.
C. If for any reason acid should be spattered in
the eyes, wash it out immediately with clean
cold water. Seek medical aid if discomfort
continues
D. Since battery acid is corrosive to metals, do
not pour into any sink or drain. Rinse empty
electrolyte containers and mutilate before
discarding.
FIGURE 3. SEAT ASSEMBLY
5
0 (2) Hex Screws 1/4-20 x 5.50" Long
E (2) Lockwashers 1/4" Screw
F (4) Hex Nuts 1/4-20 Thread
G (2) Hex Sems Screws 1/4-20 x .62" Long