


®
Outdoor LP Gas Light Model No. GTL7179SP
Contact 1.800.762.1142 for assistance. Do not return to place of purchase.
Checking for Leaks
WARNING: Before using this Outdoor Light,
make sure you have read, understand and
are following all information provided in the
Dangers and Warnings presented on page 2.
Failure to follow those instructions can cause
death, serious injury or property damage.
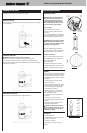
Burner Connections
Make sure the regulator valve and hose
connections are securely fastened to the burner
and the tank.
If your unit was assembled for you, visually check
the connection between the burner pipe and orifice.
Make sure the burner pipe fits over the orifice.
WARNING: Failure to inspect this connection
or follow these instructions could cause a fire
or an explosion which can cause death, serious
bodily injury, or damage to property.
Please refer to diagram for proper installation.
If the burner pipe does not rest flush to the orifice,
please contact 1.800.762.1142 for assistance.
Tank/Gas Line Connection
Make 2-3 oz. of leak solution by mixing one part
liquid dishwashing soap with three parts water.
Make sure control knob is OFF.
Attach the LP gas tank.
Spoon leak check solution at all “x” locations
If no bubbles appear after one minute turn control
knob to “OFF”, wipe away solution and proceed.
Lighting
1. Make sure there are no obstructions of airflow to
the gas unit. Spiders and insects can nest within
and clog the burner / venturi tube at the orifice.
A clogged burner tube can lead to a fire beneath
the appliance.
2. Control knob must be in the “OFF” position.
3. Attach the LP gas tank.
4. Push in control knob and rotate to “ON” position.
This will activate the built-in ignitor and light
the burner. If necessary, keep depressing and
rotating knob until burner lights.
5. If ignition does not occur in 5 seconds, turn
burner control knob to “OFF”, wait 5 minutes,
and repeat lighting procedure.
6. Once the burner is lit, hold control knob in for
30 seconds.
7. If burner does not stay lit, turn to “OFF”
position and wait 5 minutes and repeat lighting
procedure.
8. After lighting, observe the burner flame and
flame height matches illustration.
CAUTION: If burner flame goes out during
operation, immediately turn the gas “OFF” and
open top cap to let the gas clear for about 5
minutes before re-lighting.
Turning Off
1. Remove the LP gas tank.
2. Once the flame goes out, turn the control knob
clockwise to “OFF” position.
3. Properly store LP gas tank.
Note: May take up to 5 minutes for flame to
extinguish.
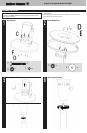
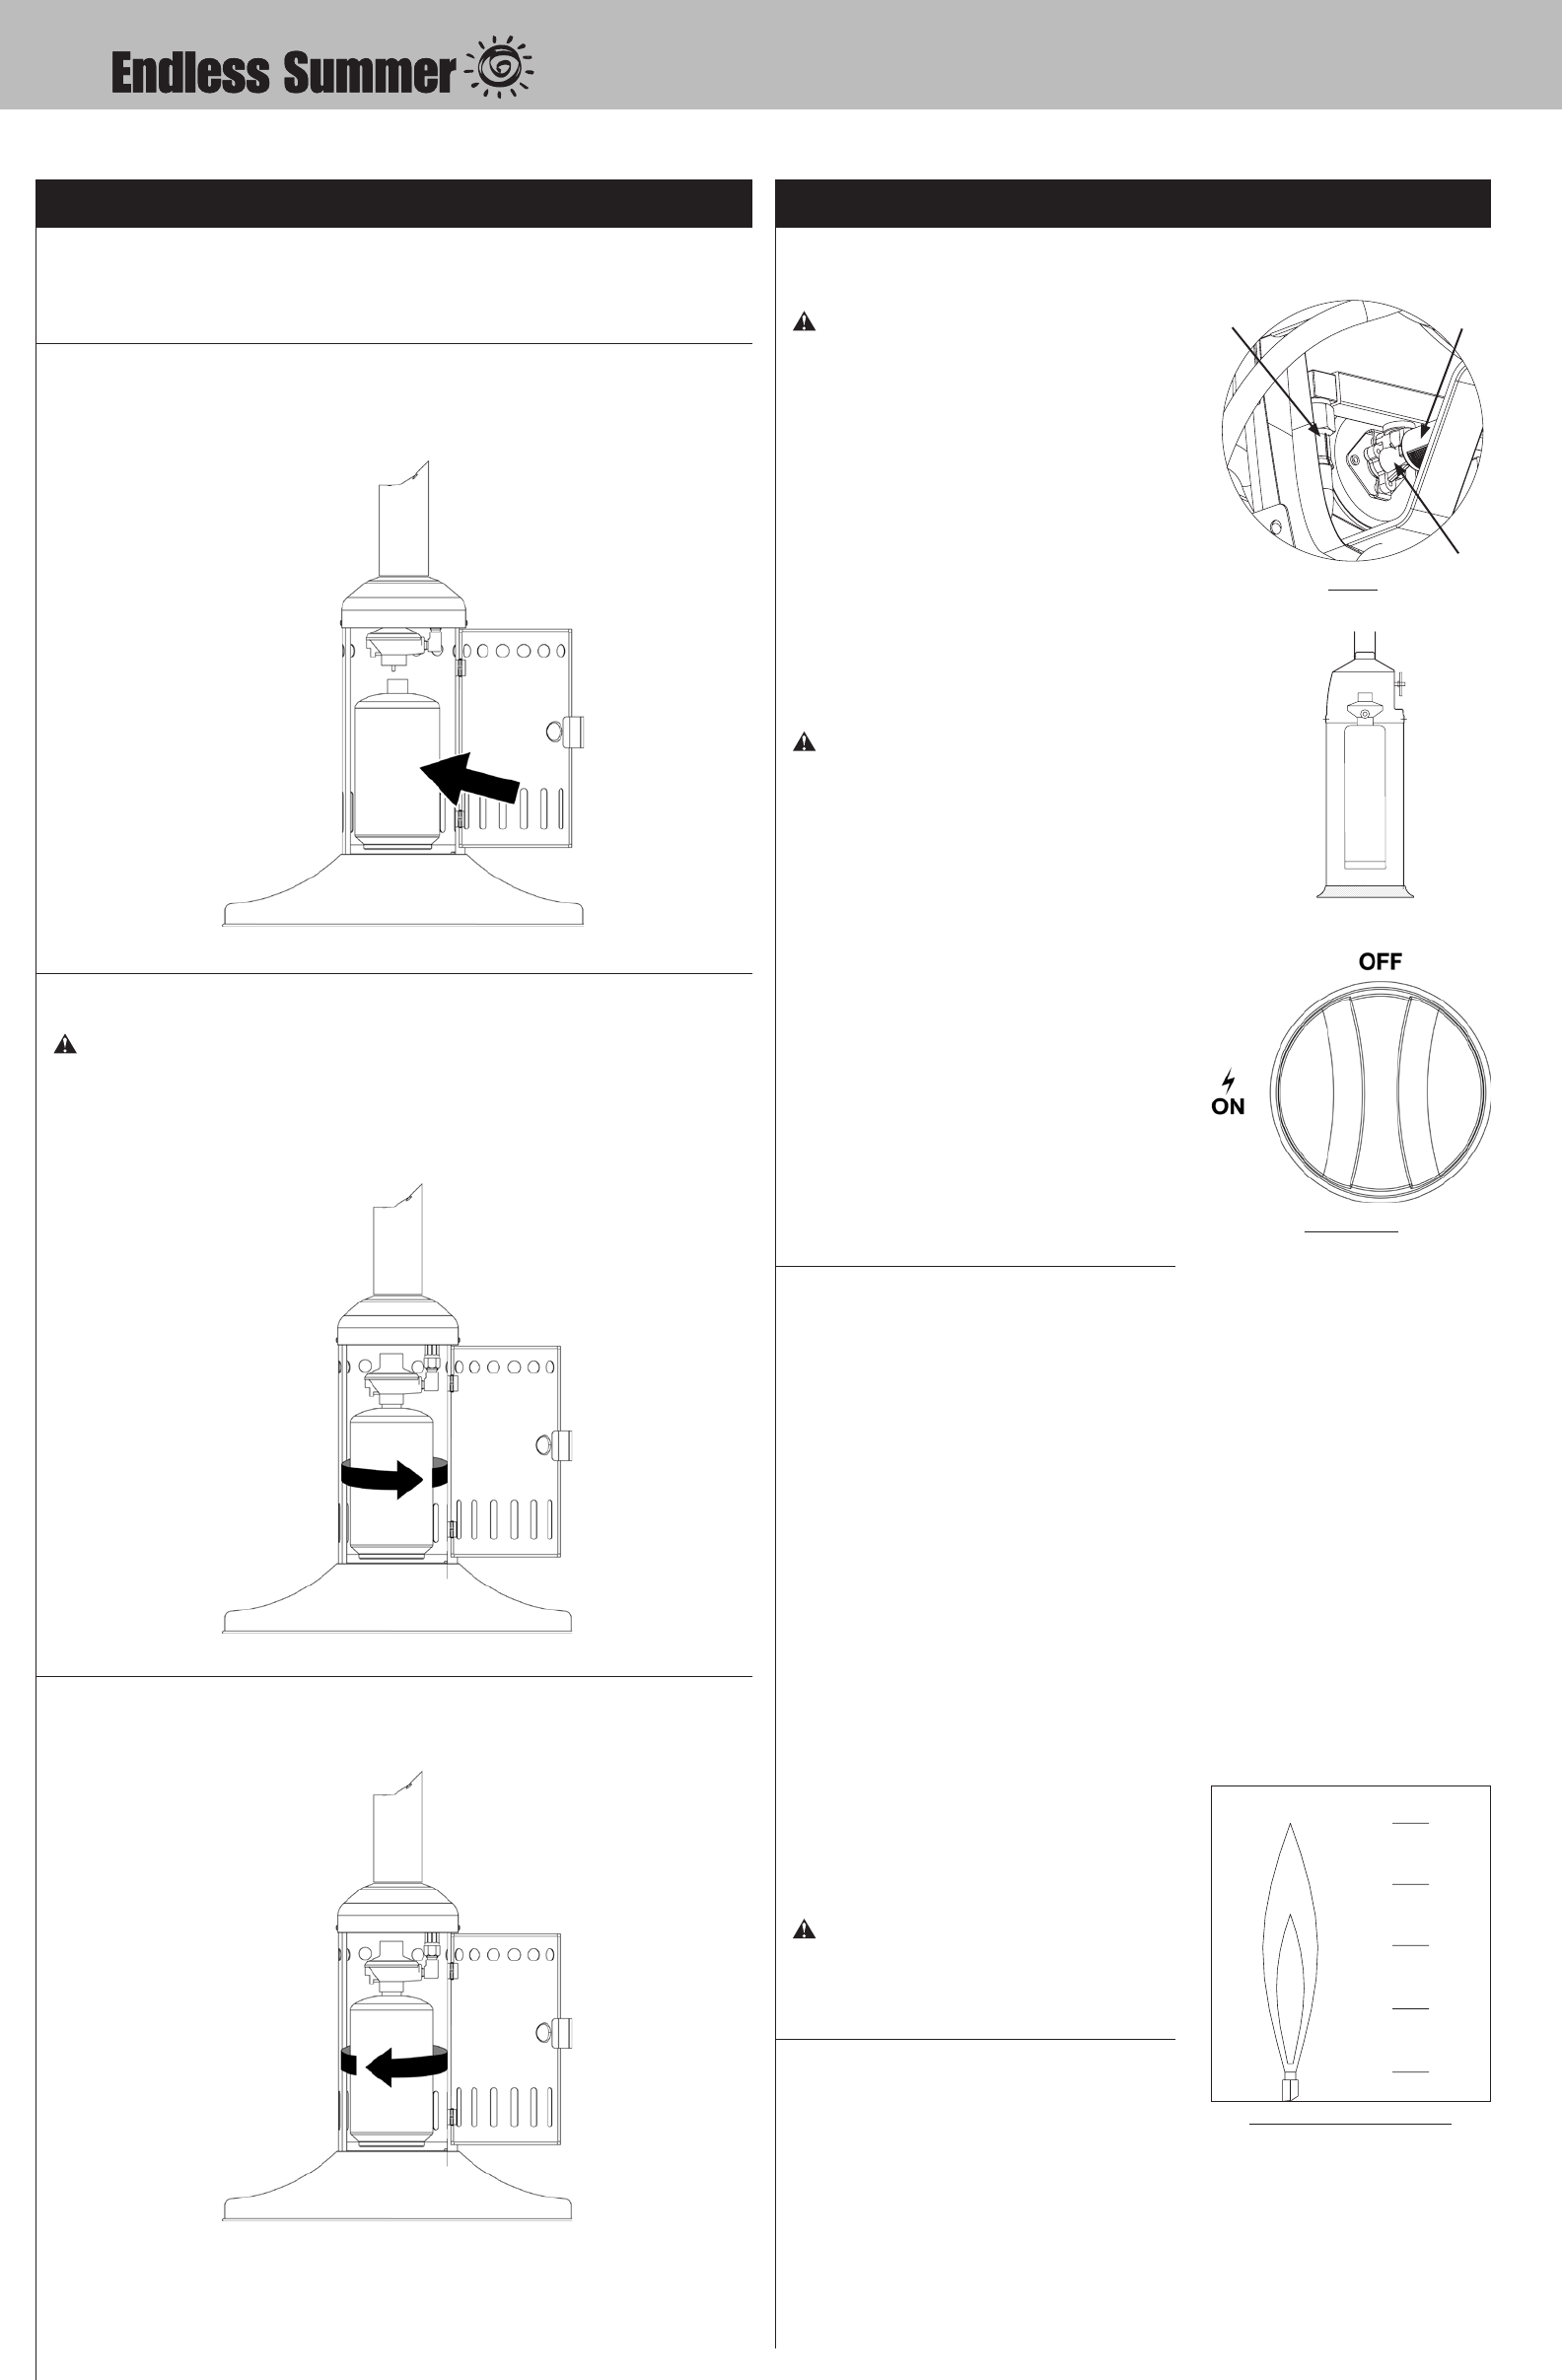
Installing LP Gas Tank
To operate you will need (1) 14.1 oz or (1) 16.4 oz LP gas tank.
Insert LP Gas Tank
Place precision filled LP gas tank upright into hole in outdoor gas light body so it is arranged
for vapor withdrawal.
Connect LP Gas Tank
WARNING: Only cylinders marked “propane” may be used.
Note: Some 14.1 oz or 16.4 oz LP gas tanks may form frost when near empty.
Line up threads on LP gas tank with those on regulator, insert and rotate LP gas tank
clockwise until they fit snugly together. HAND TIGHTEN ONLY. Be careful not to cross threads
when screwing in LP gas tank.
Disconnect LP Gas Tank
Rotate LP gas tank counterclockwise until the LP gas tank comes off.
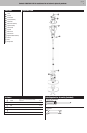
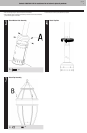
LP Gas
Connection
LP Gas Valve
with Orifice
Burner
venturi
Burner
Control Knob
Operating Instructions
Burner proper flame height.
4 in.
10 cm.
3 in.
7.5 cm.
2 in.
5 cm.
1 in.
2.5 cm.
0 in.
0 cm.
X
X