


Outdoor LP Gas Lantern Model No. GLL800W
Contact 1.800.762.1142 for assistance. Do not return to place of purchase.
Operating Instructions
This lantern is designed to operate with a one pound
7-3/8” high disposable / 16.4 oz. or 14.1 oz. propane
gas tank (DOT 39 Cylinder).
DO NOT ATTEMPT TO REFILL ANY ONE POUND (16.4
oz. or 14.1 oz.) PROPANE GAS TANKS!
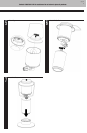
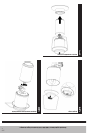
Connecting Gas Tank
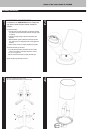
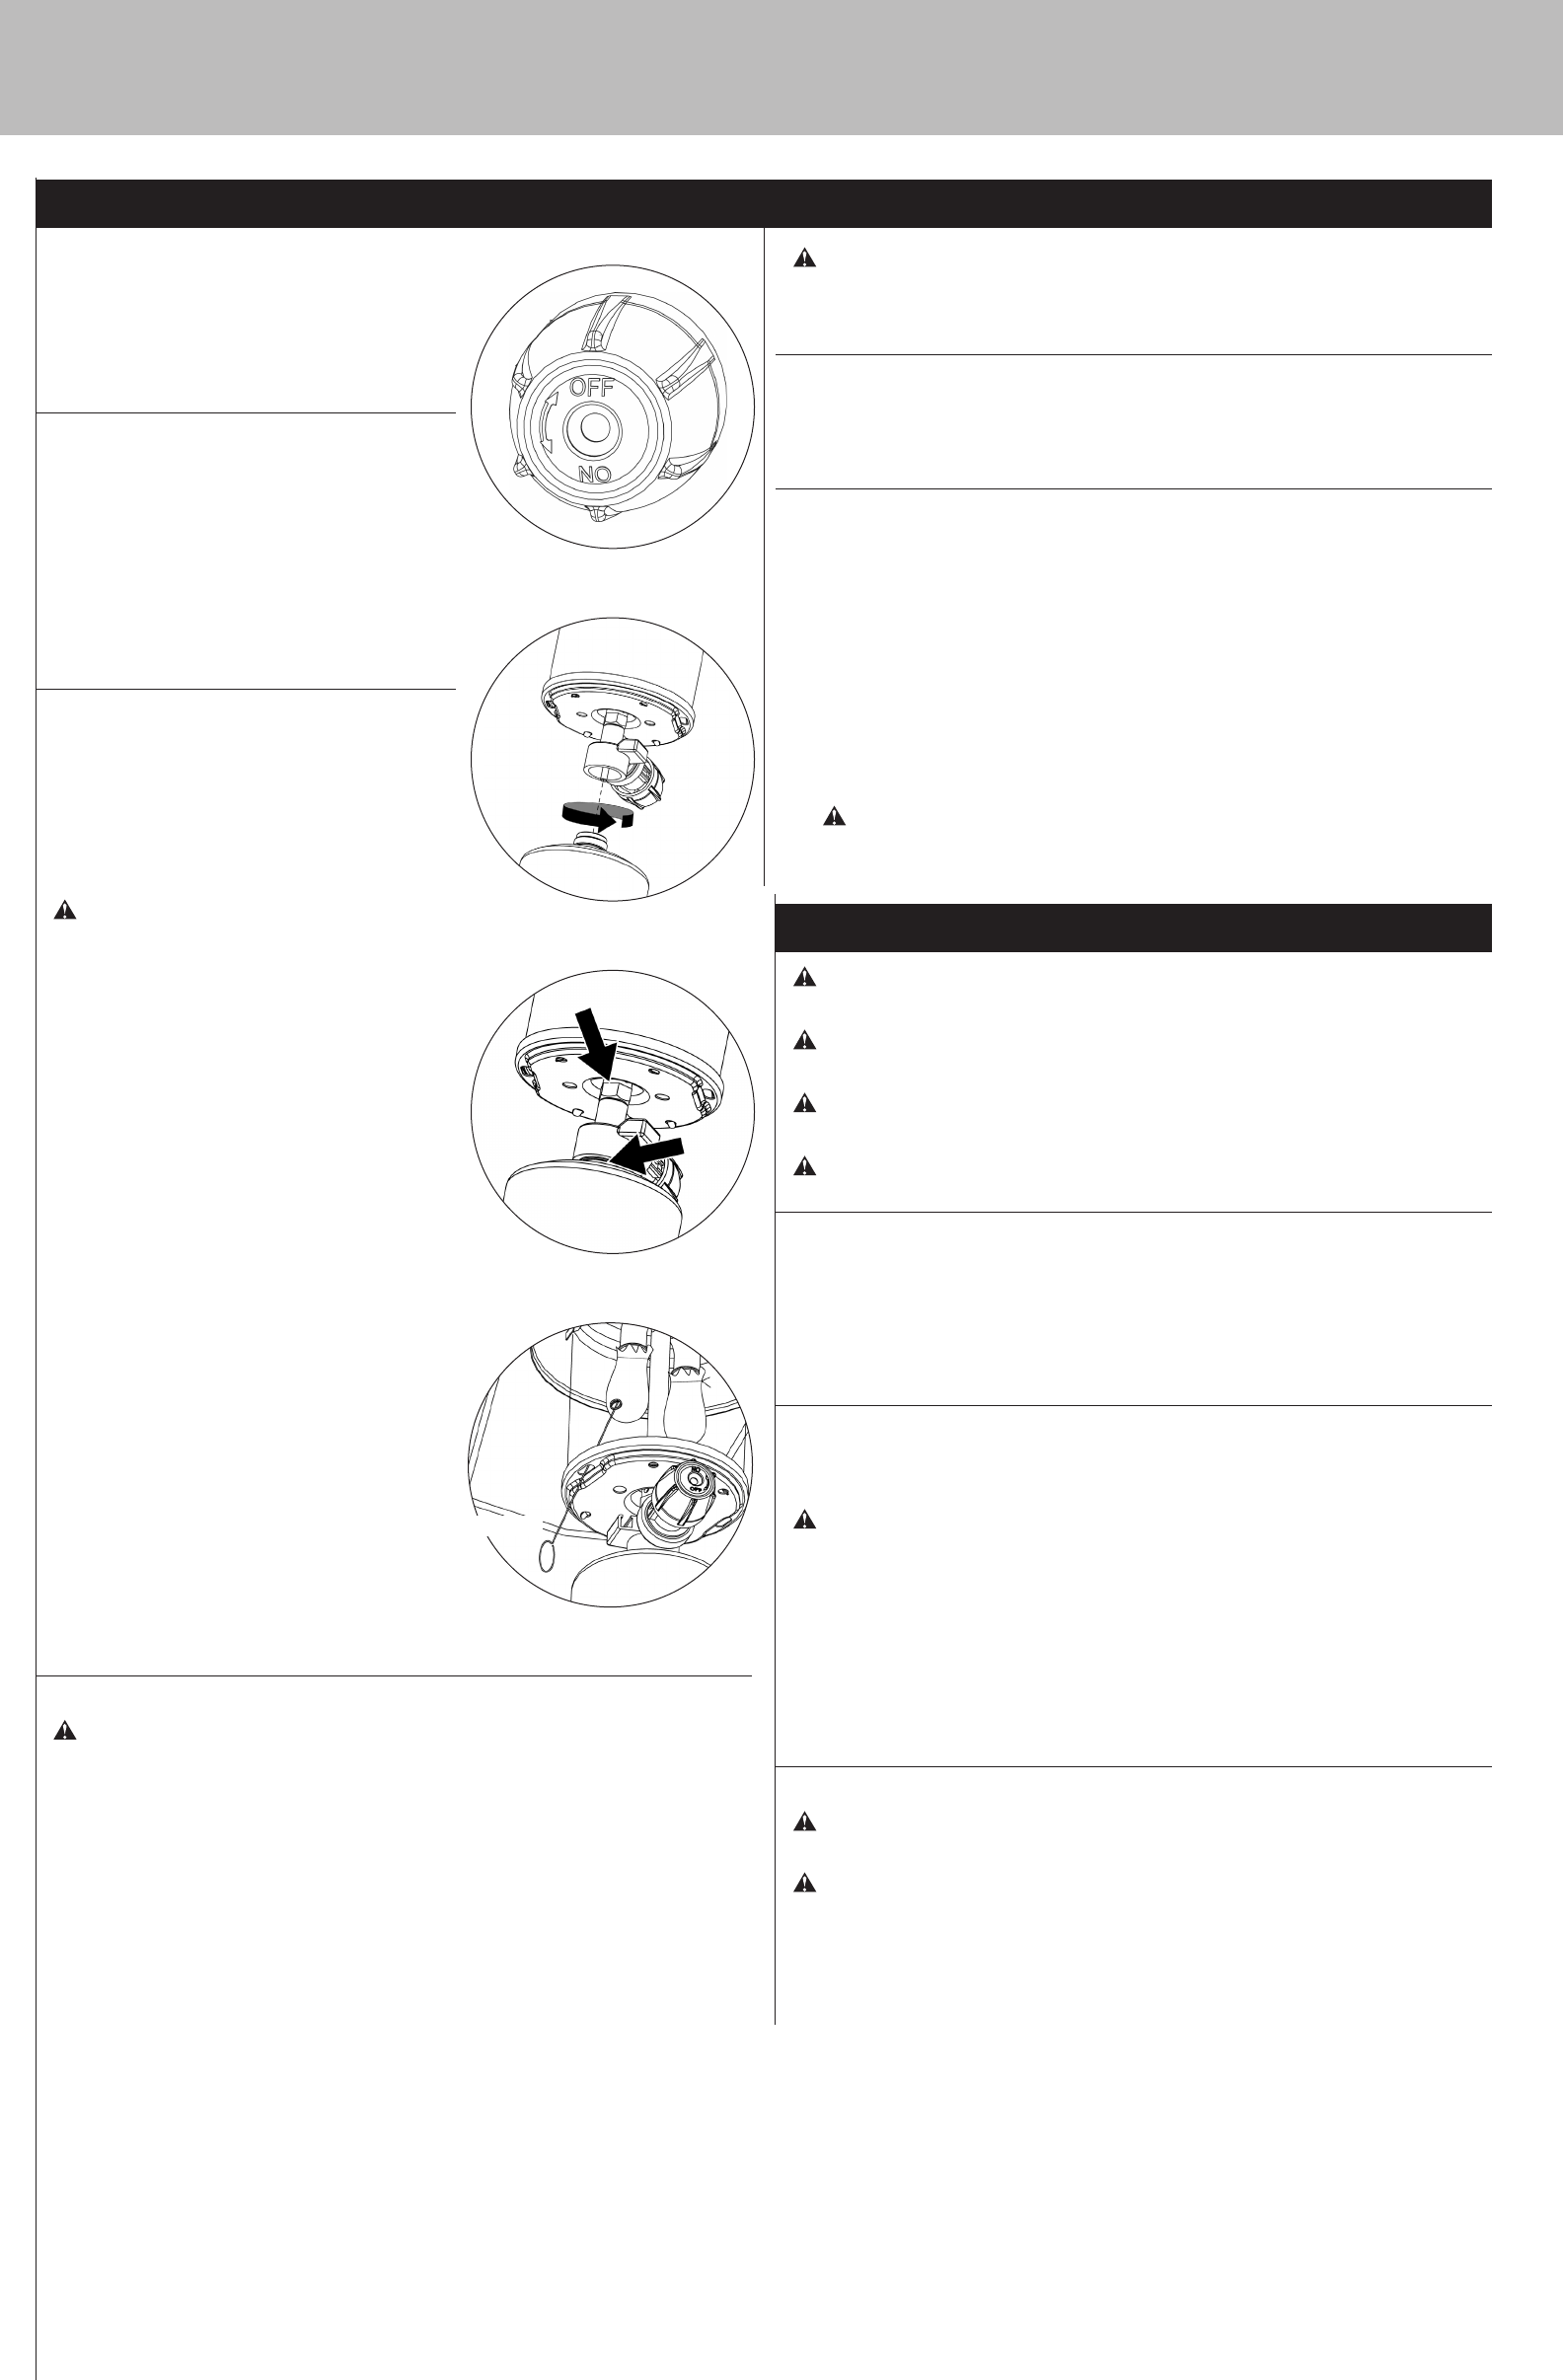
1. Make sure the control knob is in the “OFF” position.
(Figure 1)
2. Lubricate the threads of the regulator valve
with petroleum jelly, insert the gas tank into the
regulator valve and hand-tighten firmly. (Figure 2)
3. Insert LP gas tank into the base.
4. Test for leaks
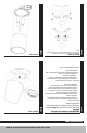
Checking for Leaks
Burner Connection
1. Make sure the control valve is securely fastened to
the burner. (Figure 3)
If your unit was assembled for you, visually check
the connection between the burner and control
valve.
WARNING: Failure to inspect this
connection or follow these instructions
could cause a fire or an explosion
which can cause death, serious bodily
injury, or damage to property.
2. If the burner pipe does not rest flush to the
control valve, please contact 1.800.762.1142 for
assistance.
Regulator / 1lbs. LP Gas Tank Connection
1. Make 2-3 oz. of leak solution by mixing one part
liquid dishwashing soap with three parts water.
2. Make sure control knob is “OFF”. (Figure 1)
3. Spoon several drops of solution, or use squirt bottle,
at the LP gas tank to regulator connection.
(Figure 3)
4. Inspect the solution at the connection, looking for
bubbles.
If NO bubbles appear, the connections are
secure.
If bubbles appear, you have a leak.
a. Loosen and retighten this connection,
making sure the connection is secure.
b. Retest with solution.
If you continue to see bubbles after
several attempts, disconnect propane
source and contact 1.800.762.1142
for assistance.
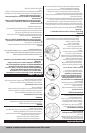
Lighting
DO NOT expose the lantern to flammable vapors or liquids during
lighting.
1. Make sure all labels, packaging and protective films have been removed from the lantern.
2. Make sure there are no obstructions of airflow to the gas unit. Spiders and insects can nest
within and clog the burner / venturi tube at the orifice.
A clogged burner tube can lead to a fire.
3. Control knobs must be in the “OFF” position. (Figure 1)
4. Attach the LP gas tank per the “Connecting Gas Tank” instructions.
5. Wearing Heat reistant gloves, position the lit long match or lit long butane lighter near the
side of the mantles. (Figure 4)
a. Turn control knob counterclockwise to “ON”.
b. Hold lit long match or lit long butane lighter next to mantle for up to 5 seconds.
c. Move lit long match or lit long butane lighter next to mantle.
d. Hold next to mantle for up to 5 seconds.
e. Remove long match/long butane lighter.
f. Repeat steps B - E for other mantle
6. If ignition does not occur in 5 seconds, turn burner control knob “OFF”, wait 5 minutes and
repeat lighting procedure.
Note: Once the mantle has been burned, it is very fragile. Be careful not to touch it with
finger or match.
Caution: If burner flame goes out during operation, immediately turn
the gas “OFF” and let the gas clear for about 5 minutes before re-
lighting.
Turning Off
1. Turn control knobs to the “OFF” position.
2. Remove LP gas tank and properly store tank.
Transporting
While Lantern is ON
1. Carefully carry the lantern by the handle.
2. Do not touch any of the lantern surfaces as they may be hot
3. Before setting the lantern down, make sure the tank is properly in the base.
While Lantern is OFF
1. The LP gas tank must be removed and stored properly.
2. Once the lantern is cooled, place the lantern and base in a plastic bag and secure the bag
with a string.
DO NOT COMPLETELY SEAL THE PLASTIC BAG.
Note: The plastic bag will help protect from insects.
Cleaning and Care
CAUTION: All cleaning and maintenance should be done when lantern
is cool and with the fuel supply disconnected.
CAUTION: DO NOT clean any lantern part in a self cleaning oven. The
extreme heat will damage the finish.
CAUTION: Keep lantern clear and free from combusitble materials,
gasolline, and other flammable vapours and liquids.
CAUTION: Do NOT obstruct the flow of combustion and ventilation air.
Notices
1. Abrasive cleaners will damage this product.
2. Never use oven cleaner to clean any part of lantern.
3. Do not clean any lantern part in a self cleaning oven. The extreme heat will damage
the finish.
Inspecting
This lantern should be inspected on a regular basis to ensure product safety and longer
product life.
WARNING: Do NOT attempt to clean this lantern unless the flames are COMPLETELY
out and unit is cool to the touch. (About 45 minutes).
1. Check burner to make sure it is secure.
2. Check venturi to make sure it is clear and free of spider nests.
3. Check all gas connections for leaks.
4. Check components for any signs of damage or rust.
5. If damage to any component is detected, do NOT operate until repairs are executed.
Cleaning Surfaces
WARNING: Do NOT attempt to clean this lantern unless the flames are COMPLETELY
out and unit is cool to the touch. (About 45 minutes).
WARNING: Do NOT use oven cleaner or abrasive cleaners as they will damage this
product.
1. Wipe surfaces clean with mild dishwashing detergent or baking soda.
2. For stubborn surfaces use a citrus based degreaser and a nylon scrubbing brush.
3. Rinse clean with water.
Figure 1
Figure 2
Figure 3
Figure 4
Match