


®
Outdoor Patio Heater Model No. EWU710SP Contact 1.800.762.1142 for assistance. Do not return to place of purchase.
NOTE: Heater functions best WITHOUT an extension cord.
If an extension cord is necessary:
• Use a UL approved, 3 prong plug (grounded)
cord shall be no. 14 AWG minimum size and
rated not less than 2,000 watts.
• Never connect two or more extension cords
together.
• Use the shortest extension cord possible.
• Keep connections dry and off the ground.
• Avoid draping the electric heater cord where
children or animals could encounter it.
Before Turning “ON”
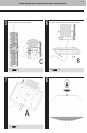
1. Make sure all labels, packaging and protective films
have been removed from the heater.
2. Heater should be thoroughly inspected before each
use, and by a qualified service person at least
annually.
Turning “ON”
1. Make sure the power button is in the “OFF” position.
(Illustration 1)
2. Plug the power cord into a dry GFI (
Ground Fault
Interrupter) 3 plug outlet. (Illustration 2)
3. Push the power button in the “ON” position.
(Illustration 3)
4.
Push the restoration button (Illustration 4). This will start the heater.
Note: When restarting the halogen bulb will start up slowly before getting to full power.
While Heater is “ON”
If heater tips over, the heater will automatically
turn “OFF”.
If heater tips over:
1. IMMEDIATLEY unplug power cord from the wall outlet.
2. Carefully turn the heater upright.
CAUTION: Dome, pole and shroud cover may
be hot. Use heat resistant gloves to set heater
upright.
3. Turn the power button to the “OFF” position.
4. Inspect heater to ensure no damage.
If no damage continue to next step.
If there is damage call a qualified technician to inspect
and make any necessary repairs.
Do NOT use the heater if there is any sign of
damage. A qualified technician should inspect
and make any nescessary repairs before the
heater is used again.
5. Plug the power cord into a dry GFI (Ground Fault
Interrupter) 3 plug outlet. (Illustration 2)
6. Push the power button in the “ON” position.
(Illustration 3)
7. Push the restoration button (Illustration 4). This will
start the heater.
Note: When restarting the halogen bulb will start up
slowly before getting to full power.
Turning “OFF”
1. Push the power button to the “OFF” position.
2. Unplug the power cord from the wall outlet.
Cleaning and Care
Notices
1. Abrasive cleaners will damage this product.
2. Never use oven cleaner to clean any part of heater.
3. Do not clean any heater part in a self cleaning oven. The extreme heat will damage
the finish.
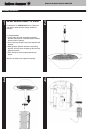
Operating Instructions
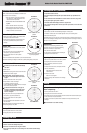
Illustration 1
Power switch in the “ON”
position
Cleaning and Care (continued)
4. Inspect heater before each use.
5. Have heater inspected annually and repairs should be made by a qualified service
person.
6. Do not clean heater with combustible or corrosive cleaners. Use warm, soapy water.
7. Do not paint engine, engine panels or dome.
8. This heater should be thoroughly cleaned on a regular basis.
9. After a period of storage and/or non use, inspect for any abrasion, wear or cuts to the
power cord.
Cleaning Surfaces
1. Wipe surfaces clean with mild dishwashing detergent or baking soda.
2. For stubborn surfaces use a citrus based degreaser and a nylon scrubbing brush.
3. Wipe clean with damp cloth.
Note: While cleaning your unit, be sure to keep the area around the heating element dry at all
times. Do not submerge the heating element. If the heating element is submerged in water, do
NOT use it. It must be replaced.
Maintenance
To enjoy years of outstanding performance from
your heater, make sure you perform the following
maintenance activities on a regular basis:
1. Keep exterior surfaces clean.
2. Air flow must be unobstructed. Keep circulating air
passages around th ebulb clean.
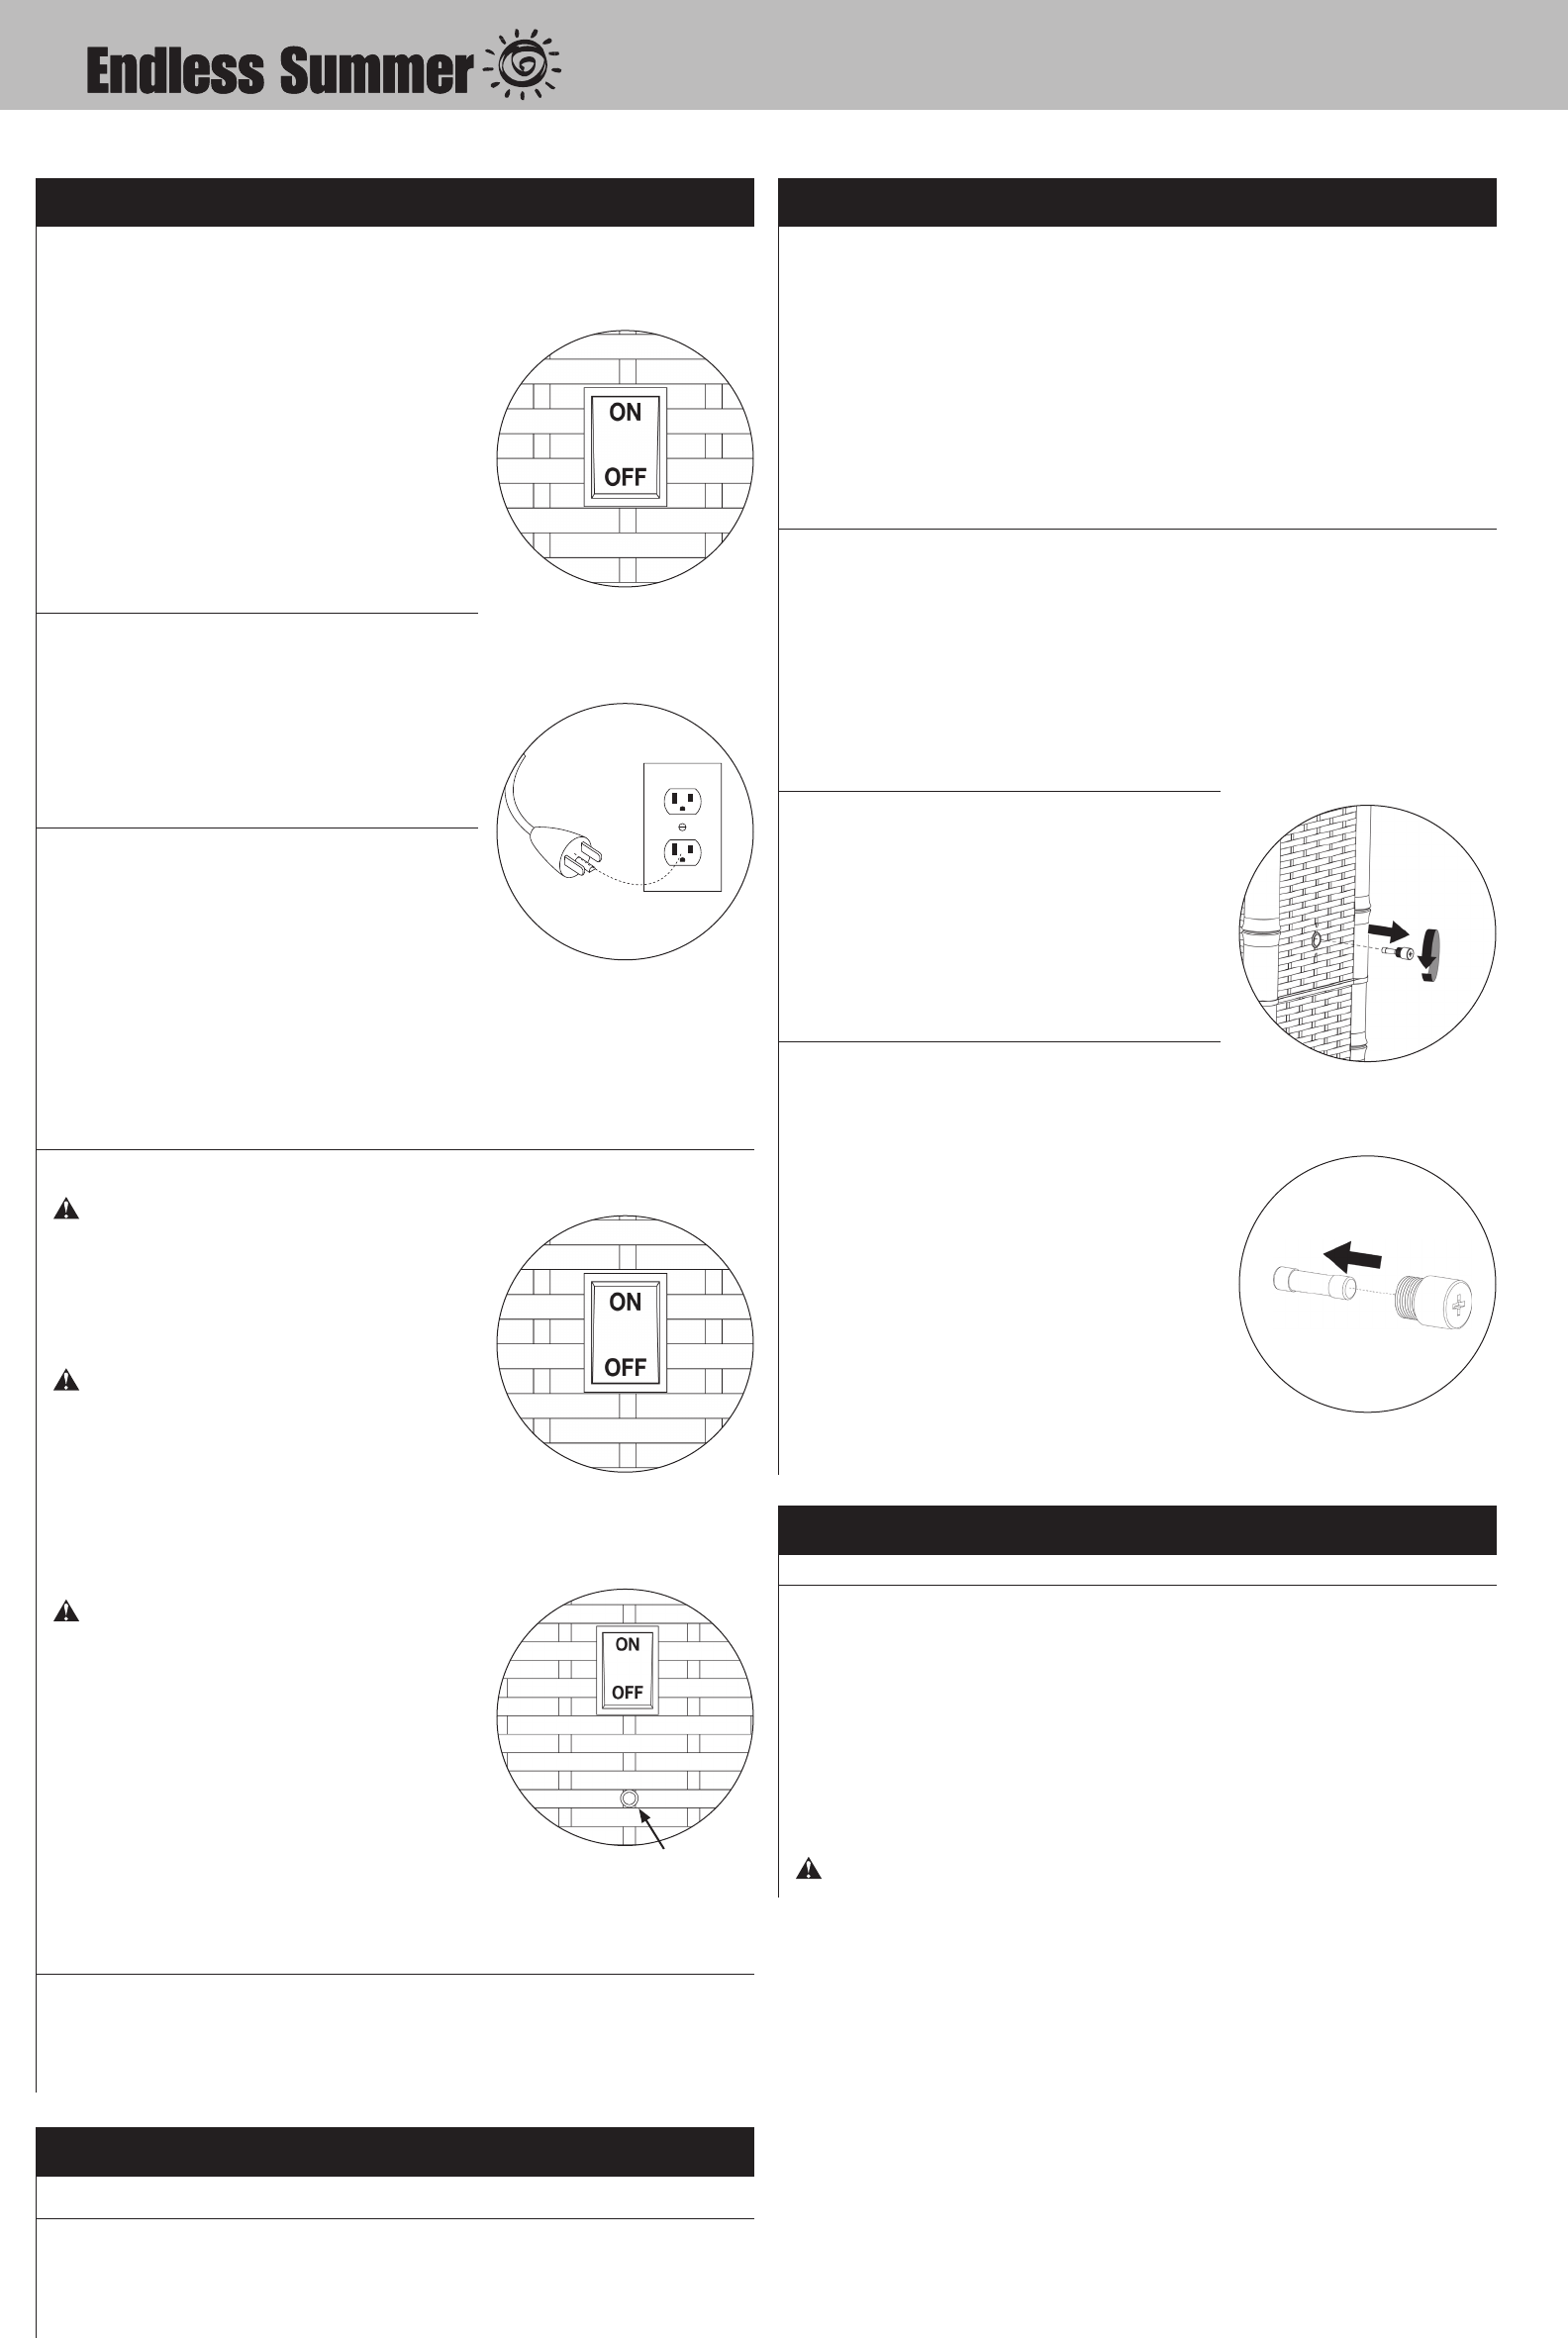
Replacing the Fuse
1. Make sure the power button is in the “OFF” position.
2. Unplug the power cord from the wall outlet.
3. Using a screwdriver, remove the fuse cover.
(Illustration 5)
4. Carefully remove the old fuse, and replace with the
new fuse. (Illustration 6)
Note: ONLY replace the old fuse with a
250V 20A fuse.
5. Reattach the fuse cover.
Note: Do not over tighten
6. Follow the Turning “ON” instructions or the Storage
Instructions.
Storage
Between Uses and During Periods of Extended Inactivity or
When Transporting:
1. Push the power button into “OFF” .
2. Unplug the power cord from the wall outlet.
3. Store heater upright in an area sheltered from direct contact with inclement weather (such
as rain, sleet, hail, snow, dust and debris).
4. If desired, cover heater to protect exterior surfaces and to help prevent build up in air
passages.
Wait until heater is cool before covering.
Illustration 2
Metal Screw
Connecting the power cord to a
dry GFI 3 plug outlet.
Illustration 3
Power switch in the “OFF”
position
Illustration 4
Restoration Button
Illustration 5
Remove fuse cover
Illustration 6
Remove old fuse