


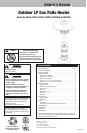

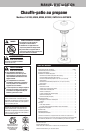
Outdoor Patio Heater Model No. 62100, 62900, 82300, 82300C, GWT501A & GWT801B Contact 1.800.762.1142 for assistance. Do not return to place of purchase.
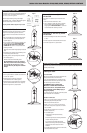
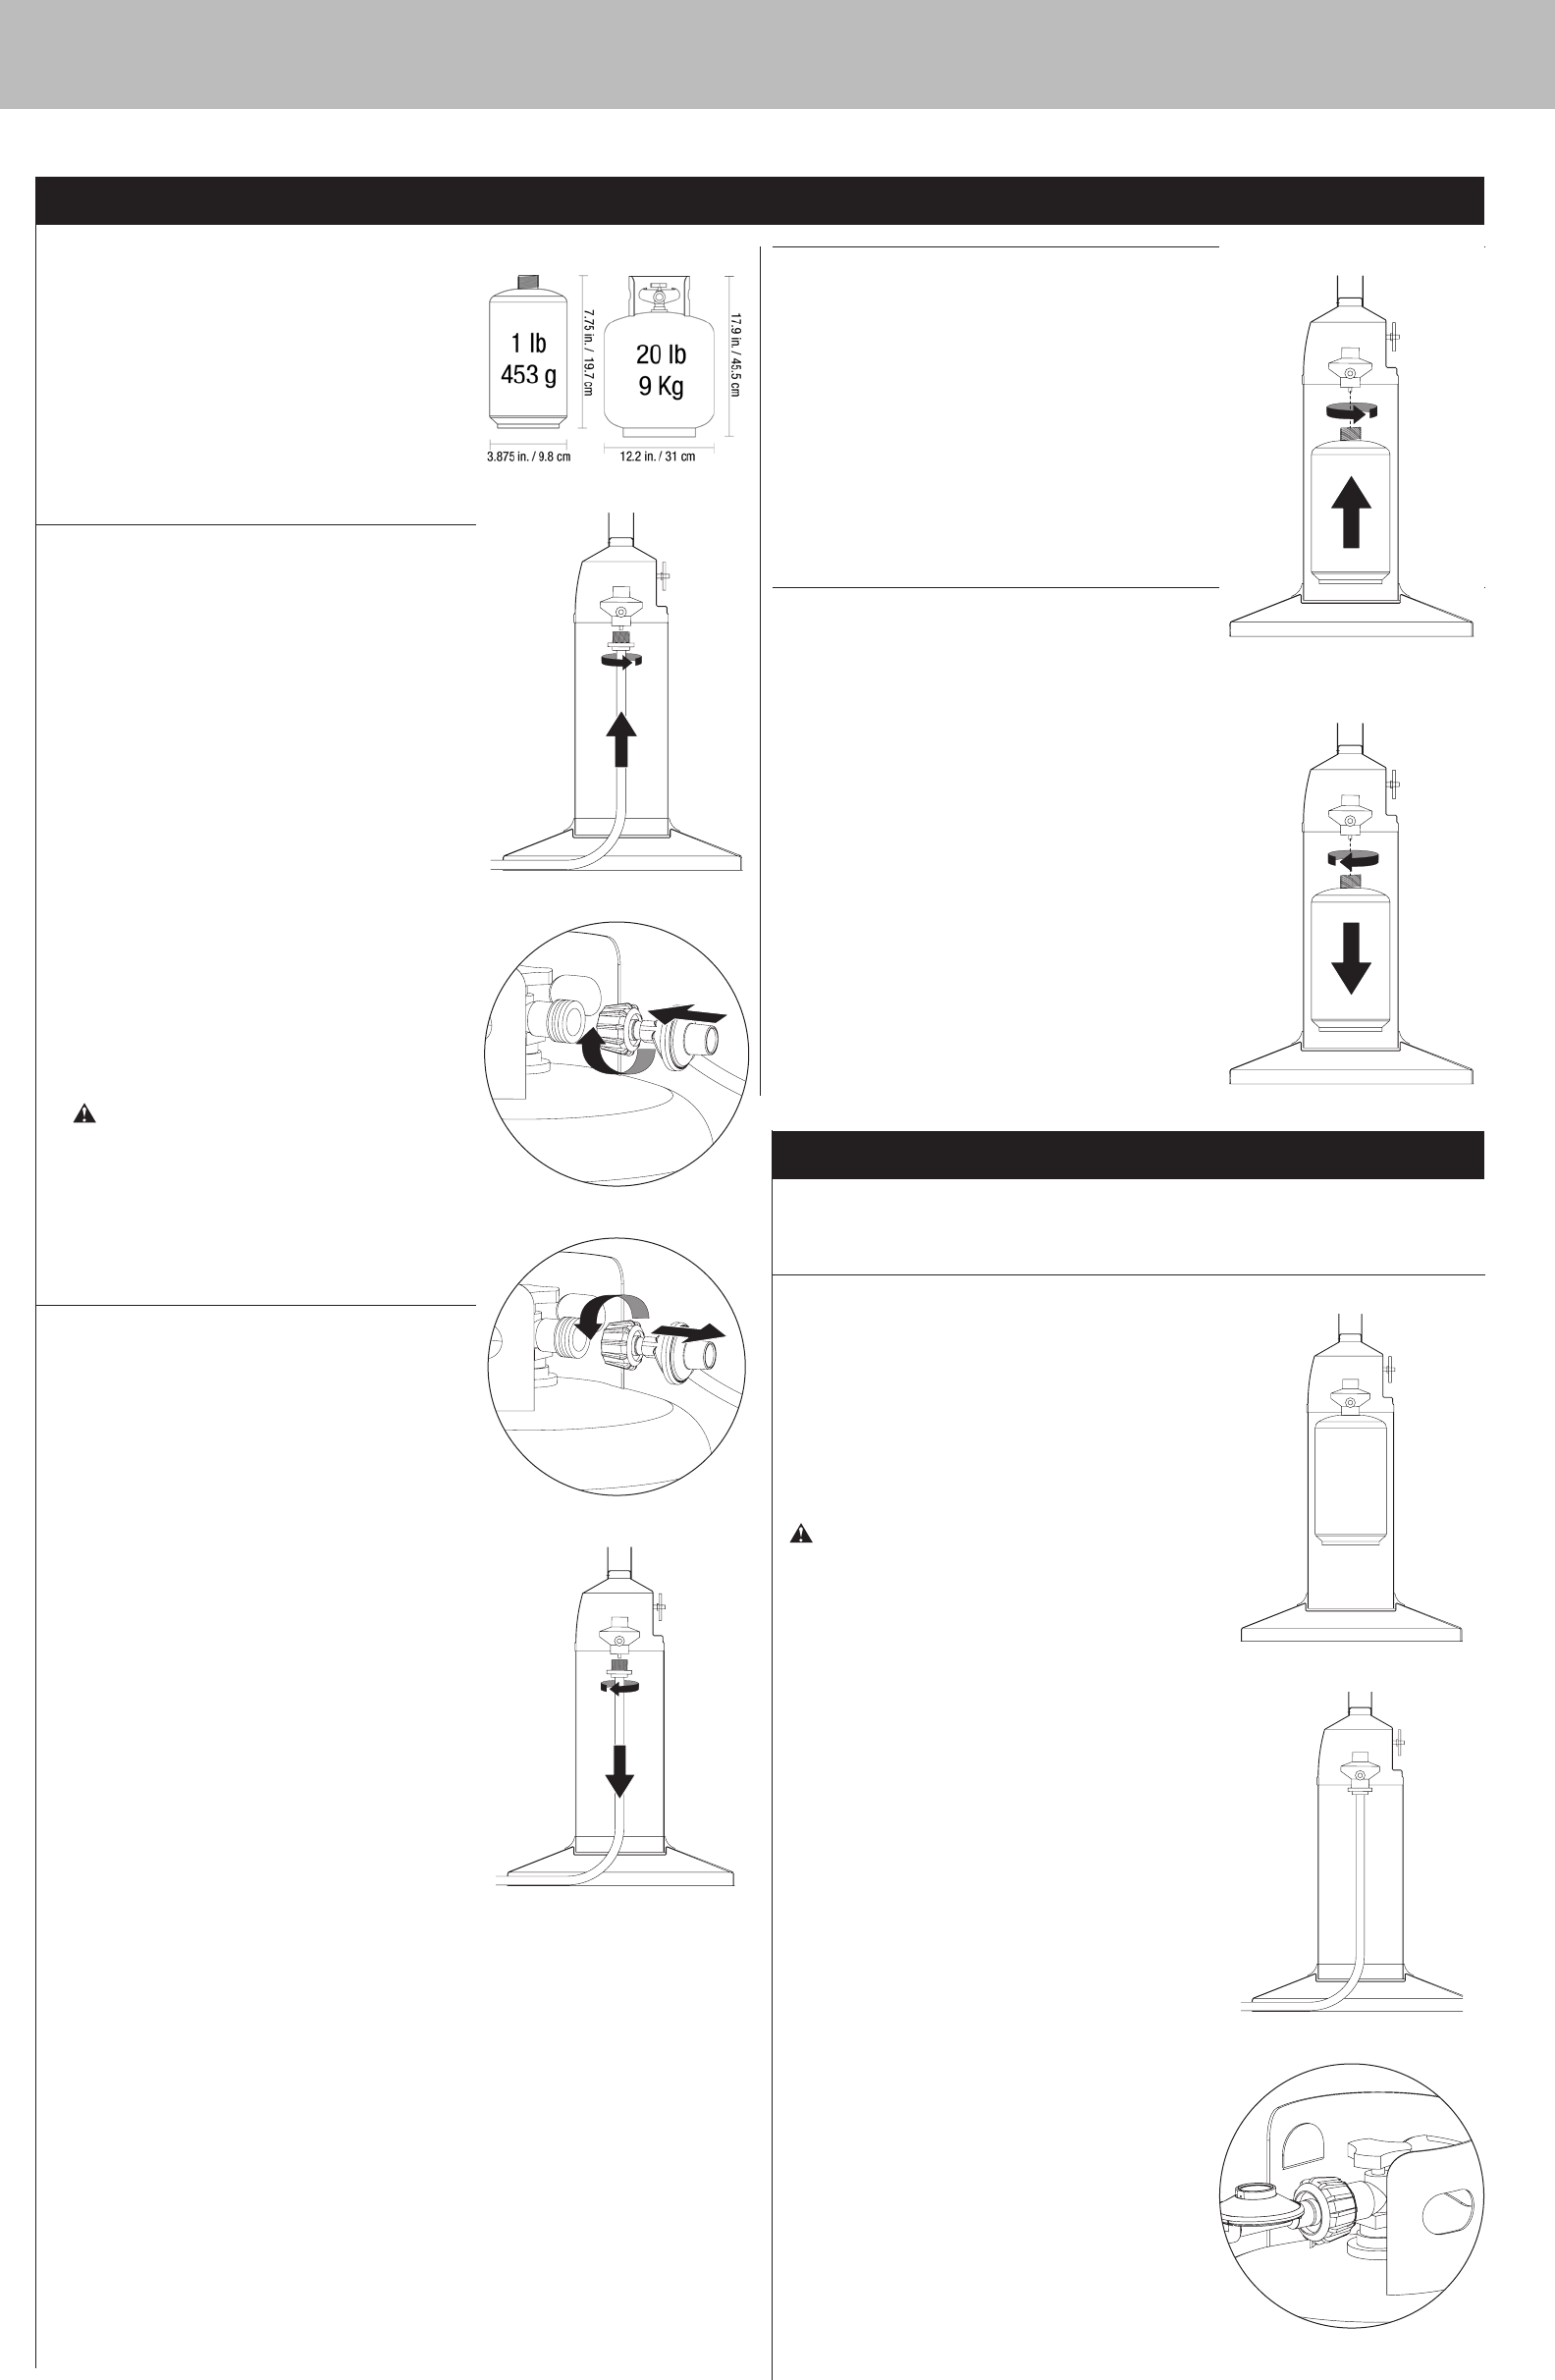
Connect (1) 14.1 oz or (1) 16.4 oz
LP Gas Tank
Note: Some 1-lb cylinders may form frost when near
empty.
1. Make sure the the control knob is “OFF”.
2. Line up threads on canister with those on regulator,
insert and rotate canister clockwise until they fit
snugly together. HAND TIGHTEN ONLY. Be careful not
to cross threads when screwing in canister.
Disconnect (1) 14.1 oz or (1) 16.4 oz
LP Gas Tank
1. Before disconnecting make sure the the control knob
is “OFF”.
2. Rotate LP gas tank counterclockwise until it is loose.
3. Store the LP gas tank in a proper location.
Operating Instructions
Inspect the visible portion of the hose before each use of the appliance. Inspect the entire hose
assembly at least annually.
Checking for Leaks
Burner Connections
Make sure the regulator valve and hose connections are
securely fastened to the burner and the tank.
If your unit was assembled for you, visually check the
connection between the burner pipe and orifice. Make
sure the burner pipe fits over the orifice.
WARNING: Failure to inspect this
connection or follow these instructions
could cause a fire or an explosion which
can cause death, serious bodily injury, or
damage to property.
If the burner pipe does not rest flush to the orifice, please
contact 1.800.762.1142 for assistance.
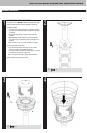
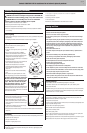
Tank/Gas Line Connection
1. Make 2-3 oz. of leak solution by mixing one part liquid
dishwashing soap with three parts water.
2. Make sure control knobs are “OFF”.
3. Attach (1) 14.1 oz or (1) 16.4 oz or LP Gas LP gas
tank. Note: if using a 20 lb LP gas tank, turn control
valve to “OPEN”.
4. Spoon leak check solution at all “x” and arrow
locations. (Figures 8-10)
5. If any bubbles appear:
a. Disconnect gas tank per disconnecting
instructions.
b. Reconnect gas tank per connecting instructions.
c. Repeat “Checking for Leaks”
If you continue to see bubbles after several
attempts, disconnect gas tank per disconnecting
instructions and contact 1.800.762.1142 for
assistance.
If no bubbles appear after one minute turn tank “OFF”,
wipe away solution and proceed.
To operate you will need (1) precision-filled standard grill
LP gas tank (20 lb.) with external valve threads or (1)
14.1 oz or (1) 16.4 oz LP gas tank.
Note: An empty standard grill LP gas tank weighs
approximately 18 lbs. A precision-filled standard grill LP
gas tank should weigh no more than 38 lbs.
Only LP gas tanks marked “propane” may be used.
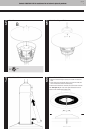
Connect 20 lb. LP Gas Tank
Note: Before connecting, be sure that there is no debris
caught in the head of the LP gas tank, head of the
regulator valve or in the head of the burner and burner
ports.
1. Slip end of flexible gas line with brass fitting through
center hole of Base and up to threaded portion of
regulator. (Figure 2)
2. Line up threads on fitting with those on regulator and
rotate clockwise until snug. HAND TIGHTEN ONLY.
DO NOT USE ANY HAND TOOLS TO MAKE THIS
CONNECTION. Be careful not to cross threads when
screwing in FITTING.
Note: hose can be routed through opening in base and
table.
3. Set heater on base, making sure that flexible gas line
is routed through small slot in base.
4. Connect gas line to tank by turning knob clockwise
until it stops. (Figure 3)
Note: Be careful not to kink flexible gas line.
CAUTION: When using the gas extension
hose always locate the hose out of pathways
where people may trip over it or in areas
where the hose may be subject to accidental
damage.
Disconnect 20 lb. LP Gas Tank
1. Turn LP gas tank valve to “CLOSED” and control knob
is in the “OFF” position.
2. Disconnect gas line to tank by turning knob
counterclockwise until it is loose. (Figure 4)
3. Disconnect gas line from regulator by turning flexible
gas line counterclockwise until it is loose. (Figure 5)
4. Store the LP gas tank in a proper location.
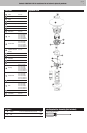
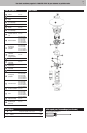
Installing LP Gas Tank
Figure 1
Figure 2
Figure 3
Figure 4
Figure 5
Figure 6
Figure 7
Figure 8
X
Figure 9
X
Figure 10
X