


®
Contact 1-800-762-1142 for assistance.
Do not return to place of purchase.
9 Owner’s manual: model 233010 outdoor patio heater 6/8/04
®
Contact 1-800-762-1142 for assistance.
Do not return to place of purchase.
10Owner’s manual: model 233010 outdoor patio heater 6/8/04
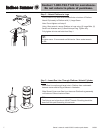
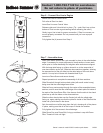
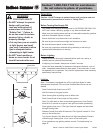
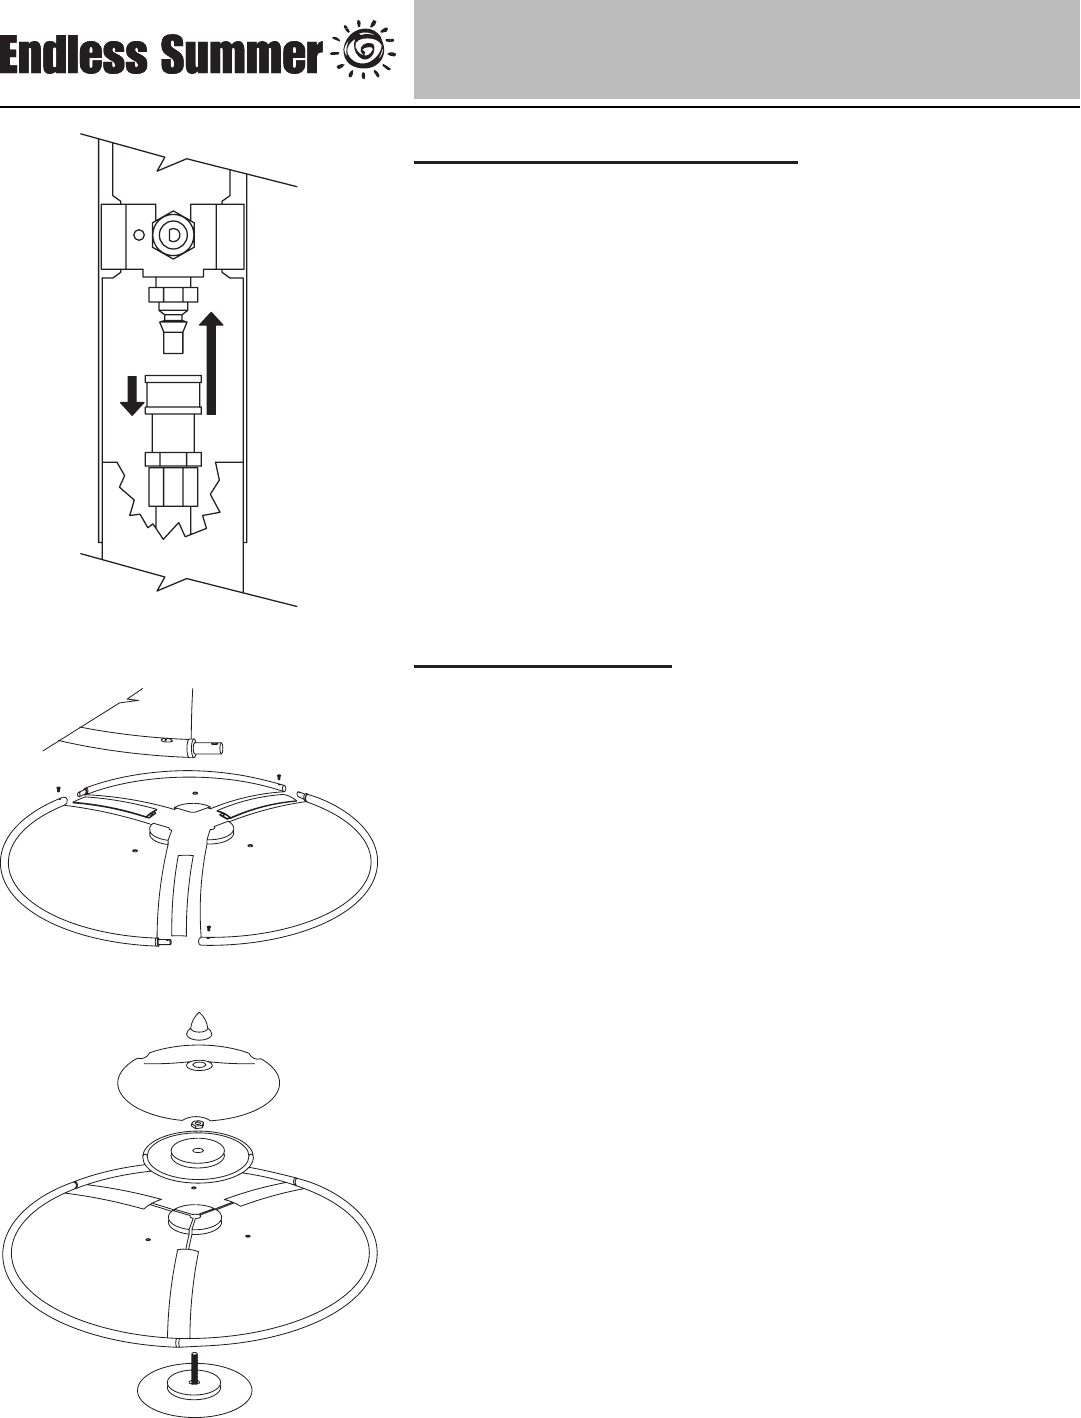
Step 6 – Connect Gas Line to Engine
Attach Gas Line to Control Valve:
Pull collar of Gas Line back.
Insert Gas Line over Control Valve.
Release collar and it should lock in place. (Tip – push Gas Line up from
bottom of Post to make a good seating before releasing the collar.)
Gently tug on line to test for proper connection. If Gas Line moves you
are not properly connected. Do not proceed until you have a proper
connection.
Fully tighten the (4) screws from Step 4.
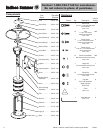
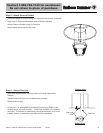
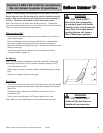
Step 7 – Assemble dome
Note: Each dome section has a pin mounted in place in the rolled bottom
edge. If necessary for proper alignment of dome sections, loosen each
screw prior to further assembly and retighten after sections are aligned.
With the large side facing up, slide a dome rib on to the same side of
one dome section as the pin. Slide two dome sections together, allowing
the exposed end of the pin slide into the rolled edge of the next dome
section. Line up hole in dome with threaded hole in pin.
Insert one Dome Screw and secure loosely.
Repeat procedure to complete the assembly of all three sections.
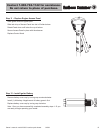
Slide Dome bolt through bottom check plate (with small center hump),
being sure that the rolled edge faces down.
Slide bolt from previous step through the center of the assembled dome
sections, and be sure that the rolled edge of the check plate fits inside of
the ends of the three Dome Ribs. Also be sure that the slots in the check
plate line up with the holes on the dome sections.
Slide the other check plate over the Center bolt with the rolled edge
facing up, again making sure that the plate fits inside of the Ribs and the
holes line up with those in the dome.
Spin the medium nut all the way down the bolt, clamping all of the pieces
in place, making sure that all of the humps fit inside one another.
Fully tighten all of the screws in the rolled edge.
Slide Dome Cap over Dome Bolt, lining up notches in cap with Dome
Ribs. Thread on finial until tight.