4
6
7
parts, mounting and any other condition that may affect its
operation. A guard or other part that is damaged should be properly
repaired or replaced by an authorized service center unlessotherwise
indicated elsewhere in this manual.
• REMOVE BATTERY before servicing, cleaning or removing
material from the hedge trimmer. Remove battery from your hedge
trimmer and carry by the front handle when not in use.
• EXERCISE CARE in handling batteries in order not to short the
battery with conducting materials such as rings, bracelets and
keys. The battery or conductor may overheat and cause burns.
• DO NOT OPEN OR MUTILATE the batteries. Released
electrolyte is corrosive and may cause damage to the eyes or skin.
It may be toxic if swallowed.
• GROUND FAULT CIRCUIT INTERRUPTER (GFCI) protection
should be provided on the circuit(s) or outlet(s) to be used for the
hedge trimmer. Receptacles are available having built-in GFCI
protection and may be used for this measure of safety.
WARNING: To reduce the risk of electrical shock;
do not expose to rain, do not use on wet surfaces. Store indoors.
SAVE THESE INSTRUCTIONS
SPECIFIC SAFETY RULES
• Hold tool by insulated gripping surfaces when performing an
operation where the cutting tool may contact hidden wiring or
its own cord. Contact with a "live" wire will make exposed metal
parts of the tool "live" and shock the operator.
WARNING: Some dust created by this product
contains chemicals known to the State of California to cause cancer,
birth defects or other reproductive harm. Some examples of these
chemicals are:
• compounds in fertilizers
• compounds in insecticides, herbicides and pesticides
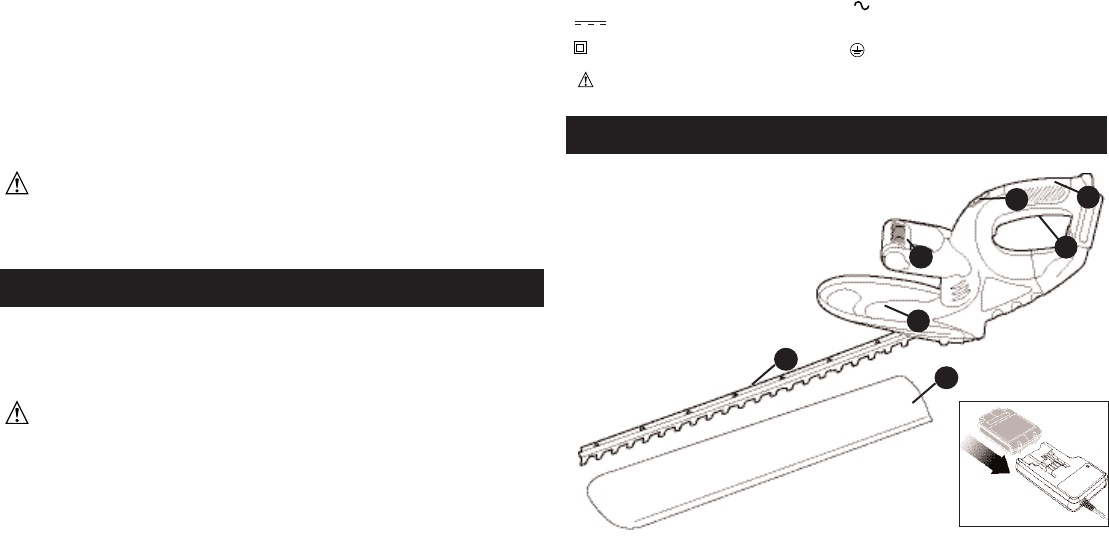
COMPONENTS
• arsenic and chromium from chemically treated lumber
To reduce your exposure to these chemicals, wear approved safety
equipment such as dust masks that are specially designed to filter
out microscopic particles.
The label on your tool may include the following symbols.
V................volts A ....................amperes
Hz..............hertz W ..................watts
min............minutes ..................alternating current
..........direct current
n
o ..................no load speed
..............
Class II Construction
....................earthing terminal
............safety alert symbol .../min ............strokes
per minute
1
4
5
2
8
9
3
1. Trigger Switch
2. Lock Button
3. Switch Hnadle
4. Blade Guard
5. Bail Handle
6. Charger
7. Battery
8. Blade
9. Blade Sheath


