GB - 19
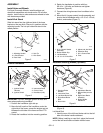
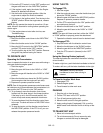
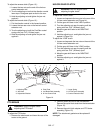
IMPORTANT: Tighten and loosen the bolts in a cross
sequence as shown in Figure 16.
11. Turn all of the jam nuts counterclockwise to loosen.
12. Torque bolts to 70 lbf-in in two stages. First tighten
bolts to 20 lbf-in in pattern shown (Figure 16). Then
tighten to 70 lbf-in in same pattern.
13. Slide the clutch assembly back onto the pinion
shaft.
14. Install the retaining ring and slide the pinion shaft
completely into the transmission.
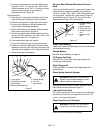
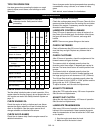
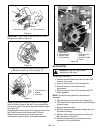
15. Reinstall the shipper shaft and other parts that were
removed (Figure 18). Make sure the trunnion block
is on the shipper shaft and held in place by the dog.
The dog should rest on the spiral teeth of the clutch
dog plate.
16. Install the gasket.
17. Align the splines on the quick hitch shaft with those
in the dog.
18. Slide the quick hitch casting and PTO brake
assembly back into place on the front of the
transmission.
19. Install the quick hitch studs and tighten.
STEERING BRAKE ADJUSTMENT
(OPTIONAL):
1. Park the tractor in a level area.
2. Put the parking brake handle in the “OFF” (down)
position.
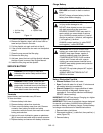
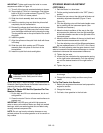
3. Loosen the two nuts on the right and left brake rod
assembly adjustment brackets (Figure 13 and
Figure 14).
4. Turn the adjusting nuts until the brake handle cross
bar is parallel with the instrument panel. (See
Controls and Features.)
5. Move the brake handlebar all the way to the right
and measure the distance from the right end edge
of the brake handle cross bar to the right side of the
instrument panel.
6. Move the brake handlebar all the way to the left and
make the same measurement on the left.
7. Turn the adjusting nuts until the difference between
the two measurements is 1/2” to 3/4” (13 to 19mm).
NOTE: Turn both adjusting nuts the same amount, clock-
wise to increase the measurement difference or counter-
clockwise to decrease the measurement difference.
8. Tighten the jam nuts.
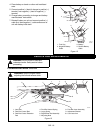
9. Loosen the two nuts below the compression spring
on the right brake rod assembly. Turn the adjusting
nut until the desired tension for the right brake is
set.
10. Tighten the jam nut.
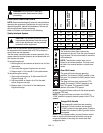
Check each item in "Before Storage" in the Maintenance
Schedule. See Engine Manual for detailed instructions on
preparing the engine for storage.
When The Tractor Will Not Be Operated For Two
Months Or More:
1. Do the daily and 25-hour maintenance, but do not
add gasoline.
2. Clean the tractor. Paint or oil bare metal surfaces to
prevent rust.
IMPORTANT: NEVER spray unit with high-pressure
water or store unit outdoors. Water can seep into sealed
bearings, which are sealed against dirt and debris only,
causing reduced component life.
NOTE: Do not use harsh or abrasive cleaners on any
painted surface. Do not allow gasoline or oil to remain on
any surface.
3. Refer to the engine manual and prepare the engine
for storage.
4. Charge the battery initially and then every three
weeks.
To Put The Tractor Into Service:
1. Refer to the engine service manual and prepare the
engine for service.
2. Charge the battery.
3. Put fresh, clean gasoline in the fuel tank.
STORAGE
WARNING: AVOID INJURY. Read and
understand entire Safety section before
proceeding.


