


GB - 31
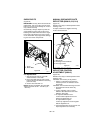
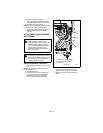
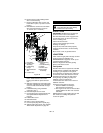
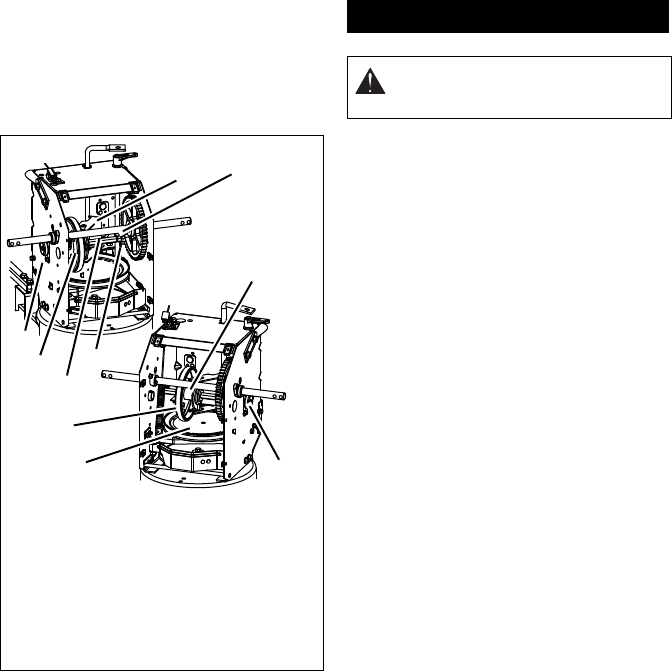
10. Remove three screws holding friction
disc to carrier bearing.
11. Remove old friction disc. Put the new
friction disc in place, cup side to carrier
bearing.
12. Reinstall three screws into new friction
disc and carrier bearing. Torque to
5 – 6 lbf-ft. (6.8 – 8.13 N•m).
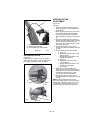
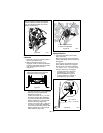
13. Insert new friction disc assembly into
frame. Install washers onto carrier
bearing and slide into speed selector
arm.
14. Slide hex shaft through new friction plate
assembly. Install pinion gear and washer
onto hex shaft and slide shaft into right
bearing.
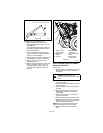
15. Install left bearing using hardware
removed in step 7.
16. Reinstall hairpin into hex shaft.
17. Connect pivot pin to speed selector arm.
See Speed Selector Adjustment on
page 24.
18. Install bottom cover.
19. Reinstall wheels.
20. Return unit to upright position.
21. Connect spark plug wire to spark plug.
22. Adjust traction drive clutch. See Traction
Drive Clutch Adjustment on page 29.
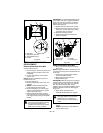
SHORT TERM
IMPORTANT: NEVER spray unit with high
pressure water or store unit outdoors.
Run with attachment clutch engaged a few
minutes after each use to free unit of any
loose or melting snow.
Close fuel shut-off valve.
Inspect unit for visible signs of wear,
breakage or damage.
Keep all nuts, bolts and screws properly
tightened and know unit is in safe working
condition.
Store unit in a cool, dry protected area.
LONG TERM
Clean unit thoroughly with mild soap and low
pressure water and lubricate (see
MAINTENANCE on page 20). Touch up all
scratched painted surfaces.
Remove weight from wheels by putting
blocks under frame or axle.
Fuel System
Gasoline left in the fuel system for extended
periods without a stabilizer will deteriorate,
resulting in gum deposits in the system.
These deposits can damage the carburetor
and the fuel hoses, filter and tank. Prevent
deposits from forming in the fuel system
during storage by adding a quality fuel
stabilizer to the fuel. Follow the
recommended mix ratio found on the fuel
stabilizer container.
To treat the fuel system for storage:
1. Add fuel stabilizer according to
manufacturers’s instructions.
2. Run engine for at least 10 minutes after
adding stabilizer to allow it to reach the
carburetor.
NEVER store the engine with fuel in the fuel
tank inside of a building with potential
sources of ignition.
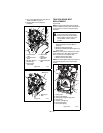
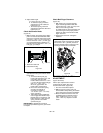
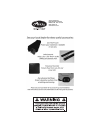
1. Hex Shaft
2. Friction Disc
Assembly
3. Left Bearing
Flange
4. Speed Selector
Arm
5. Friction Disc
6. Right Bearing
Flange
7. Carrier Bearing
8. Hairpin
9. Pinion Gear
10.Drive Plate
Assembly
OS8280
Figure 38
1
2
3
4
6
7
5
8
9
10
STORAGE
WARNING: AVOID INJURY. Read
and understand the entire Safety
section before proceeding.