


GB - 19
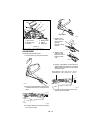
1. Place unit on a flat, level surface.
2. Disconnect spark plug wire.
3. Remove fuel cap, place a piece of
plastic bag over the opening and tighten
cap securely.
4. Tip unit onto left side, opposite the
discharge opening (911330, 331, 514,
515, 525, 526, 531).
Tip unit onto right side (911099, 101,
102).
Make sure unit is secure and will not tip
over.
IMPORTANT: Remove plastic from fuel cap
after unit is upright and service is complete.
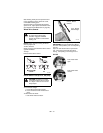
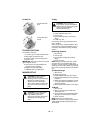
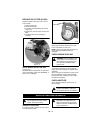
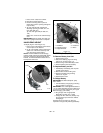
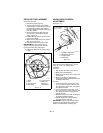
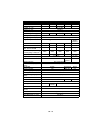
HANDLEBAR HEIGHT
To adjust (Figure 12 and Figure 13):
1. Place a hole at the bottom of the braces
over the pins on the bracket .
2. On 911102 and 526, use the fasteners to
attach one of the holes at the top and
one of the holes at the bottom .
NOTE: To fold handlebars flat for storage,
pull the speed control rod (if equipped) all the
way back, disconnect braces from support
bracket, and fold handlebar forward. Do not
bend speed control rod.
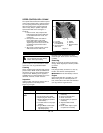
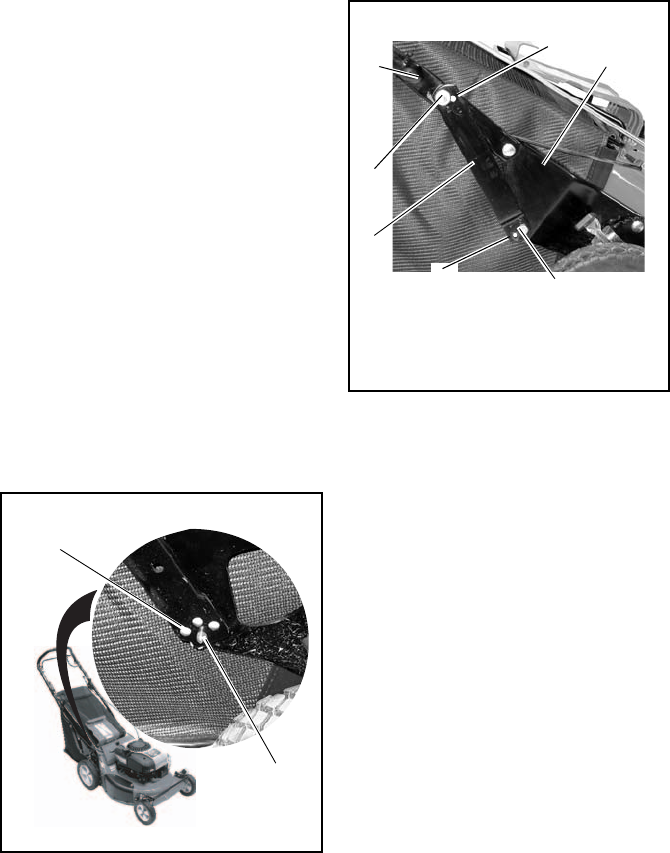
BATTERY (911331, 515)
To Remove Battery from Unit
1. Remove drive cover.
2. Disconnect battery plug from wiring
harness on engine (Figure 14).
3. Remove wing nuts from battery U-bolt.
4. Remove battery plate and battery.
To Replace Battery on Unit
1. Hold battery and battery plate in place
against mower frame.
2. Secure with U-bolt and wing nuts.
3. Reconnect battery plug to wiring
harness on engine.
4. Replace drive cover.
To Charge Battery
IMPORTANT: DO NOT attempt to “jump
start” mower.
1. Connect battery charger plug to mating
plug on battery (not engine).
IMPORTANT: Your unit shipped with either a
110- or a 220-volt battery charger. Make sure
you have the correct charger for your region
before charging your battery.
2. Plug charger into an appropriate
Alternating Current (A.C.) outlet.
3. Charge for 24 to 48 hours (battery may
be charged for up to 56 hours without
damaging it).
At least 8 hours of engine run time are
required to charge a fully discharged battery.
Figure 12
Pin
Hole
OM1800
Figure 13
1. Handlebar
2. Adjustment Hole
3. Support Bracket
4. Fasteners
5. Brace
911102, 526
5
1
3
4
4
2
2
OM1660