


Page 3
STEP 2: ATTACHING THE SECOND SIDE PANEL
STEP 3: COMPLETING THE ASSEMBLY
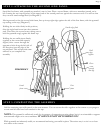
Stand the first frame, with pyramid cap attached, onto its base. Place a second frame, with cross-members inward, on its
left. Leaning the two tops together, let the upper end of the second panel rest against the connector stub. You will see that
they can now stand unsupported (see Diagram 2).
Moving around to face the second side frame, line up its top right edge against the side of the first frame, with the pyramid
cap resting on the top (Diagram 2).
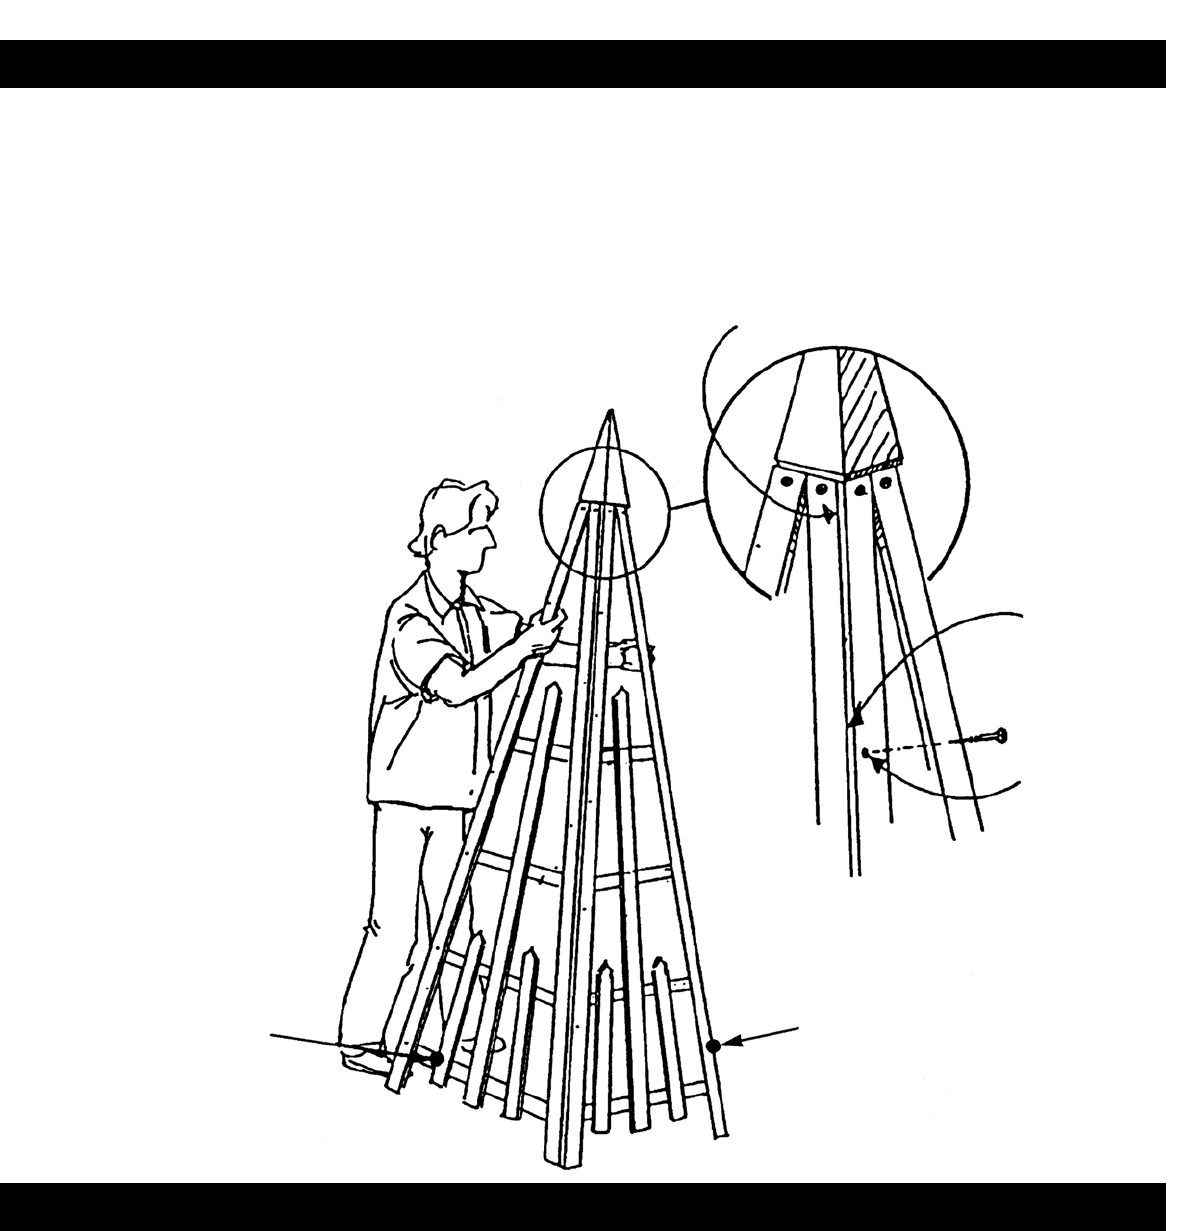
Holding the two sides firmly in this position,
drive the right-hand screw into the connector
stub. Then drive the second screw, taking care to
hold the pyramid snugly against the frame top.
Holding the two trellis pieces firmly
together at the corner and squarely
aligned, drive a screw through the
uppermost hole along the left side of
the first piece into the edge of the
second panel. This will provide some
stiffness as you complete the
assembly.
DIAGRAM 2
Outside edges flush
Hold
edges
together
Drive
screw
squarely
into edge
First
frame
Second
frame
Add the remaining two trellis panels in the same manner. You can secure the sides together at the corners as you progress
or wait until all sides have been attached to the cap.
NOTE: This pyramid is sufficiently sturdy for its purpose of supporting growing plants, but it is not intended to support
concentrated weight on its cross-members.
IT SHOULD NOT BE CLIMBED ON!
While pyramids are inherently stable, we recommend anchoring your trellis in place. The easiest way is to tie it to at least
two stakes at the corners.