


16
754323-100 Rev A
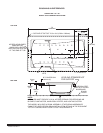
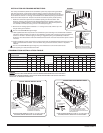
Please note that care must be taken to protect the surface of the tub during all aspects of the installation.
Do not drill or cut the bath deck with the tub directly beneath it as damage to the tub may result.
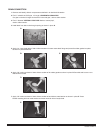
1. Install the tub per the installation instructions provided with the unit.
2. Prepare the bath deck support structure per the local codes. Note - the bath deck must be self supporting.
3. Cut bath deck to your specifications.
4. Place the bath deck in position and trace the opening on the tub with a soft pencil. Do not drill or cut the bath
deck with the tub directly beneath it as damage to the tub may result.
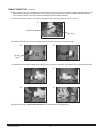
5. Remove the bath deck and apply a generous bead of waterproof sealant on the outer edge of the traced line.
6. Replace the bath deck and secure it into place.
7. Apply additional sealant along the tub and bath deck interface as necessary to ensure a watertight seal.
8. Remove excess sealant per the manufacturer's instructions.
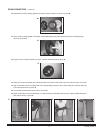
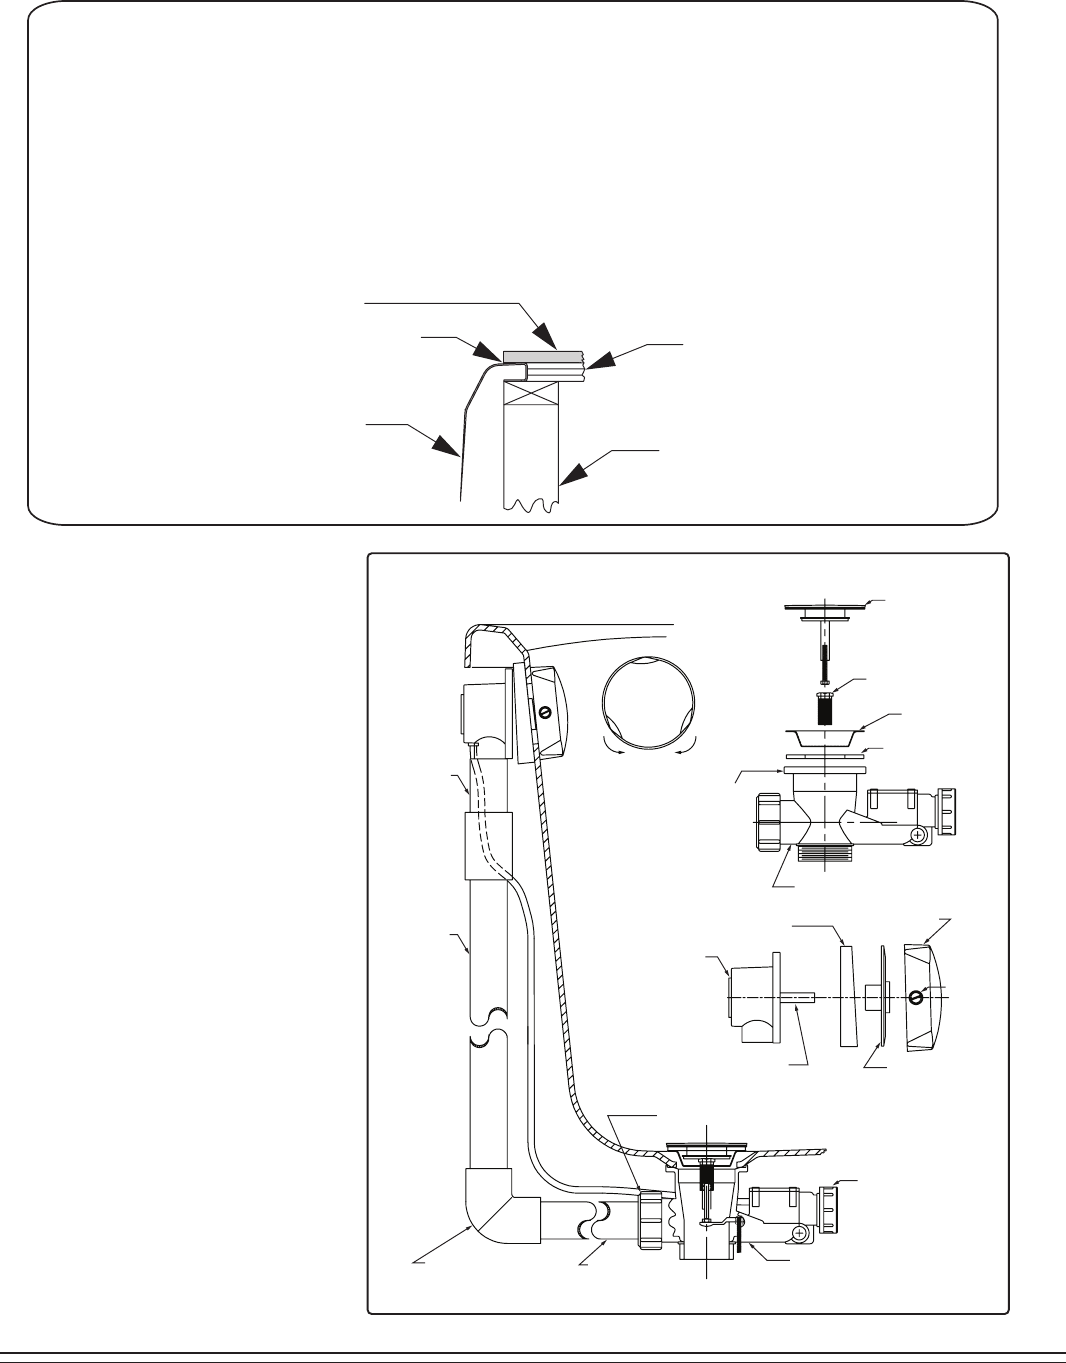
Finished bath deck surface material must be
self-supporting and secured per local codes
Tub support structure per installation
instructions provided with the tub
Bath deck support material
Bathtub
Waterproof
Sealant
UNDER DECK MOUNTING INSTRUCTIONS
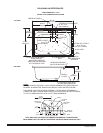
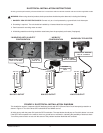
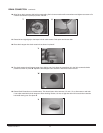
DRAIN STOPPER
WITH
ADJUSTABLE
BOLT
METAL STRAINER
BOLT
METAL
STRAINER
FLAT RUBBER
GASKET
DRAIN WASTE
FLANGE
OVERFLOW
ASSEMBLY
OVERFLOW NUT WITH O-RING
OVERFLOW
ESCUTCHEON
PLASTIC DRAIN BASE
DRAIN ACTUATOR SHAFT
SET
SCREW
AIR BATH NUT
WITH WASHER
AND GASKET
OVERFLOW
RETAINER
WEDGE
GASKET
CLOSE
OPEN
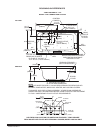
OVERFLOW
ASSEMBLY
VERTICAL
DRAIN PIPE
HORIZONTAL
DRAIN PIPE
PLASTIC
DRAIN BASE
90˚ ELBOW
AIR BATH DRAIN ILLUSTRATION
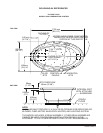
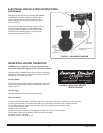
With supplied cable drain assembled to
bath, connect drain outlet to waste line in
accordance with the drain assembly
instructions. Tighten all drain joints
securely. Check the couplings and make
sure they are hand-tight. Clean the air
bath and fill with water to a point 2" below
the overflow. Recheck the couplings and
make certain that they are not leaking.
(Although the couplings are factory
tightened and inspected, some loosening
may have occurred during transit.) Make
sure the air bath is connected to the
electrical supply and turn the air bath on.
Check for leaks around all piping
connections while the air bath is running.
DRAIN CONNECTION AND
SYSTEM TEST
(before installing bath into
framed out structure)