


754286-100 Rev. A-3-
INSTALLATION INSTRUCTIONS (continued)
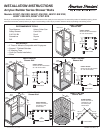
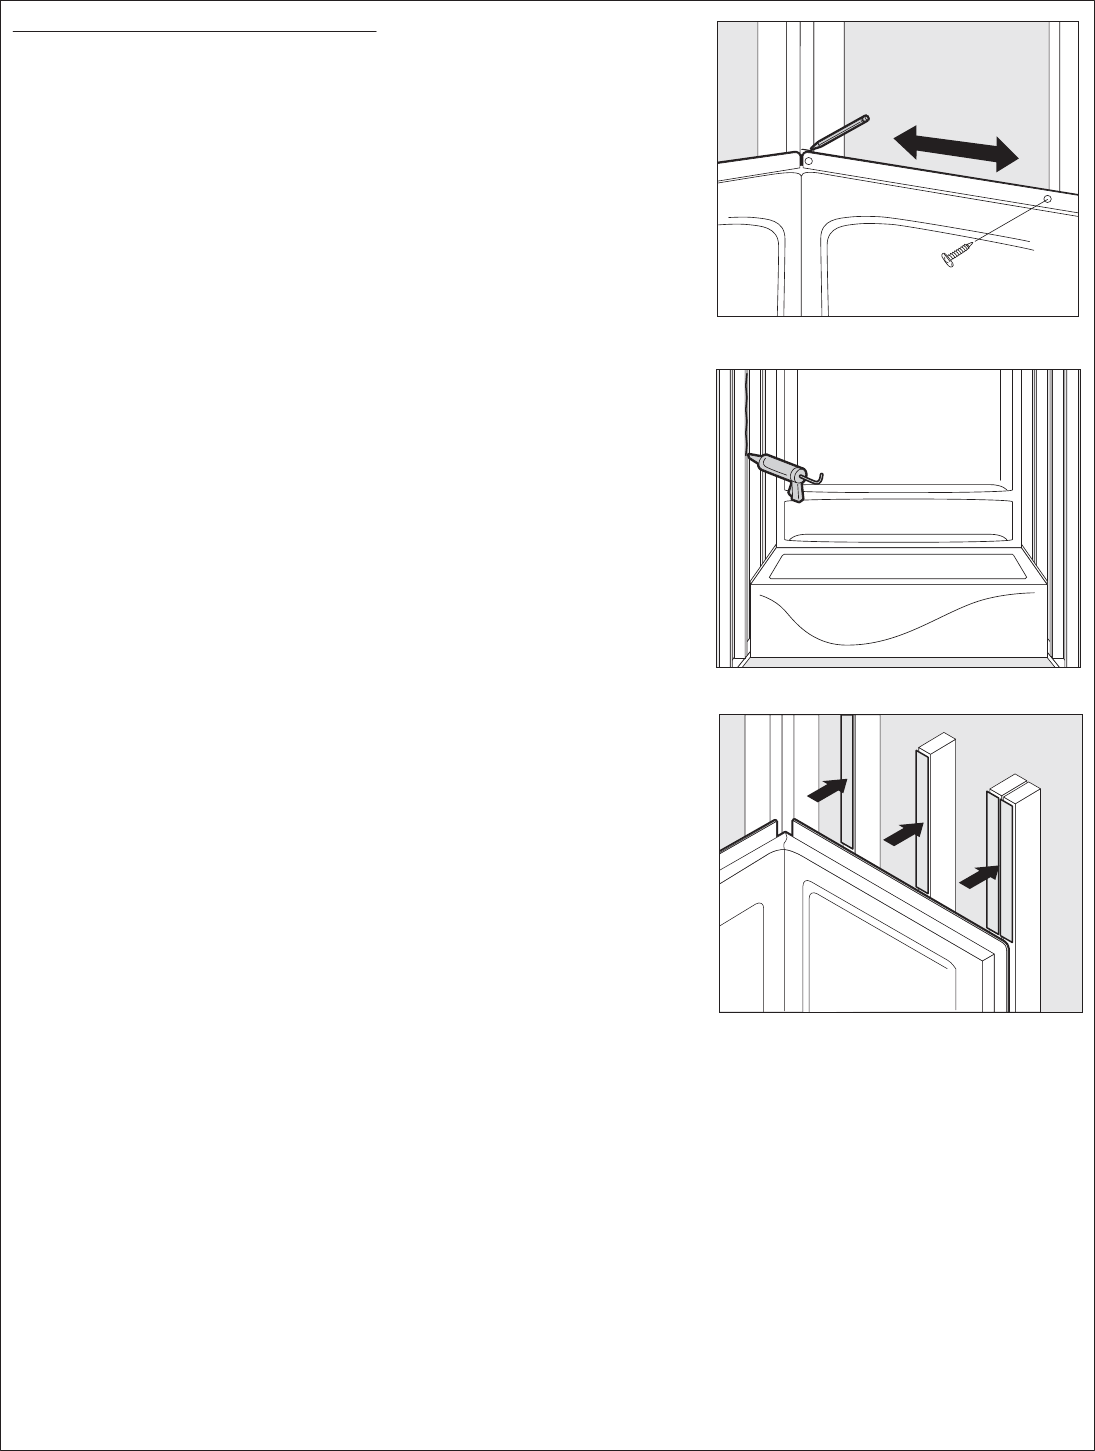
STEP 4. INSTALLING SHOWER WALL IN ALCOVE
• Apply a generous bead of adhesive below mark on each back wall stud only (follow
adhesive manufacturer’s recommended instructions).
• Position back panel in place and press firmly against studs to assure full contact
with adhesive.
• Apply adhesive to studs for side panel opposite the shower controls.
• Push side panel firmly into place.
• Apply adhesive to each stud for faucet side panel and push side panel firmly into
place. (Fig. 6)
• Reposition shims as needed.
• Align the front of the side walls and the front of the shower base.
• With walls properly positioned and shimmed, screw front flanges of side panels
to studs.
• Screw top flange of side panels to studs.
• Screw back panel flange to studs.
• After installation is complete, press panels against each stud to assure full contact
with the adhesive. This will prevent the wall from “oil canning” and helps deaden the
sound in finished alcove.
STEP 5. CAULKING
• When installed on an American Standard Shower Base, your American Standard
Shower Wall is designed to function properly without being caulked. However, if you
prefer the appearance of caulked joints, all seams must be caulked.
• Caulk must be applied around holes for the faucet, diverter valve and shower head.
• If your American Standard Shower Walls are used on a shower base other than an
American Standard base, it will be necessary to caulk all seams.
• If a shower door is installed, it will require caulking between the base, the walls and
the door.
• When caulking is required, always use a good grade silicone caulk for best results.
STEP 6. FINISHING
DRYWALL
• Using lattice strips or 1/4" luan, shim studs so that drywall will overlap nail flange
smoothly. (If your wall extends past the shown alcove, it may be necessary to shim
these studs.) (Fig. 7)
• Install 1/2" drywall on sides of alcove first then the back.
TILE
• Install 1/2" drywall up to (not over) wall nail flanges.
• Tile may now be installed over drywall up to the wall.
CLEANING
• Do not use any abrasive cleaners or metal scrapers.
• If drywall mud or plaster gets on your shower, it may be carefully removed with a
wooden scraper made from a piece of scrap wood.
• Adhesive may be removed with mineral spirits.
• Ideal cleaners are Soft Scrub Gel
®
or Comet Gel
®
.
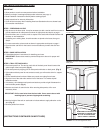
FIGURE 5.
Mark studs.
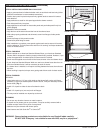
FIGURE 6.
Apply adhesive.
FIGURE 7.
Shim studs.
WARNING: Some cleaning products are not suitable for use. Read all labels carefully.
DO NOT USE if they say “not suitable for use with ABS, acrylic or polystyrene”.
CENTER ASSEMBLED
WALL ON SHOWER
MARK TOP OF STUD