


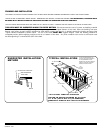
SUGGESTED INSTALLATION
METHOD
LEVELING SURFACE
WATERPROOF
SEALANT
BATH
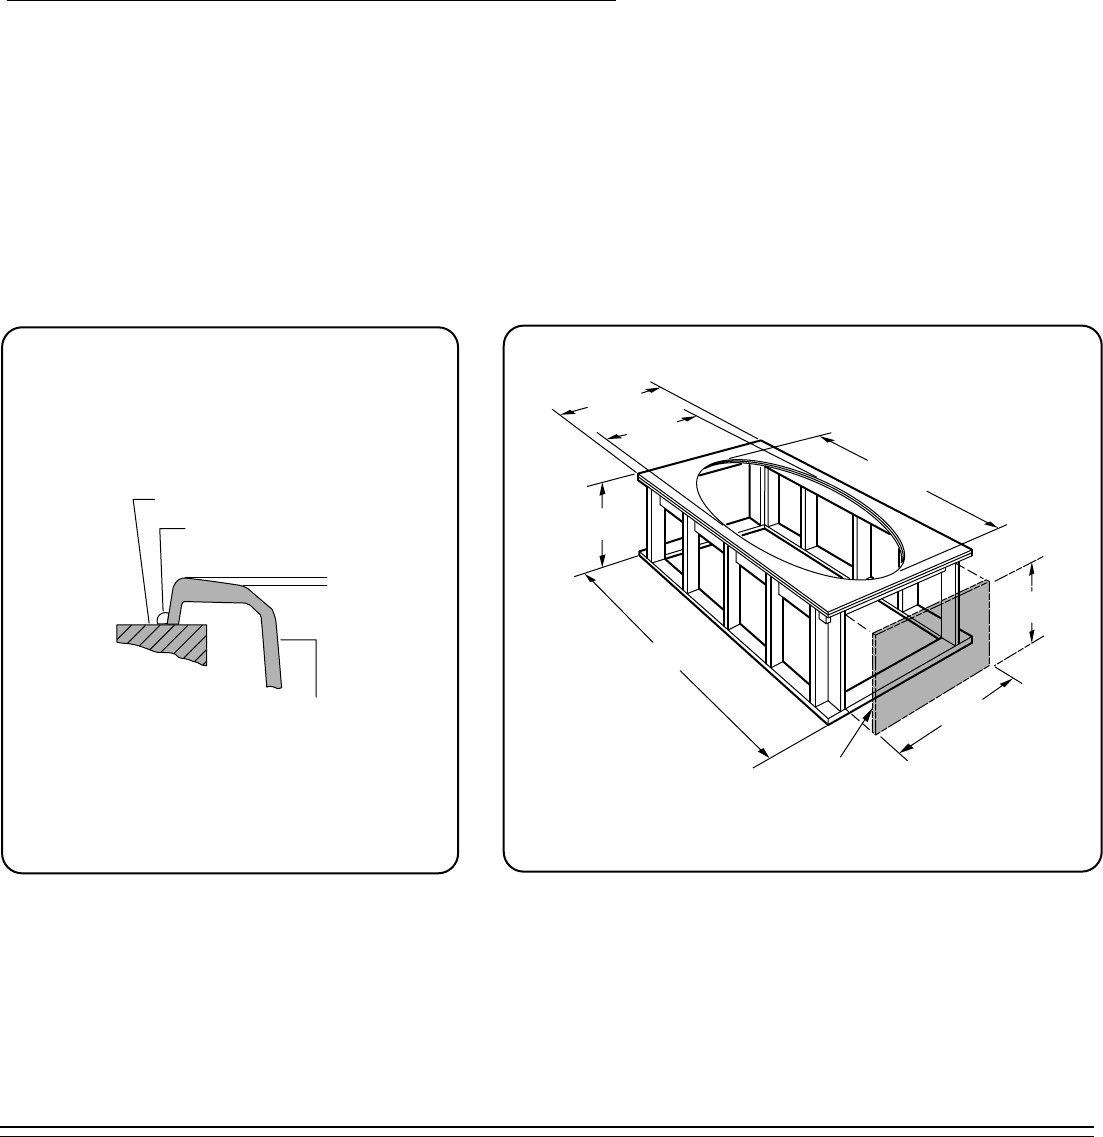
FRAMING AND INSTALLATION
THE VARIETY OF INSTALLATIONS POSSIBLE FOR THIS BATH MAY REQUIRE FRAMING PROCEDURES OTHER THAN THOSE SHOWN.
LOCATE STUDS AS REQUIRED. INSURE ROUGH DIMENSIONS ARE PROPER, PLUMB AND SQUARE. FOR WHIRLPOOLS, PROVISION MUST
BE MADE IN ALL INSTALLATIONS FOR AN ACCESS OPENING FOR SERVICING PUMP AND CONTROLS.
THE FOLLOWING PROCEDURE MUST BE USED FOR ALL INSTALLATIONS: STRINGER OR PIER HEIGHT SHOULD BE AS INDICATED.
THIS BATH MUST BE SUPPORTED ALONG ITS ENTIRE BOTTOM. We recommend the use of mortar as bedding material
(sand is not recommended). Apply enough bedding to support the complete bottom of the bath. After the bedding has been
poured, and before it sets, position whirlpool or bath within recess until the rim is leveled against the leveling stringers (see
"Typical Recess Installation") shown below. The rim of the bath MUST NOT support weight. Allow the bedding material to
completely harden before applying weight to the rim or bottom of the bath. Any finish material such as tile or wall board must
be self-supporting if it contacts the deck of the bath.
753571-100 (2)
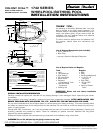
TYPICAL INSTALLATION
AS DESIRED
*39
(991 mm)
CUTOUT
AS DESIRED
*69
(1753 mm)
CUTOUT
21-7/8
(556mm)
ACCESS PANEL
12
(305 mm)
*SEE CUTOUT TEMPLATE PROVIDED
UNLESS AN ACCESS OPENING OF AT LEAST
12" X 24" (305 X 610 mm) IS PROVIDED,
WARRANTY SERVICE WILL NOT BE PERFORMED.
24
(610mm)
IT MAY BE NECESSARY TO
NOTCH THE DECK SURFACE
TO ACCOMMODATE THE
WHIRLPOOL ON/OFF SWITCH
AND/OR THE AIR CONTROL
DURING INSTALLATION