STACKING KIT(GAS) INSTALLATION INSTRUCTIONS
(MAH6700 washer & MDG6700 dryer only)
STACKING KIT COMPONENTS:
Stacking Support Guides(2) -34001449
Rear Bracket(2) -34001463
Maytag Flexing Gas Connector(1)
-34001465
Screws-Hex Head(4) -34001382
Screws Phillips-Pan Head(8) -6006-001174
Washer(4)
Label Warning(1) -35001251
Maytag Flexing Gas Connector
Rear Bracket
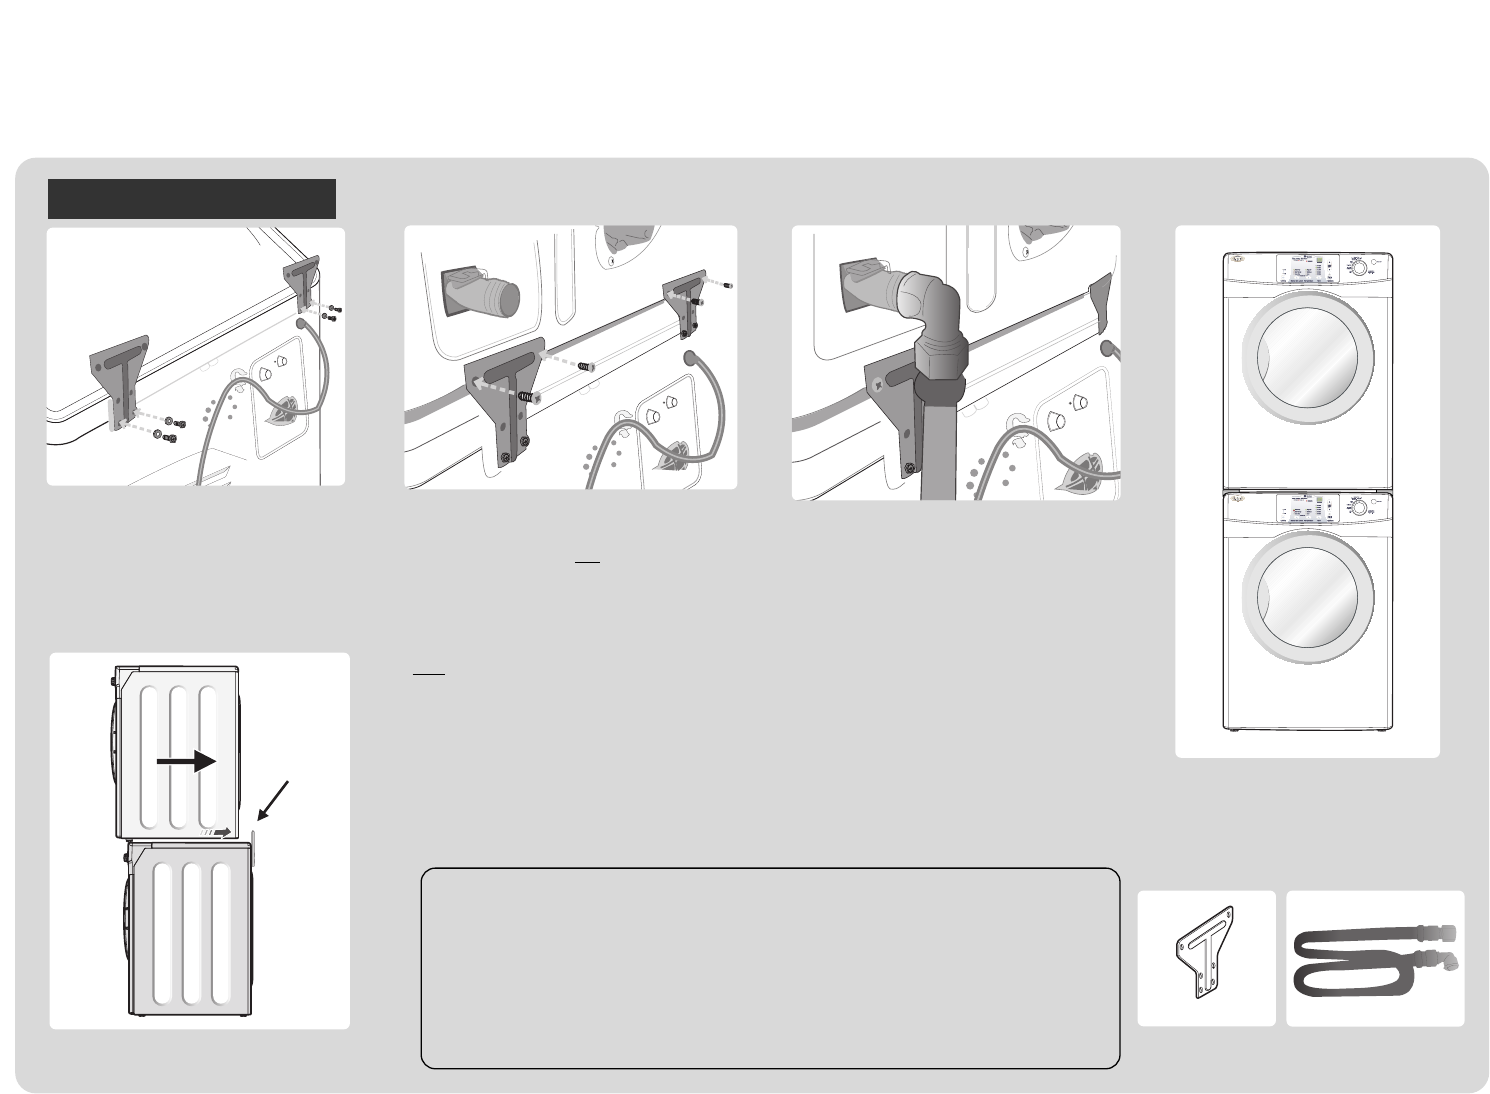
Step10 : Assemble the Rear Brackets to the dryer
as shown above. Note that four screws must be
used to hold the Rear Brackets to the back of the
dryer. Use four(4) Screws-phillips Pan Head(6006-
001174) in the back of the dryer cabinet.Extra
screws are included in the kit for this.
Note: When Rear Brackets are assembled to the
stacked units, attach the Flexing Hose Use
Warning Label(35001251). The label must be
placed as close as possible to the dryer gas
inlet pipe.
Step 13: Stacked Unit is now ready to
be installed. Refer to detailed installa-
tion instructions packed with products.
Step11 : Before the stacked unit is pushed into the
installed position, the Maytag Flexing Gas
Connector(34001465) must be installed on the dryer
gas inlet pipe. Attach the 90° elbow of the Flexing
Gas Connector to the dryer gas inlet pipe using
proper gas sealing materials, such as Teflon® tape,
etc. Elbow connection must be gas-tight
Step12 : Connect the other end of the Maytag Flexing
Gas Connector(34001465) to the house-supply outlet
pipe for the dryer, using proper gas sealing materials,
such as Teflon® tape,etc. Leak-test both connections
before proceeding further.
STOP HERE
Step 9: Lift and position dryer into the position on the
washer shown.
Step8 : Assemble the Rear Brackets to the washer
as shown above. Use two(2) Screws-Hex
Head(34001382) with washers in each washing
machine top cover tang if there are two holes.
Use one(1) Screw-Hex Head(34001382) with
washer in each top cover tang if there is one hole.
Washer
Where exactly does this
label go?? Here?
Where is the drawing for the guides?
Should these screws be illustrated?


