


©2007 ALVIN & COMPANY, INC. • P.O. Box 188, Windsor, CT 06095-0722
Phone: 860-243-8991 • Toll-Free: 800-444-2584 • Fax: 860-242-8037 • Toll-Free Fax: 800-777-2896
www.alvinco.com
LIT-A7143 6/07
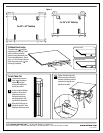
Figure 4
To Attach Pencil Ledge
The pencil ledge (
H
) prevents
materials from sliding off a tilted
surface. Slotted connection
allows for easy adjustment from
flush to elevated position. Use an
awl or a
1
⁄
16
" drill to start holes and
attach using two screws (
J
) into
front edge of tabletop.
J
H
21
7
⁄
8
"
Flush Position
Elevated Position
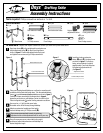
1"1"
1" 1"
3½" 3½"
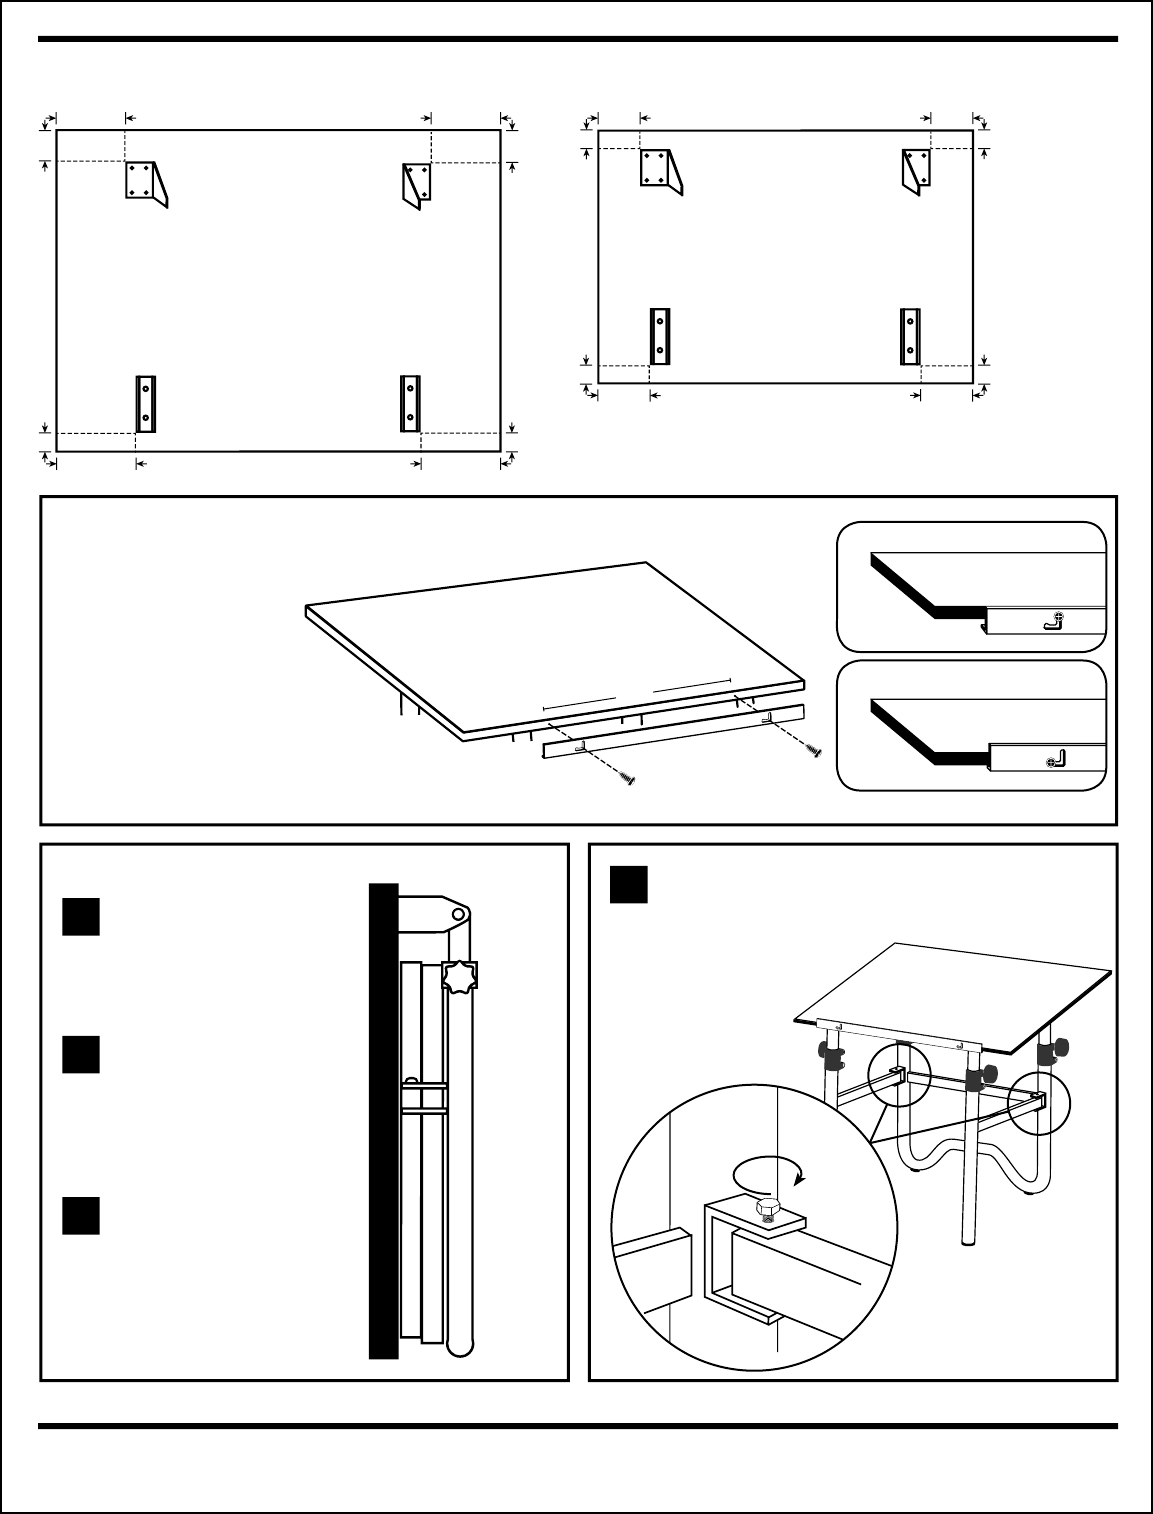
Tighten the two hinge bolts
that connect the front legs to
the back of the base frame to
maximize the strength and
stability of the table.
2"
Approx. 6" Approx. 6"
2"
6½"6½"
1"
1"
Loosen lower screws in
front height adjustment
collars (
E
) and spin
collars until adjustment
knobs face inward.
1
Lift front edge of tabletop
slightly to remove front
extension tubes from
front guide tracks and
swing legs inward. Left
leg should be folded first.
2
When both front legs are
folded into position, allow
tabletop to drop downward.
3
To Fold Table Flat
Hint
For 30" x 42" Tabletop
For 24" x 36" Tabletop
Approx.
3"
Approx.
3"