


2
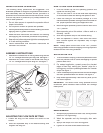
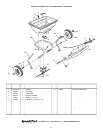
1. Assemble the handle tube to the leg tubes using the two
1/4" x 2" carriage bolts and nylon wing nuts. See fi gure 1.
2. Assemble the Control Cable to the handle tube using a
1/4" x 2" carriage bolt and nylon wing nut. See fi gure 1.
FIGURE 1
ASSEMBLY INSTRUCTIONS
NYLON
WING NUT
1/4" x 2"
CARRIAGE
BOLT
RULES FOR SAFE OPERATION
The following safety precautions are suggested. This
broadcast spreader is designed, engineered and tested to
offer reasonably safe and effective service, provided it is
operated in strict accordance with these instructions. Failure
to do so may result in personal injury. Always observe the
rules of safe operation.
1. Do not allow anyone to operate the spreader without
proper instructions.
2. Do not permit children to operate the spreader.
3. Wear eye and hand protection when handling and when
applying lawn or garden chemicals.
4. Read the label instructions and cautions for handling
and applying the chemicals purchased for spreading.
5. Keep all nuts, bolts and screws tight to be sure equipment
is in safe working condition.
6. Follow maintenance and lubrication instructions as
outlined in this manual.
HOW TO USE YOUR SPREADER
1. Pivot the handle up into the operating position and
tighten the two wing nuts.
2. This unit will cover a 4 to 8 foot wide area depending
on the material used and walking the speed of user.
3. Check the listing on the material package or in the
Recommended Spreader Settings instruction sheet for
the proper spreader setting and application rate.
4.
Before fi lling the spreader, push the control lever to the
"OFF" position.
5. Move spreader onto a fl at surface - either a walk or a
driveway - and fi ll.
6
.
Slide the Adjustable Stop to the desired setting.
7.
Start the spreader in motion, then move the control
lever forward against the adjustable stop to begin
spreading.
NOTE:
Always place control lever in the "OFF" position
while fi lling spreader and when stopping or turning to prevent
excess fertilizer from being released.
APPLICATION TIPS
1. To avoid misses or striping, make each pass about 5 feet
from the previous one so some overlapping of spread
pattern does occur.
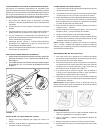
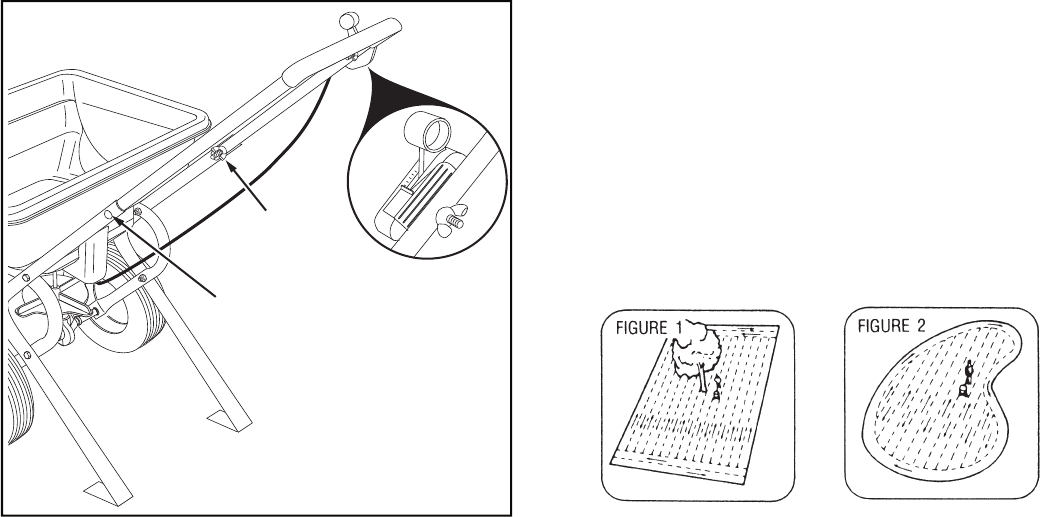
2. For easiest application, spread across the shortest
edges of lawn fi rst, making two "header" strips for a
turning area, and then spreading between the header
strips. See fi gure 1.
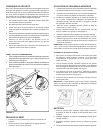
3. If lawn is odd shaped, spread a border around the edges
and then spread between the border. See fi gure 2.
4. Keep wheel approximately 4 feet from any area you do
not wish to spread.
IMPORTANT:
Be careful when using spreader around
ornamental plants because weed controls can damage
these plants.
MAINTENANCE
1. Always empty spreader after each use, storing leftover
material in it's original bag.
2. Wash the spreader and dry thoroughly after each
use.
3. Apply a few drops of oil to all moving parts.
4. Tighten all nuts and screws before each use.
ADJUSTING THE FLOW RATE SETTING
1. Loosen the wing nut that fastens the control to the
handle.
2. Slide the Adjustable stop to the desired setting and
retighten the wing nut.