4
TOOLS REQUIRED FOR ASSEMBLY
(2)7/16"Wrenches
(2)9/16"Wrenches
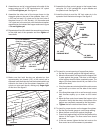
FIGURE 3
ASSEMBLY
NYLON
WASHER
1/4" NYLOCK
NUTS
1/4" FLAT
WASHER
1/4" x 1-1/4"
HEX BOLT
PLASTIC
GRIP
FERRULE
FLOW
CONTROL
ROD
FLOW
CONTROL
ARM
HOPPER
BRACE
1/2"
FIGURE 2
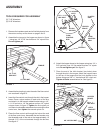
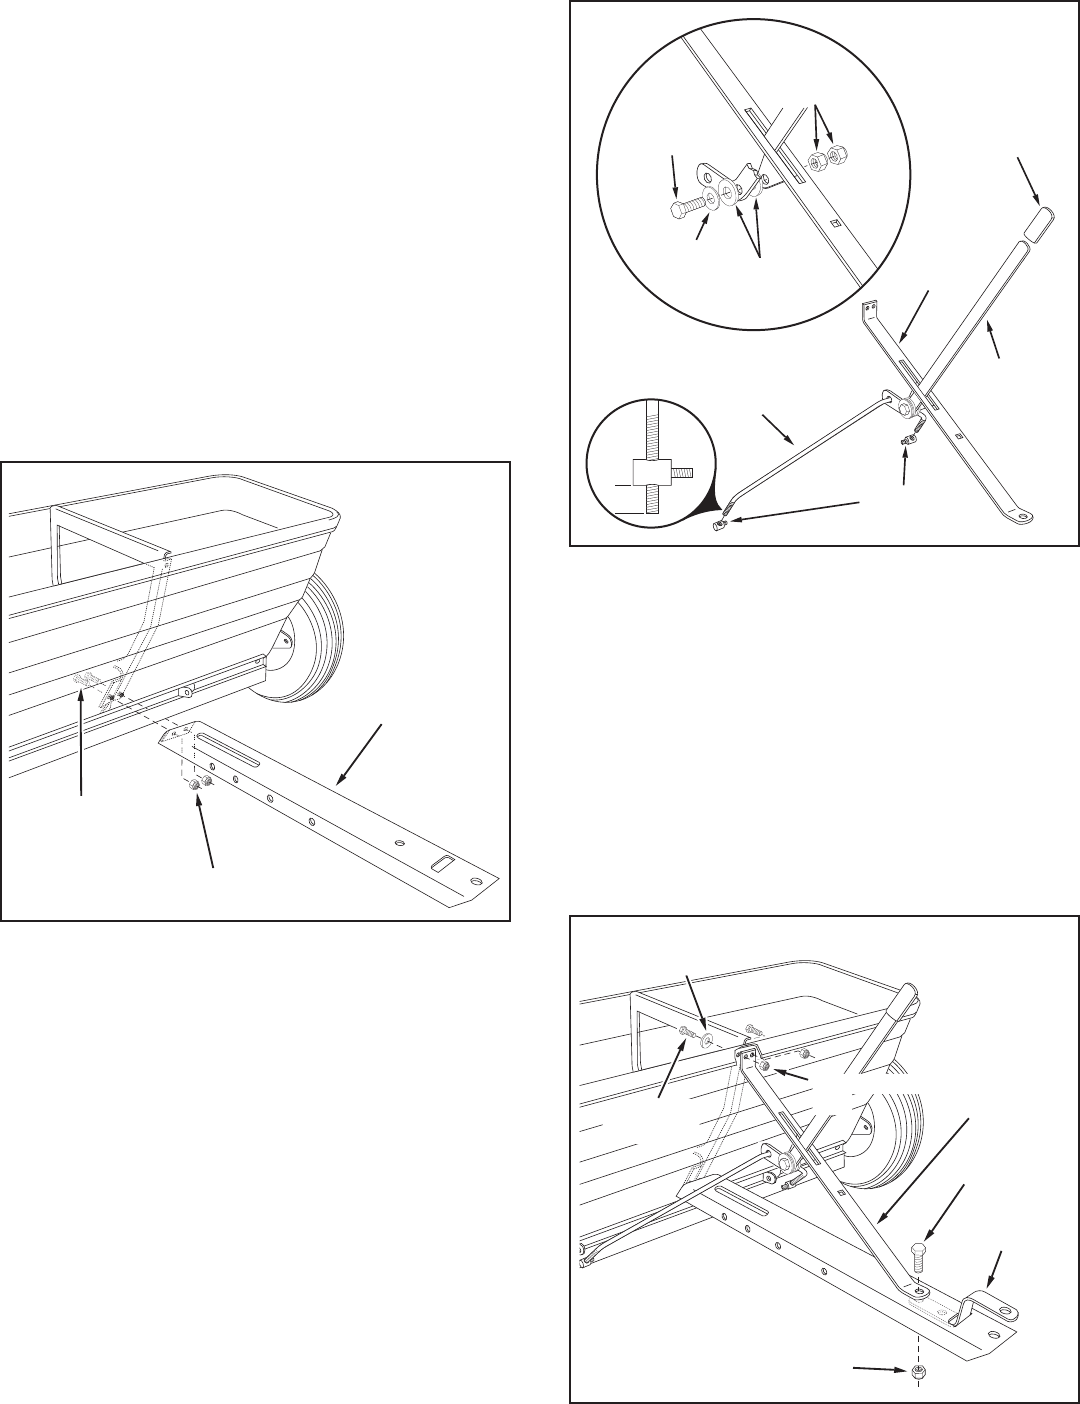
3. Assembletheplasticgripontotheendoftheowcontrol
armasshowningure2.
4. Inserttheowcontrolarmthroughtheslotinthehopper
brace.Placeanylonwasheroneachsideofthearm
andattachittothebrace'sweldedbracketusinga1/4"
x1-1/4"hexbolt,a1/4"atwasherandtwo1/4"nylock
nutsasshowningure2.Tightentherstnylocknut
untilthereisnoticeableresistancewhenmovingtheow
controlarm,thentightenthesecondnylocknut.
5. Placetheowcontrolrodthroughtheholeattheend
oftheowcontrolarm.Assemblethetwoferrulesonto
thethreadedendsoftherodsothatapproximately10
threads(1/2")oftherodextendsthroughtheferrules.
Seegure2.
1/4" HEX NUT
1/4" x 5/8"
HEX BOLT
TONGUE
FIGURE 1
1. Removethehardwarepackandallindividualpartsfrom
thecartonandlayoutasshownonpage2and3.
2. Assemblethetonguetothehopperasshowningure
1usingtwo1/4"x5/8"hexboltsand1/4"nylocknuts.
Do not tighten yet.
3/8" NYLOCK NUT
1/4" x 5/8"
HEX BOLT
3/8" x 1"
HEX BOLT
1/4" FLAT WASHER
(ONE ONLY)
HOPPER
BRACE
HITCH
BRACKET
1/4" NYLOCK
NUT
6. Attachthehopperbracetothehopperusingtwo1/4"x
5/8"hexbolts,one1/4"atwasherandtwo1/4"nylock
nuts.Do not tighten yet.Seegure3.
7. Placetheend ofthehitch bracket(twoholes) down
throughtheslotinthetongue.Attachthehopperbrace
tothetopofthetongueandthehitchbrackettothe
bottomusingone3/8"x1"hexboltand3/8"nylocknut.
Tighten all boltsassembledsofar.Seegure3.


