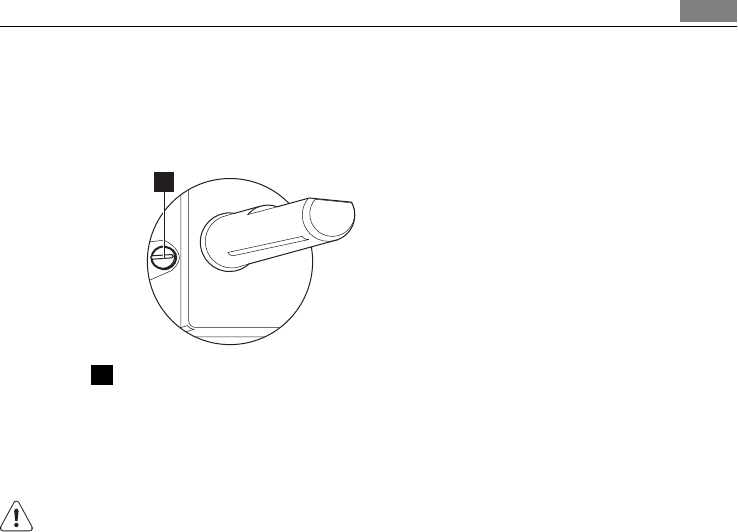
1. Light the burner.
2. Turn the knob on the minimum position.
3. Remove the knob.
4. With a thin screwdriver, adjust the by-pass screw position.
1
1 The by-pass screw
– If you change from natural gas 20 mbar to liquid gas, fully tighten the adjustment
screw in.
– If you change from liquid gas to natural gas 20 mbar, undo the by-pass screw ap-
proximately 1/4 of a turn.
WARNING!
Make sure the flame does not go out when you quickly turn the knob from the maximum
position to the minimum position.
Electrical connection
• Any electrical work required to install this hob should be carried out by a qualified elec-
trician or competent person, in accordance with the current regulations.
• THIS HOB MUST BE EARTHED.
• Always use a correctly installed shockproof socket.
• Make sure that there is an access to the mains plug after installation.
• Do not pull the mains cable to disconnect the appliance. Always pull the mains plug.
• The appliance must not be connected with an extension cable, an adapter or a multiple
connection (risk of fire). Check that the ground connection is in conformity with the
standard and regulations force.
• The power cable must be placed in such a way that it does not touch any hot part.
• Connect the appliance to the mains with a device that lets to disconnect the appliance
from the mains at all poles with a contact opening width of minimum 3 mm, eg. auto-
matic line protecting cut-out, earth leakage trips or fuse.
• None of a parts of the connection cable can not get a temperature 90°C.
Electrical Requirements
Any permanent electrical installation must comply with the latest I.E.E. Regulations and lo-
cal Electricity Board regulations. For your own safety this should be undertaken by a quali-
fied electrician, e.g. your local Electricity Board, or a contractor who is on the roll of the
National Inspection Council for Electrical Installation Contracting (NICEIC).
The manufacturer declines any liability should these safety measures not be observed.
Installation
9


