


12 Maintenance
MAN0561 (8/25/2006)
MAINTENANCE
The information in this section is written for operators
who possess basic mechanical skills. If you need help,
your dealer has trained service technicians available.
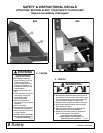
For your protection, read and follow the safety informa-
tion in this manual.
NEVER GO UNDERNEATH EQUIPMENT. Never
place any part of the body underneath equipment
or between moveable parts even when the engine
has been turned off. Hydraulic system leak-down,
hydraulic system failures, mechanical failures, or
movement of control levers can cause equipment
to drop or rotate unexpectedly and cause severe
injury or death.
• Service work does not require going under-
neath.
• Read Operator's Manual for service instruc-
tions or have service performed by a qualified
dealer.
Keep all persons away from operator control
area while performing adjustments, service, or
maintenance.
Always wear relatively tight and belted clothing
to avoid getting caught in moving parts. Wear
sturdy, rough-soled work shoes and protective
equipment for eyes, hair, hands, hearing, and head;
and respirator or filter mask where appropriate
BOX SCRAPER
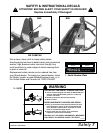
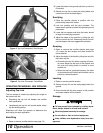
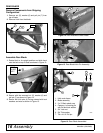
Blocking Up
NOTE: To service the box scraper when attached to
the tractor, it must be blocked up off the ground.
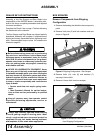
1. Place two 4" x 4" (10 x 10 cm) blocks under each
side frame of the box scraper as shown in Figure 5.
2. Lower the box scraper to rest securely on the
blocks.
NOTE: Do not block the machine any higher than
needed for removing the shanks.
Figure 5. Box Scraper Blocked Up
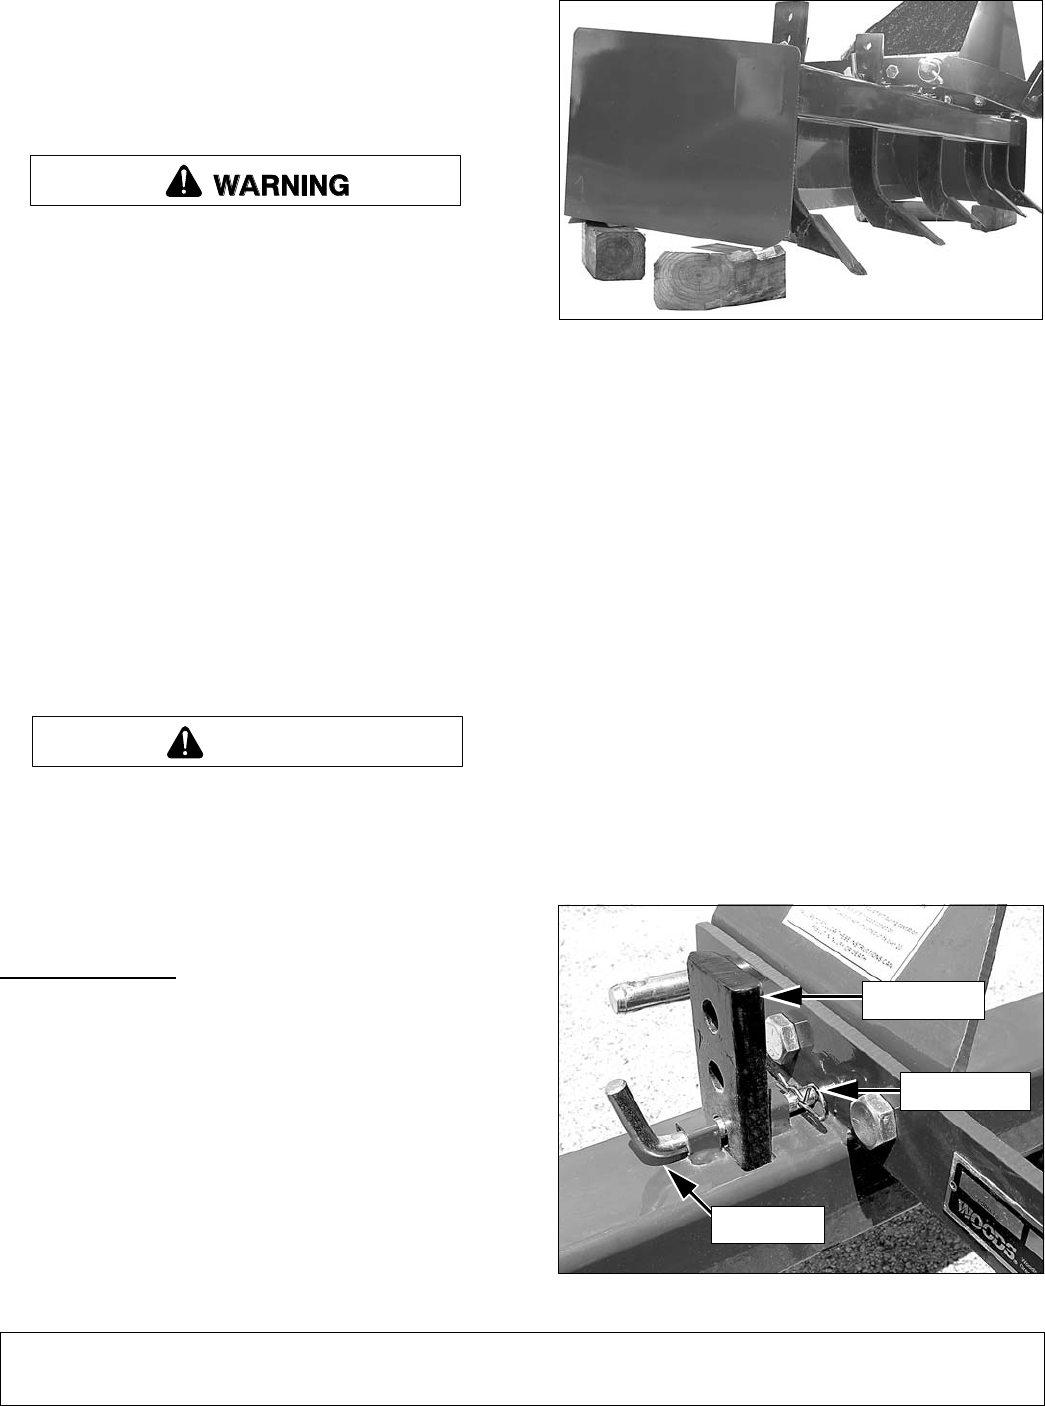
Adjusting or Removing Scarifier Shanks
Scarifier shanks have three operating positions in the
scraper. They may be removed if scarifying action is
not needed.
1. Block up machine by placing two 4" x 4" (10 x 10
cm) blocks under each side-frame of the box
scraper (see Figure 5).
2. Lower the box scraper to rest securely on the
blocks.
NOTE: Do not block the machine any higher than
necessary to remove the shanks or cutting edge.
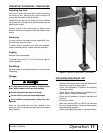
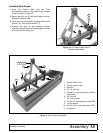
3. Remove safety pin and lock pin. Adjust scarifier to
desired position, Figure 6.
4. Replace safety and lock pins.
Figure 6. Scarifier Removal or Adjustment
CAUTION
SCARIFIER
SAFETY PIN
LOCK PIN
(Rev. 1/26/2007)