Setup Guide
Figure 1
WARNING: Always wear safety glasses or eye shields
when assembling the snow thrower.
Handle Assembly
1. Carefully unfold the handle while guiding the speed
control rod over the tire before cutting the orange ties.
2. Raise the upper handle (A, Figure 1) to the operating
position.
NOTE: Make sure the Z fi ttings at the ends of the cables are
secured in the holes on the control levers. Make sure
the cables are not caught between the upper and lower
handle.
3. Insert two bolts (B) into lower holes and fasten with two
lock washers and wing knobs (C) or nuts (if equipped).
Tighten all four fasteners securely.
4. Use the supplied ties to secure the EZ Steer™ cable (if
equipped) to the left handle and the wire harness to the
right handle.
Copyright Briggs & Stratton Corporation 1739435 (Rev. B)
Dual Stage Snow Thrower
Install the Speed Control Rod
Attach the ball joint (D, Figure 2), located on the bottom end
of the speed control rod (E), to the shift yoke assembly (F)
with 5/16” lock washer (G) and 5/16” nut (H). Tighten nut
securely.
Figure 2
Mfg. No.
1695734, 1695735, 1695820, 1695821, 1695824, 1695825,
1695826, 1695827, 1695843, 1695853, 1695906, 1695908,
1695964
A
C
B
B
E
G
FDH
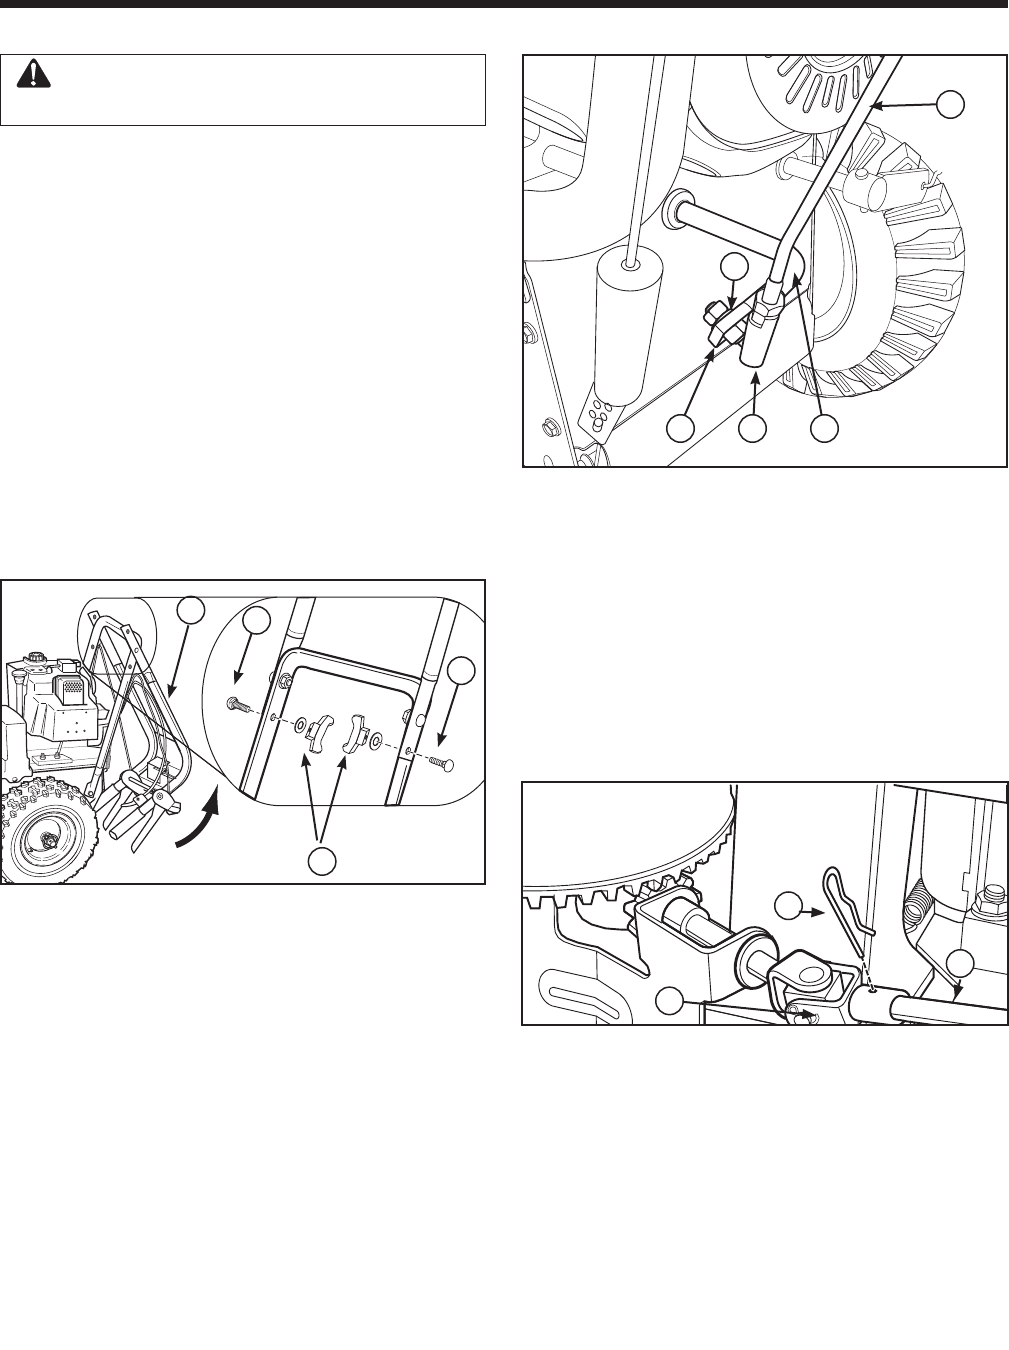
Install the Chute Control Rod
NOTE: Some models have the chute control already installed.
Models with an electric chute do not have a control rod.
Insert the chute control handle (if equipped) through the 1.
opening in the upper handle control panel.
Insert the end of the chute control rod (2. I) into the uni-
versal joint assembly (J) located next to the chute gear.
Secure with hair pin (K).
Figure 3
I
J
K


