


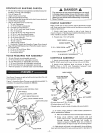
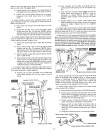

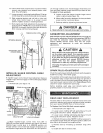


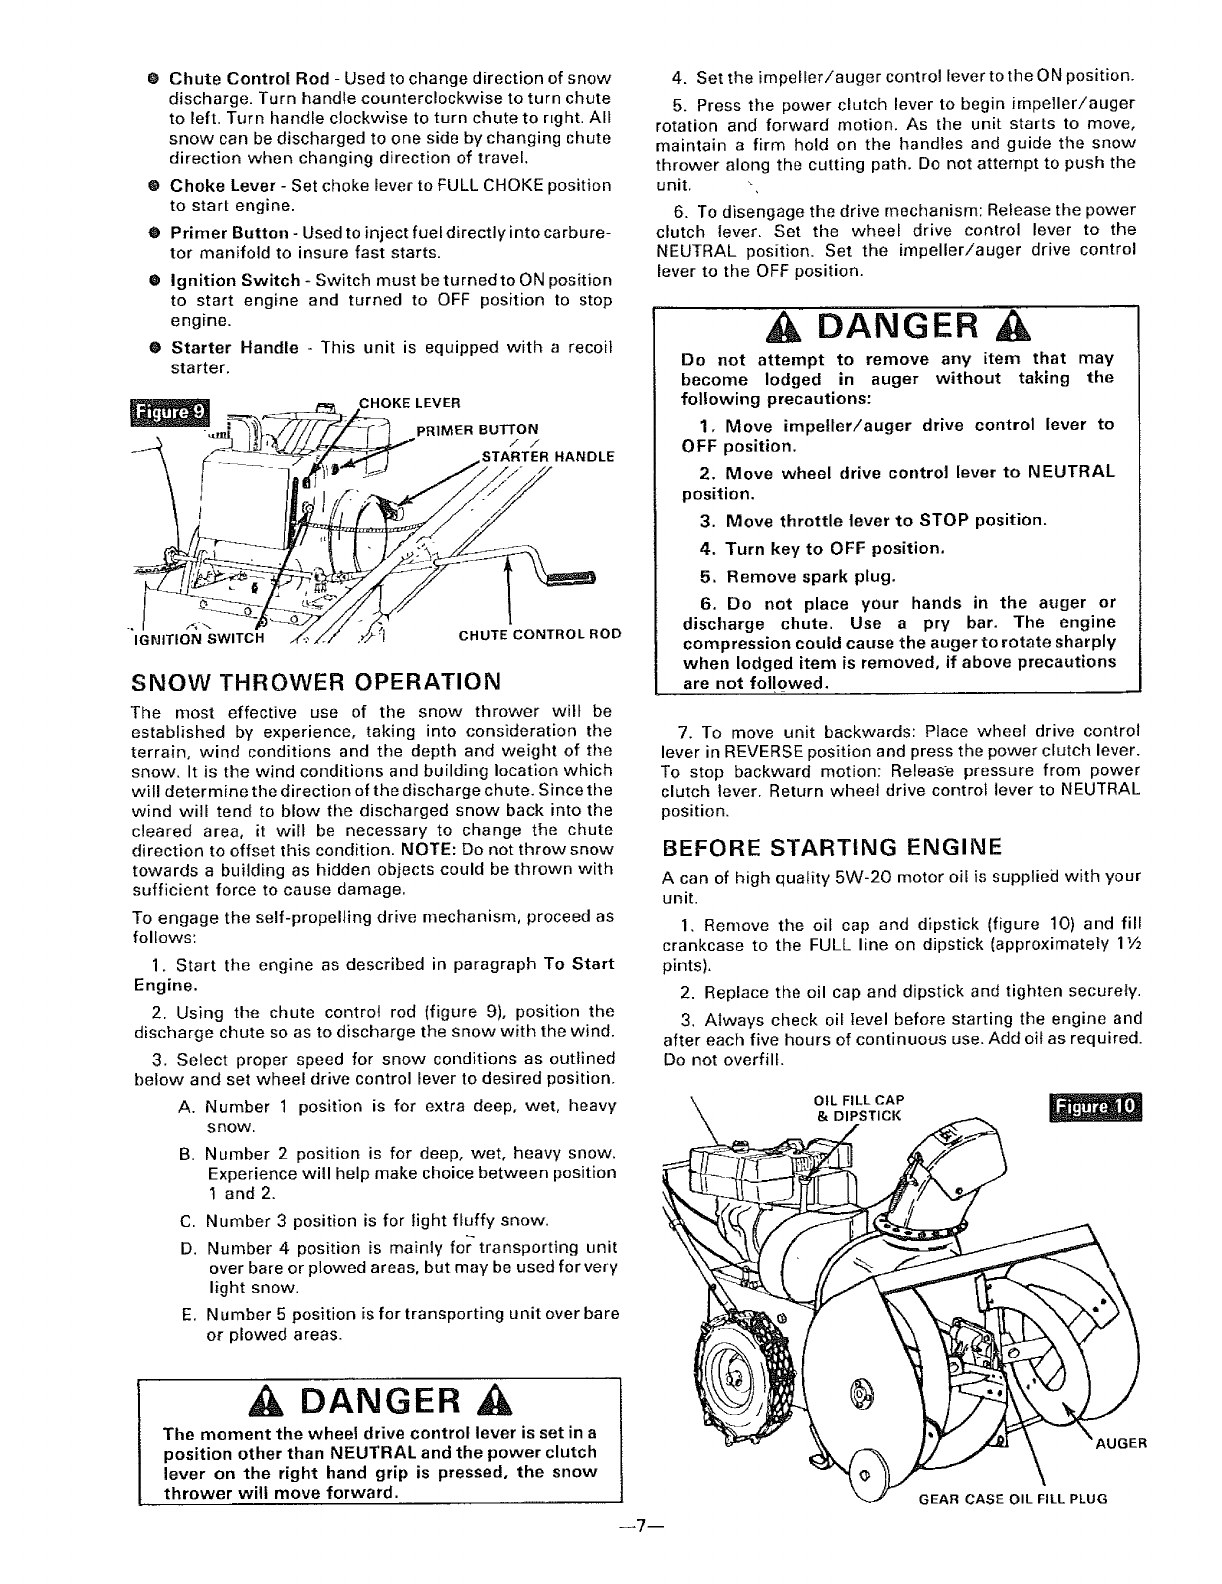
@ Chute Control Rod - Used to change direction of snow
discharge. Turn handle counterclockwise to turn chute
to left. Turn handle clockwise to turn chute to Hght. All
snow can be discharged to one side by changing chute
direction when changing direction of travel.
@ Choke Lever - Set choke lever to FULL CHOKE position
to start engine.
@ Primer Button - Used to inject fuel directly into carbure-
tor manifold to insure fast starts.
8 Ignition Switch - Switch must be turned to ON position
to start engine and turned to OFF position to stop
engine.
• Starter Handle - This unit is equipped with a recoil
starter.
_== CHOKE LEVER
_-- fl4/- x
IGNITION SWITCH 1( .I -"
CHUTE CONTROL ROD
SNOW THROWER OPERATION
The most effective use of the snow thrower wilt be
establishsd by experience, taking into consideration the
terrain, wind conditions and the depth and weight of the
snow. It is the wind conditions and building location which
will determine the direction of the discharge chute. Since the
wind will tend to blow the discharged snow back into the
cleared area, it wilt be necessary to change the chute
direction to offset this condition. NOTE: Do not throw snow
towards a building as hidden objects could be thrown with
sufficient force to cause damage.
To engage the self-propeINng drive mechanism, proceed as
follows:
1. Start the engine as described in paragraph To Start
Engine.
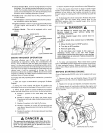
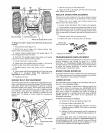
2. Using the chute control rod (figure 9), position the
discharge chute so as to discharge the snow with the wind.
3. Select proper speed for snow conditions as outlined
below and set wheel drive control lever to desired position.
A. Number 1 position is for extra deep, wet, heavy
SROW,
B. Number 2 position is for deep, wet, heavy snow.
Experience will help make choice between position
1 and 2.
C. Number 3 position is for light fluffy snow.
D. Number 4 position is mainly for transporting unit
over bare or plowed areas, but may be used for very
light snow.
E. Number 5 position is for transporting unit over bare
or plowed areas.
4. Set the impeller/auger control lever to the ON position.
5. Press the power clutch lever to begin impeller/auger
rotation and forward motion. As the unit starts to move,
maintain a firm hold on the bandies and guide the snow
thrower along the cutting path. Do not attempt to push the
unit. "-,
6. To disengage the drive mechanism: Release the power
clutch lever. Set the wheel drive control lever to the
NEUTRAL position. Set the impeller/auger drive control
lever to the OFF position.
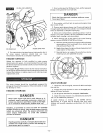
A DANGER
Do not attempt to remove any item that may
become lodged in auger without taking the
following precautions"
1, Move impeller/auger drive control lever to
OFF position.
2. Move wheel drive control lever to NEUTRAL
position.
3. Move throttle lever to STOP position.
4. Turn key to OFF position.
5. Remove spark plug.
6. Do not place your hands in the auger or
discharge chute. Use a pry bar. The engine
compression could cause the auger to rotate sharply
when lodged item is removed, if above precautions
are not followed.
7. To move unit backwards: Place wheel drive control
lever in REVERSE position and press the power clutch lever.
To stop backward motion: Release pressure from power
clutch lever. Return wheel drive control lever to NEUTRAL
position.
BEFORE STARTING ENGINE
A can of high quality 5W-20 motor oil is supplied with your
unit.
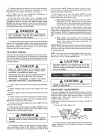
1. Remove the oil cap and dipstick (figure 10) and fill
crankcase to the FULL line on dipstick (approximately 1V2
pints),
2. Replace the oil cap and dipstick and tighten securely.
3. Always check oif level before starting the engine and
after each five hours of continuous use. Add oil as required.
Do not overfill.
OIL FILLCAP
& DIPSTICK
DANGER A
The moment the wheel drive control lever is set in a
position other than NEUTRAL and the power clutch
lever on the right hand grip is pressed, the snow
thrower will move forward.
--7--
GEAR CASE OIL FILL PLUG
IGER