


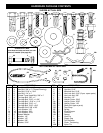
7
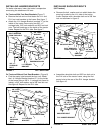
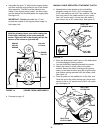
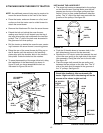
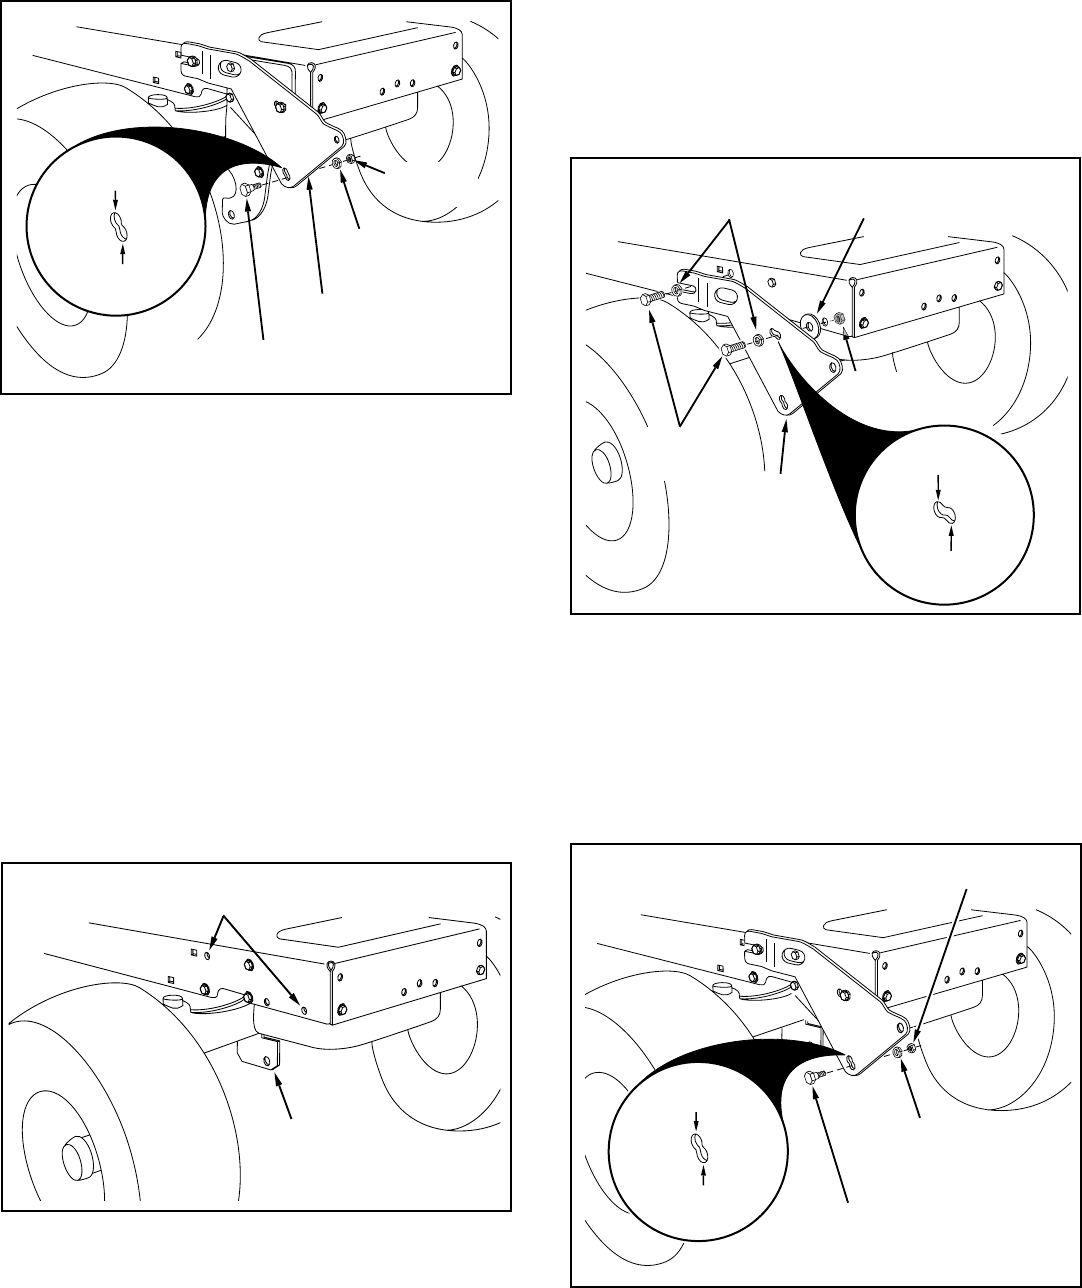
• Assemble a shoulder bolt, a 3/8" lock washer and a
3/8" hex lock nut to the bottom hole in each side
plate. See figure 3.
• Proceed to page 8.
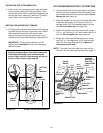
FIGURE 6 RIGHT SIDE VIEW
FIGURE 4 RIGHT SIDE VIEW
FIGURE 3 RIGHT SIDE VIEW
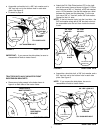
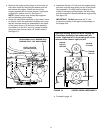
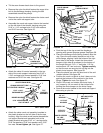
TRACTORS WITH AXLE MOUNTED FRONT
SUSPENSION BRACKETS
• Remove any bolts present in the holes shown in
figure 4 on both sides of the tractor frame.
THESE HOLES
MUST BE EMPTY
FRONT
SUSPENSION
BRACKET
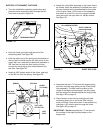
• Assemble a shoulder bolt, a 3/8" lock washer and a
3/8" hex lock nut to the bottom hole in each side
plate. See figure 6.
NOTE: If you remove the side plates, be sure to
reassemble all bolts to tractor frame .
FIGURE 5 RIGHT SIDE VIEW
3/8" SHOULDER BOLT
3/8" HEX LOCK NUT
3/8" LOCK
WASHER
This end for
16" front tires
This end for all
smaller tires
IMPORTANT: If you remove the side plates, be sure to
reassemble all bolts to tractor frame .
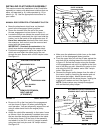
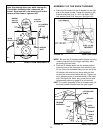
• Attach the R.H. Side Plate (marked "R") to the right
side of the tractor frame as shown in figure 5. For the
front hole use a 3/8" x 1" hex bolt, a 3/8" lock washer,
and a 1/2" flat washer. Use the flat washer as a shim
between the frame and the side plate. For the rear
hole use a 3/8" x 1" hex bolt, and a 3/8" lock washer.
Repeat for the L.H. side.
NOTE: If the bolt inserts freely into the front hole, the
3/8" lock washer along with a 3/8" hex lock nut must
be assembled onto the bolt from inside the tractor
frame.
3/8" SHOULDER BOLT
3/8" HEX
LOCK NUT
R. H. SIDE PLATE
3/8" LOCK
WASHER
This end for
16" front tires
This end for all
smaller tires
3/8" LOCK
WASHER
R.H. SIDE
PLATE
1/2" FLAT
WASHER
3/8" x 1"
HEX BOLT
3/8" HEX
LOCK NUT
This end for
16" front tires
This end for all
smaller tires