P3000iE QUICK START GUIDE
This Quick Start Guide is not a substitute for reading the Operator’s Manual.
To reduce the risk of injury or death, user must read and understand Operator’s Manual before using this product.
IMPORTANT Storing The Unit
Troubleshooting
Stopping The Unit
First Time Starting
8.
9.
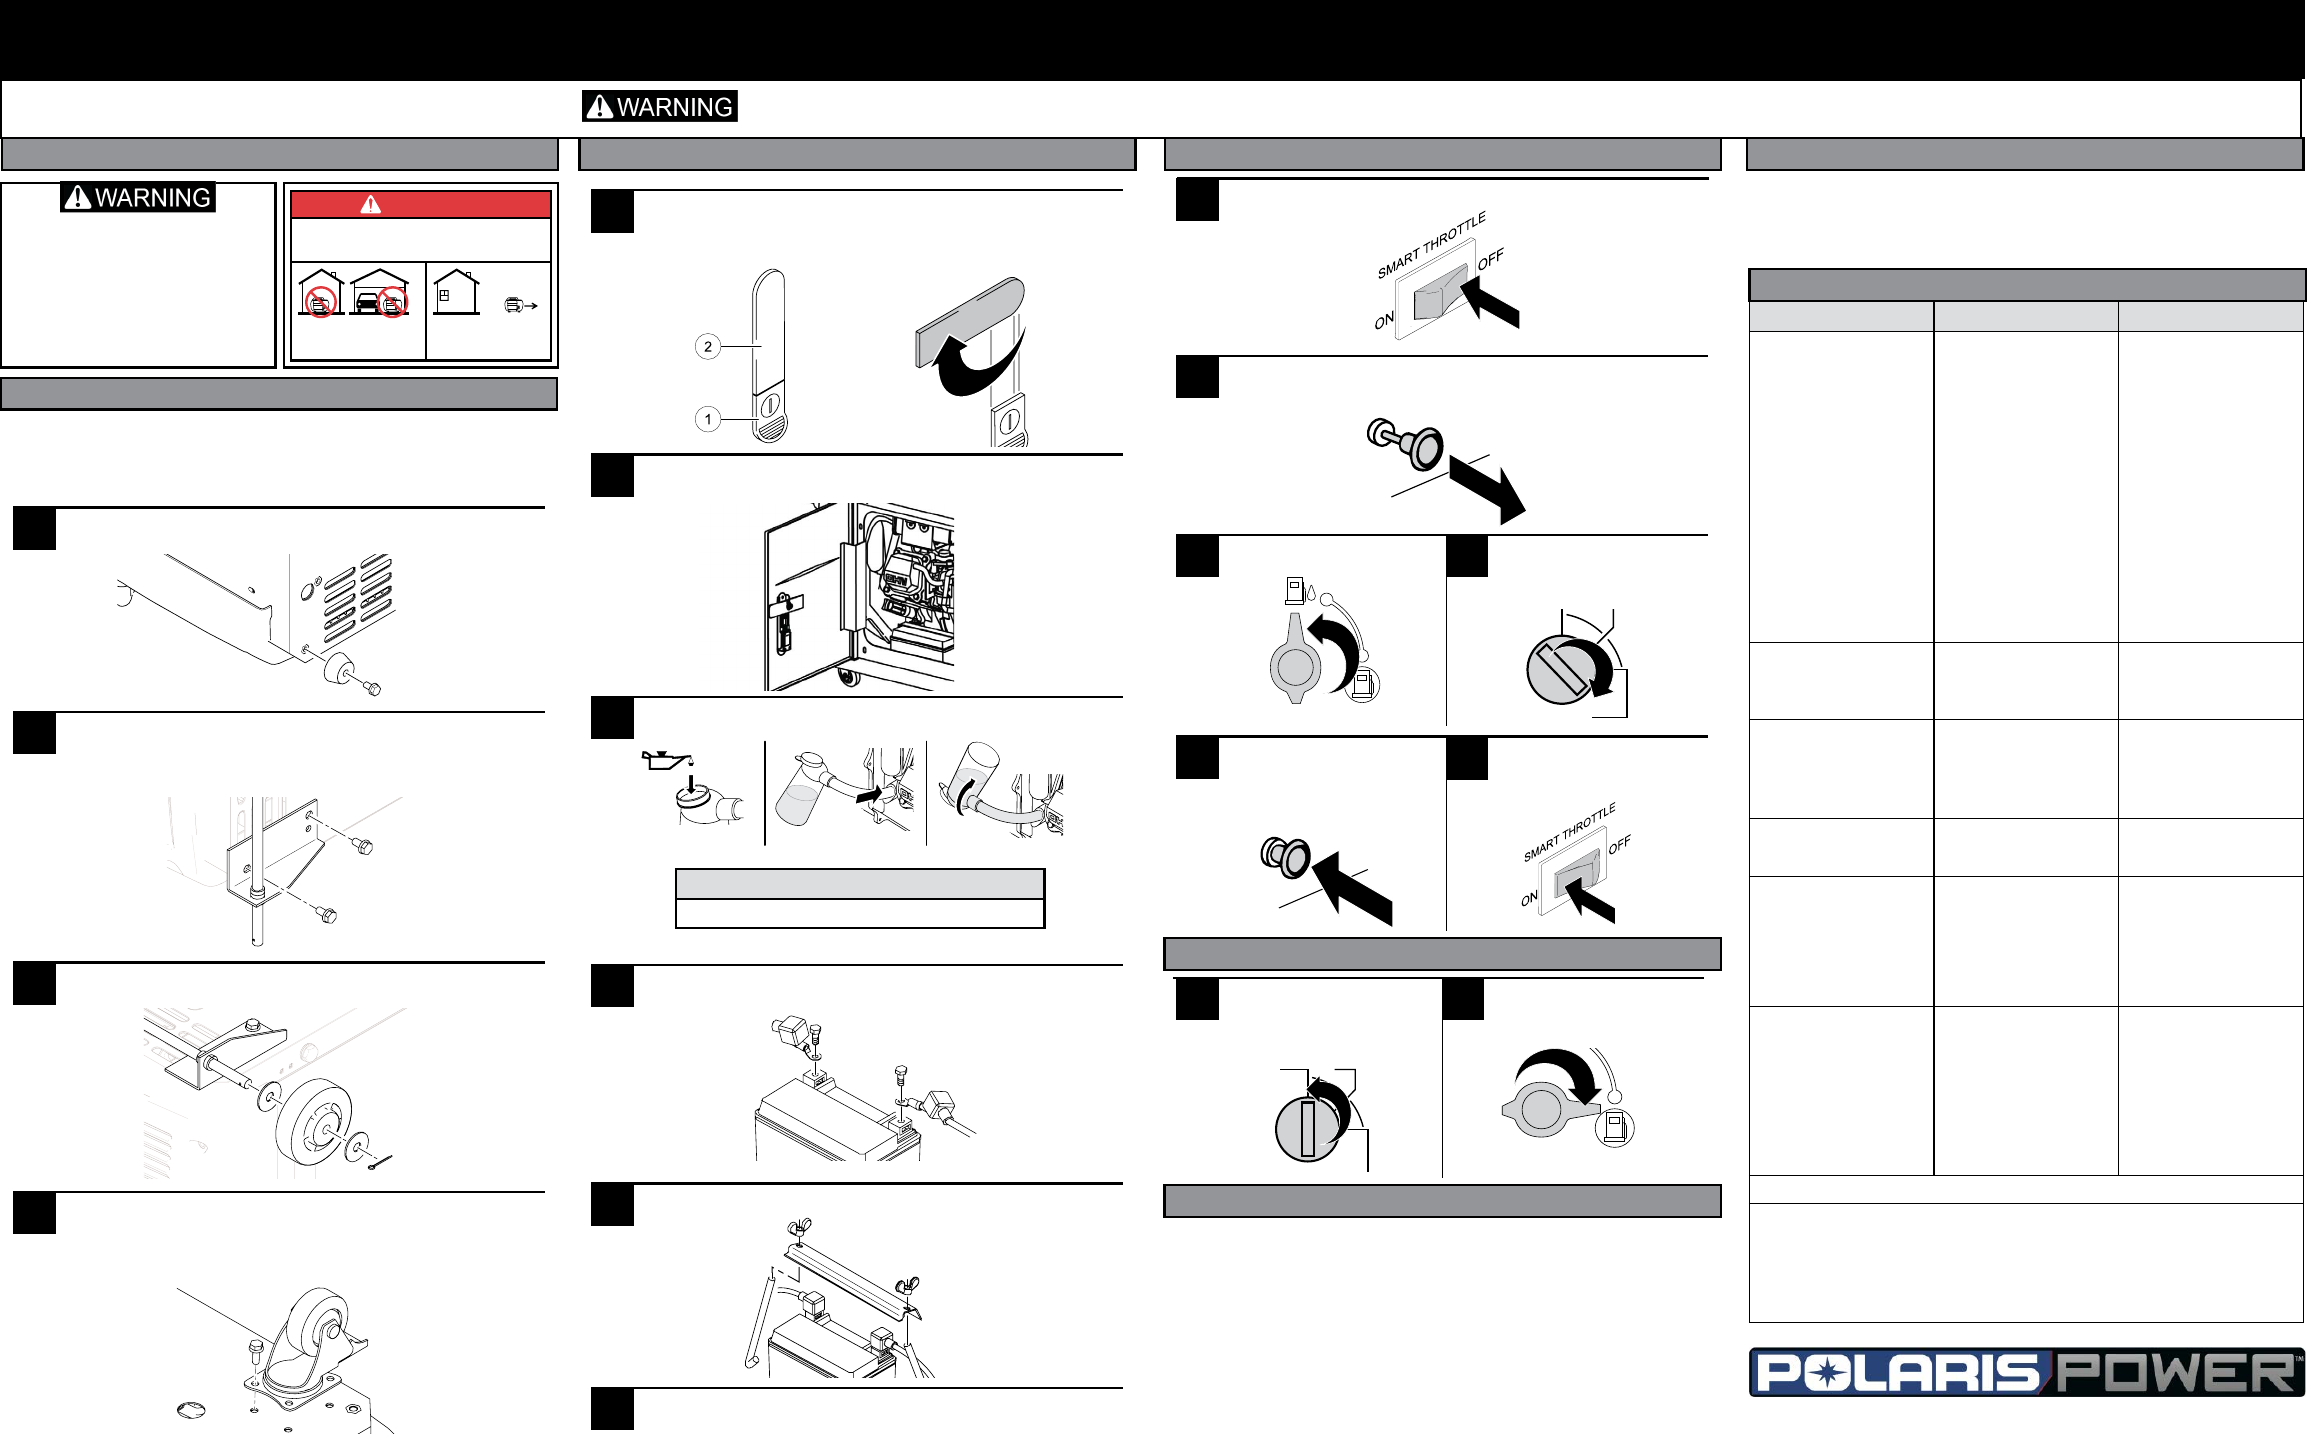
DANGER
Using a generator indoors CAN KILL YOU IN MINUTES.
Generator exhaust contains carbon monoxide.
This is a poison you cannot see or smell.
NEVER use inside a home
or garage. EVEN IF doors
and windows are open.
Only use OUTSIDE and
far away from windows,
doors, and vents.
Do not connect to a building’s
electrical system unless the generator
and transfer switch have been veried
by a qualied electrician. The
connection must isolate the generator
power from utility power and must
comply with all applicable laws and
electrical codes.
Pull CHOKE knob out to choke engine.
3.
Add engine lubricant per the Operator’s Manual instructions.
Position the FUEL VALVE
to ON.
10.
11.
Turn the ignition key to
START position. When the
engine starts, release the
key.
When preparing to store the generator, allow the unit to cool completely. If the
unit is going to be stored for more than 4 weeks, turn off generator by turning
fuel valve to the OFF position. After the generator stops running, turn key to
the OFF position. Follow complete storage instructions in Operator’s Manual.
7.
Position the SMART THROTTLE switch to OFF.
9926058 R2
PROBLEM POSSIBLE CAUSE SOLUTION
Engine will not start. - Engine switch is off.
- No fuel.
- Stale fuel or water
in fuel.
- Engine oil level is low.
- Spark plug faulty, fouled
or improperly gapped.
- Choke lever is in
RUN position.
- Engine stored without
treating or draining
fuel.
- Refueled with bad
fuel.
- Dirty fuel lter.
- Turn engine switch to ON.
- Fill fuel tank.
- Drain entire fuel system
and rell with fresh fuel.
- Engine is equipped with
Low Oil Shutoff. If the
engine oil level is
low, the unit will not start.
Check engine oil
level and ll if necessary.
- Replace spark plug.
- Move choke lever to
START position.
- Drain fuel and carburetor.
Refuel with fresh
fuel.
- Contact authorized
service dealer.
Engine hard to start. - Water in fuel.
- Weak spark at spark plug.
- Drain entire system and
rell with fresh fuel.
- Contact authorized
service dealer.
Engine lacks power. - Dirty air lter.
- Engine stored without
treating or draining
fuel, or refueled with
bad fuel.
- Check air lter element.
- Clean or replace as
needed.
- Drain fuel and carburetor.
- Refuel with fresh fuel.
AC receptacle does not work. Item plugged in is defective.
Overload indicator on (light
solid)
- Try a different item.
- Press reset button.
DC receptacle does not work. - Circuit protector engaged.
- Item plugged in is defective.
- Remove any load from
the generator.
- Replace the fuse,
then depress the DC
circuit breaker.
- Try a different item.
Generator makes a “spark
knock” or “pinging” noise.
- If knocking or pinging
occurs under normal load
at a steady engine
speed, the problem may
be with the fuel
being used.
- An occasional light
“knocking” or “pinging”
under heavy load is not a
cause for concern.
- Switch to a different
brand of fuel with
a octane rating of 86 or
higher.
- Contact authorized
service dealer.
If problems persist after trying the above solutions, contact your authorized service dealer.
The following symptoms may indicate problems that will affect the emissions level on the unit.
- Hard starting or stalling
- Rough idle
- Misring or backring under load
- Afterburning (backring)
- Black exhaust smoke or high fuel consumption
If you encounter any of these symptoms, take the unit to your authorized service dealer for service.
Always verify oil level is at upper limit mark on dipstick before operating.
P3000iE
3 oil ll bottles up to #2 mark
Oil ll recommendations using included oil ll bottle:
Disconnect all appliances
connected to the generator.
Position the Ignition Switch
to OFF.
1. 2.
Allow the engine to cool.
Turn the FUEL VALVE to
OFF.
4.
Using supplied nuts and bolts, connect battery Cables to positive (+)
and negative (-) terminals. Slide boots over cables and terminals.
12.
Once the engine is running,
slowly push the choke knob
in to the RUN position.
After a 2-3 minute warm up,
Position the SMART
THROTTLE switch to ON.
Using The Generator
Connect devices to be powered by following the steps below:
- Make sure the total rated power from the items you plan to use at the same
time are less than the generator continuous (running) watts. Make sure the total
surge (starting) power from the items you plan to use at the same time are less
than the generator maximum watts. See Operator’s Manual to calculate total
amount of power needed.
- Start the generator with nothing connected.
- Plug in and turn on the rst load (perferably the largest load).
- Allow the generator output to stabilize (engine runs smoothly and attached
device operates properly).
- Repeat previous steps for additional loads.
IMPORTANT: Never add more load than the generator’s capacity.
Please consider surge load when determining total power need.
First Time Starting (Cont.)
Wheel Kit Installation (Optional)
The unit comes with the rubber mounting feet installed. If you wish to install
the wheel kit, please perform the following procedure.
TOOLS: 10mm Wrench, 13mm Wrench, 10mm Socket, 13mm Socket
1.
Unlock the access panel latch (1), slide the lock down until the
latch handle (2) pops out. Turn the latch handle clockwise to
disengage the latch.
2.
Expose the generator inner components by swinging open the
service door.
1.
Carefully tip the generator onto the handle opposite the control
panel to access the bottom. Remove the four existing feet with a
13mm socket.
2.
3.
Add a washer, a wheel, another washer and a lock pin to each
end of the axle, in the specied order.
Install the axle into the two black axle mounting brackets. Attach
the axle mounting brackets with the four supplied bolts (M8 x 16)
to the corresponding holes in the bottom of the generator. Use a
13mm wrench or socket.
4.
Attach each locking swivel wheel to the bottom of the generator
with the four supplied bolts (M6 x 16) using a 10mm wrench or
socket. Fully tighten all mounting bolts, then return the generator
to an upright position.
5.
Install and tighten battery holder over battery.
6.
Fill the fuel tank per the Operator’s Manual instructions.


