


7
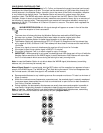
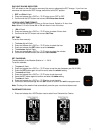
DAYLIGHT SAVING INDICATOR:
DST will default to the ON position as most of the country observes the DST change. If you live in an
area does not observe the DST change, switch this to the OFF position.
1. DST and ON will flash.
2. Press and release the +/RCC or -/°C/°F button to turn DST to OFF.
3. Confirm with the SET button and move to 12/24 hour time format.
12 OR 24 HOUR TIME FORMAT:
The Time may be displayed in 12-hour or 24-hour format. Default is 12-hour time.
Note: When in 12-hour format AM or PM will show in front of the hour.
1. 12H will flash.
2. Press and release the +/RCC or -/°C/°F button to select 24-hour time.
3. Confirm with the SET button and move to Set Time.
SET TIME:
To set the time manually:
1. The hour digit will flash.
2. Press and release the +/RCC or -/°C/°F button to select the hour.
3. Press and release the SET button to set the minutes.
4. The minute’s digit will flash.
5. Press and release the +/RCC or -/°C/°F button to select the minutes.
6. Confirm with the SET button and move to Set Calendar.
SET CALENDAR:
The date default of the Weather Station is 1. 1. 2010.
To set the calendar:
1. The year will flash.
2. Press and release the +/RCC or -/°C/°F button to set the year (between year 2010-2039).
3. Press the SET button again to confirm and to enter the month setting.
4. The month will flash.
5. Press and release the +/RCC or -/°C/°F button to set the month.
6. Press the SET button again to confirm and enter the date setting.
7. The date will flash.
8. Press and release the +/RCC or -/°C/°F button to set the date.
9. Confirm all calendar settings with the SET button to confirm and exit the program menu.
Note: The day of the week will set automatically once the year, month and date are set.
FAHRENHEIT/CELSIUS:
1. Press and release the -/°C/°F button once to switch from Fahrenheit to Celsius.
DST
ON
12H
2010
1M.1D