


H1. After every use
In order to avoid overheating the motor, remove
any dust and dirt from the slots on the cylinder
cover and finds of the cylinder using a wooden
scraper. Store the machine in a dry place.
After 25 hours of use
Remove the filter as shown in the figure and clean it
using a gentle jet of compressed air. For more thor-
ough cleansing, you can wash it with soapy water.
After 50 hours of use
Add some high speed gear grease in the gearbox
through hole (C). Remove and clean the spark
plug (set the space between the electrode at
0.5/0.6 mm). Replace if excessively encrusted. In
case of excessive encrustation check the carbu-
retor adjustment, the percentage of oil in the fuel
mixture and make sure the oil is of excellent quali-
ty and suitable for two-stroke engines.
After 100 hours of use
Replace the spark plug.
Every three months
Contact your Service Center for a complete over-
haul, replacement of the fuel filter and cleaning of
the parts inside the machine. This will reduce the
possibility of unexpected problems and will
ensure the good performance and long life of
your machine.
Periods of prolonged disuse
See "Environmental information".
If you use the machine in an exceptionally
dirty or dusty environment these operations
should be carried out more often.
H2. Replacement of nylon string (A)
To replace the reel of string, press both the
release pawls indicated by the arrows, remove
the empty reel, unroll any string left and rewind
the new string. Open the original package of
string and insert the ends of the two strings in the
eyelets on the reel, then wind the strings com-
pletely on the reel in the same direction and fas-
ten the end of each string in the 2 opposite
grooves. Replace the reel in its housing and
thread the ends of the strings in their bushings.
Pull each string so that about 15 cm comes out
on each side. Reassemble the nylon string head
as shown (fig. H5). If the reel becomes excessive-
ly worn, replace it with a whole new reel.
H3. Replacement of nylon string (B)
1) Loosen the locking nut on the base of the
nylon head by turning it clockwise.
2) Remove the base cover assembly.
Remove the empty spool from the housing and
discard any remaining line.
3) Prepare 2 lengths (8ft each) of 2.4 mm nylon
line. Thread 1 end of each line into the two
holes on opposite sides of the spool. Pinch the
exposed ends flat with a pair of pliers to pre-
vent them slipping through the hole.
4) Wind the two lines in the same direction
around the spool.
5) Slide the end of the two lines into the grooves
to hold the line temporarily.
6) Position the spool back into the housing and
pull the line through the eyelets.
7) Pull about 15cm (5ins) of line out on either side.
8) Reassemble the nylon string head as illustrat-
ed; mower gauge,spring and locking nut (tight-
en in an anti-clockwise direction).
ENGLISH - 7
After stopping the engine the rotating parts,
blade or nylon string head, keep spinning
by inertia for a few seconds. Grip the machine
firmly until they stop. In case of emergency the
above delay can be abbreviated by scraping the
blade supporting cup parallel on the ground.
G. Carburetor adjustment
Your machine can be equipped with a low emis-
sion carburetor. We recommend that you have
any adjustment of the carburetor made exclusive-
ly by an authorized service center, which disposes
of special equipment for ensuring the best per-
formance with the lowest emissions. To adjust the
speed to the minimum, turn the screw marked (T)
as shown: With the engine running and well
warmed up, turn the screw (T) gently clockwise,
until the engine rotates at regular speed (stead
noise), without the cutting devices in motion. If
the cutting devices are moving, turn the screw (T)
gently counterclockwise until you obtain the prop-
er adjustment. The correct minimum speed is
shown in the instruction manual in the paragraph
of technical data.
All the above adjustments should be made
with the cutting devices correctly installed.
The warranty may be invalidated due to erro-
neous adjustments made by personnel not
belonging to authorized service centers.
8 9 10 11
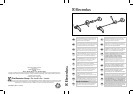
H. Routine maintenance
1 2 3 4 7 9 10