


12
2”
45°
2”
CAUTION
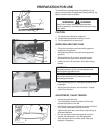
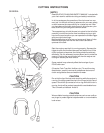
A falling tree can seriously damage anything it may hit - a
car, a house, a fence, a power line, or another tree. There
are ways to make a tree fall where you want it, so first
decide where that is!
Before cutting, clear the area around the tree. You will need
good footing while working and you should be able to work
the saw without hitting any obstacles. Next, select a path of
retreat. When the tree begins to fall you should retreat away
from the direction of fall at a 45 degree angle to avoid the
trunk kicking back over the stump.
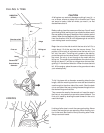
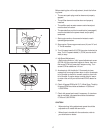
Begin the cut on the side to which the tree is to fall. Cut a
notch about 1/3 of the way into the tree as shown. The
position of this notch is important since the tree will try to
fall “into” the notch. The felling cut is made on the side op-
posite the notch and at a level about 2” above the bottom of
the notch. Do not try to cut through to the notch with the
felling cut. The remaining wood between the notch cut and
felling cut (about 2”) will act as a hinge when the tree falls,
guiding it in the desired direction. When the tree starts to
fall, kill the engine, place the saw on the ground and make
your retreat quickly.
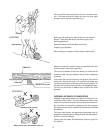
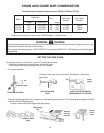
To fell big trees with a diameter exceeding twice the bar
length, start the notching cuts from one side and draw the
saw through to the other side of the notch. Start the back
cut on one side of the tree, pivoting the saw through to form
the desired hinge on that side.
Then remove the saw for the second cut. Insert the saw in
the first cut, very carefully so as not to cause kickback. The
final cut is made by drawing the saw forward in the cut to
reach the hinge.
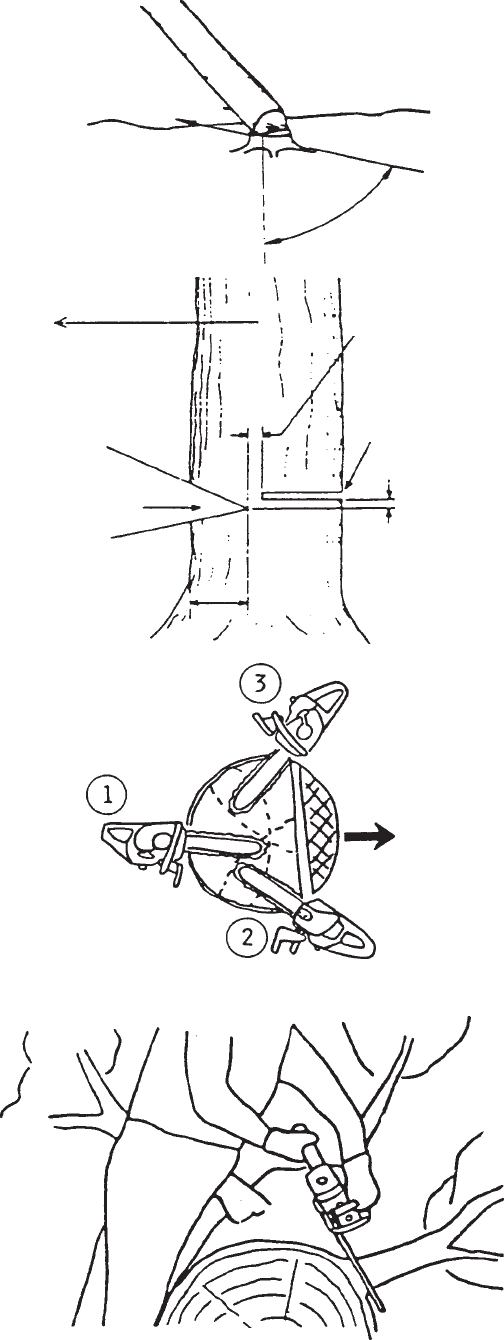
Limbing a fallen tree is much the same as bucking. Never
limb on the tree that you are standing. When limbing, cau-
tion is the word. Be careful of the tip touching other limbs.
Always use both hands.
FELLING A TREE
DIRECTION
OF FALL
Direction of fall
Hinge
Felling cut
First cut
Notch
Second cut
One-third tree
diameter
LIMBING