CAUTION!Muffleris hot!Allowengineto
cool downbeforeproceedingwith bumper
installation.
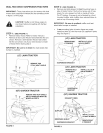
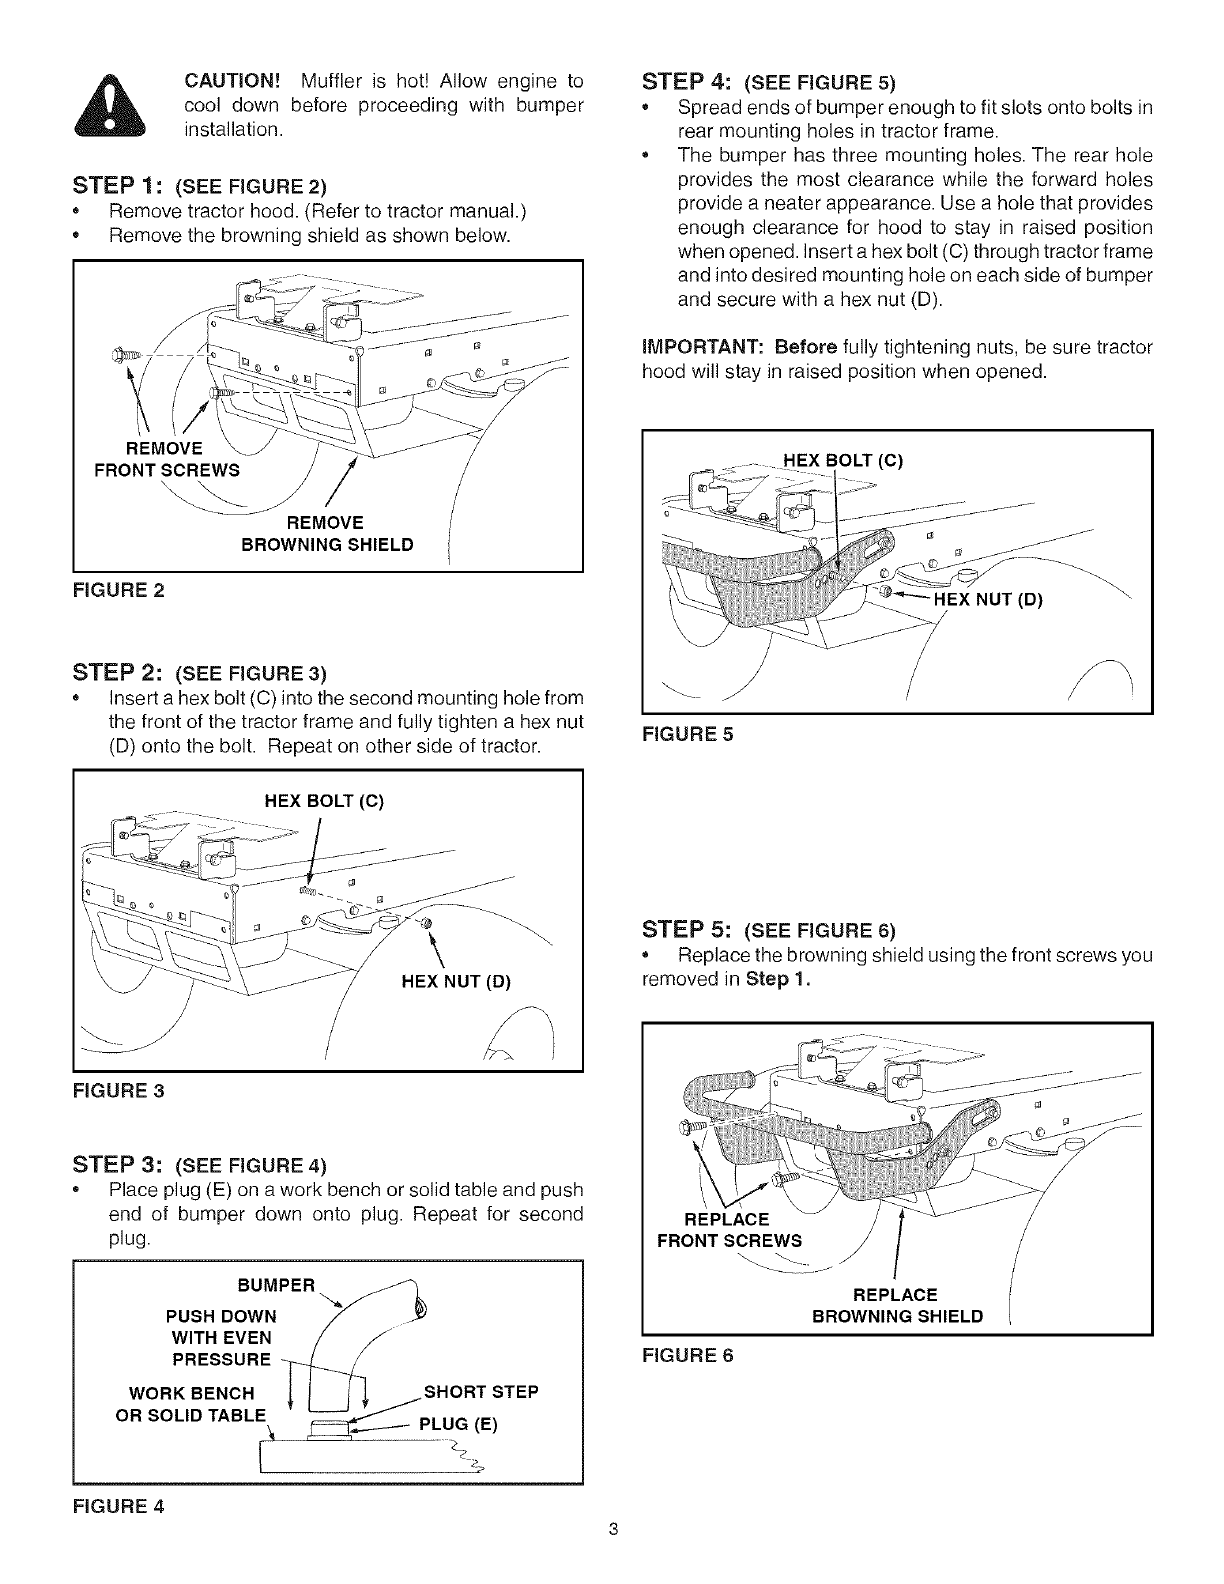
STEP 1 : (SEE FIGURE 2)
* Remove tractor hood. (Refer to tractor manual.)
* Remove the browning shield as shown below.
REMOVE
FRONT SCREWS
REMOVE
BROWNING SHIELD
FIGURE 2
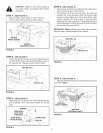
STEP 2: (SEE FIGURE 3)
* Insert a hex bolt (C) into the second mounting hole from
the front of the tractor frame and fully tighten a hex nut
(D) onto the bolt. Repeat on other side of tractor.
STEP 4: (SEE FIGURE 5)
* Spread ends of bumper enough to fit slots onto bolts in
rear mounting holes in tractor frame.
* The bumper has three mounting holes. The rear hole
provides the most clearance while the forward holes
provide a neater appearance. Use a hole that provides
enough clearance for hood to stay in raised position
when opened. Insert a hex bolt (C) through tractor frame
and into desired mounting hole on each side of bumper
and secure with a hex nut (D).
iMPORTANT: Before fully tightening nuts, be sure tractor
hood will stay in raised position when opened.
HEX BOLT(C)
/
(D)
FIGURE 3
HEX BOLT (C)
\
HEX NUT (D)
STEP 3: (SEE FIGURE 4)
* Place plug (E) on awork bench or solid table and push
end of bumper down onto plug. Repeat for second
plug.
BUMPER
PUSH DOWN
WITH EVEN
PRESSURE
WORK BENCH
OR SOLID TABLE
SHORT STEP
PLUG (E)
STEP 5: (SEE FIGURE 6)
* Replace the browning shield using the front screws you
removed in Step 1.
REPLACE
FRONT SCREWS
REPLACE
BROWNING SHIELD
FIGURE 6
/
FIGURE 4
3


