


#8-32 x3/8"
Hex bolt
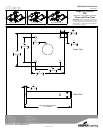
Exploded view and part call-out
(2x)
Fixture head
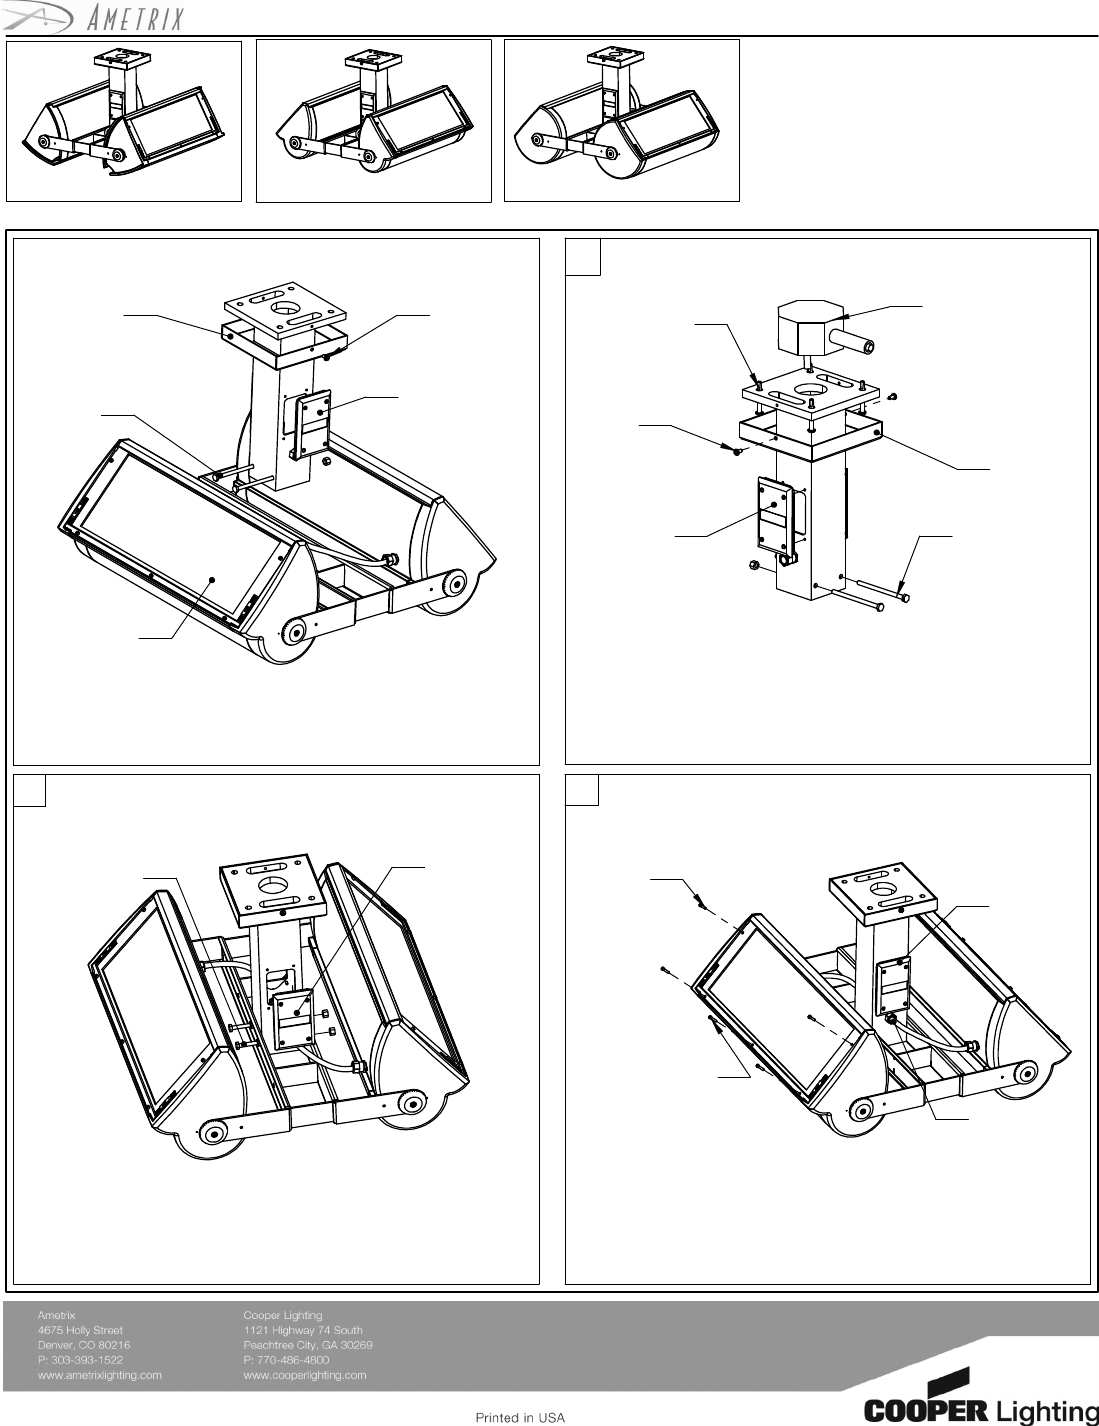
. Replace canopy and secure using both set screws.
Set screw
(2x)
1/4-20 x4"
Canopy
(2x)
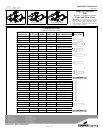
Wiring the fixture
assembly
Cover plate
1. Remove both 1/4-20 x4 hex bolts from bottom of pendant.
2. Remove both #8-32 x3/8" set screws and allow canopy to
slide down pendant.
3. Run wires from J-box into pendant, ensure there is enough
wire to reach cover plate.
4. Using appropriate fasteners, secure fixture to ceiling. Use
additional bracing if necessary.
5
Sealing the fixture
Attention:
Large fixtures require additional bracing/structure
around J-box to support fixture.
(by others)
J-box3/8" fasteners
(by others)
Set screw
(2x)
Canopy
Cover plate
#8-32 x3/8"
1/4-20 x4
Hex bolts
(2x)
(2x)
properly matched
Hex bolts
Slide fixture assembly onto pendant and secure with both 1.
Secure cover plate
1/4-20 x4
Cover plate
3.
2. Attach appropriate wires and ensure all connections are
1/4-20 x4 hex bolts.
1. To seal fixture, ensure door is secured with provided socket
cap screws. Secure #6-32 x1/2" socket cap screws above door
latches.
2. Secure #6-32 x5/8" socket cap screws into bottom of door.
3. Refer to supplementary sheets for torque specs and aiming
instructions.
Securing pendant to ceiling
(3x)
Socket cap screws
#8-32 x1/2"
(2x)
(2x)
Socket cap screws
#8-32 x5/8"
Cover plate
gasket
Wire seal
1
Visor and Non-Visor
performed by a certified electrician.
3
Warning
2
that all sources of power are turned off. All
Sheet 1 of 3
: Before starting any work ensure
work must meet local/national codes and be
Do not
mount fixtures vertically.
Installation Instructions
Vault
C-Scroll
Roundel
These installation instructions are valid with the above Ametrix styles.
Large, OUTDOOR
P2R
(Pendant, 2-way, Remote ballast)
ADY071474 REV A(ECN070347)