


35
Battery Maintenance
NOTE: This unit is equipped with a maintenance-free
BCIU1 battery.
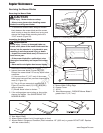
Removing the Floor Pan to Access the Battery:
1. (CE Models Only): Loosen and remove the floor
pan retaining bolt (D, Figure 32).
2. (All Models: 2014696070 & Below): Tilt the left
side of the floor pan (C) up so that the locking
pins clear the holes in the frame. Slide the floor
pan to the left until it stops.
(All Models: 2014696071 & Above): Remove the
two hair pins with lanyards (E) from the floor pan
retention pins (F).
3.
Raise the floor pan straight up and remove from
the machine.
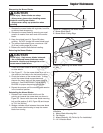
Cleaning the Battery and Cables:
1. Disconnect the cables from the battery, negative
(black) cable first (B).
2.
Clean the battery terminals and cable ends with a
wire brush until shiny.
3. Reinstall the battery and reattach the battery
cables, positive (red) cable first (A).
4. Coat the cable ends and battery terminals with
petroleum jelly or non-conducting grease.
Reinstall the Floor Pan:
1. (All Models: 2014696070 & Below): Insert the
floor pan so that the right locking pins go into the
holes in the right side of the frame. Push the floor
pan to the right until it stops and then lower the
floor pan into place.
(All Models: 2014696071 & Above): Insert the
floor pan onto the machine and install the two hair
pins with lanyards (E) from the floor pan retention
pins (F).
2. (CE Models Only): Reinstall and tighten the floor
pan retaining bolt (D).
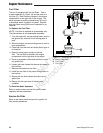
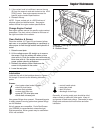
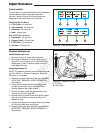
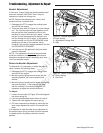
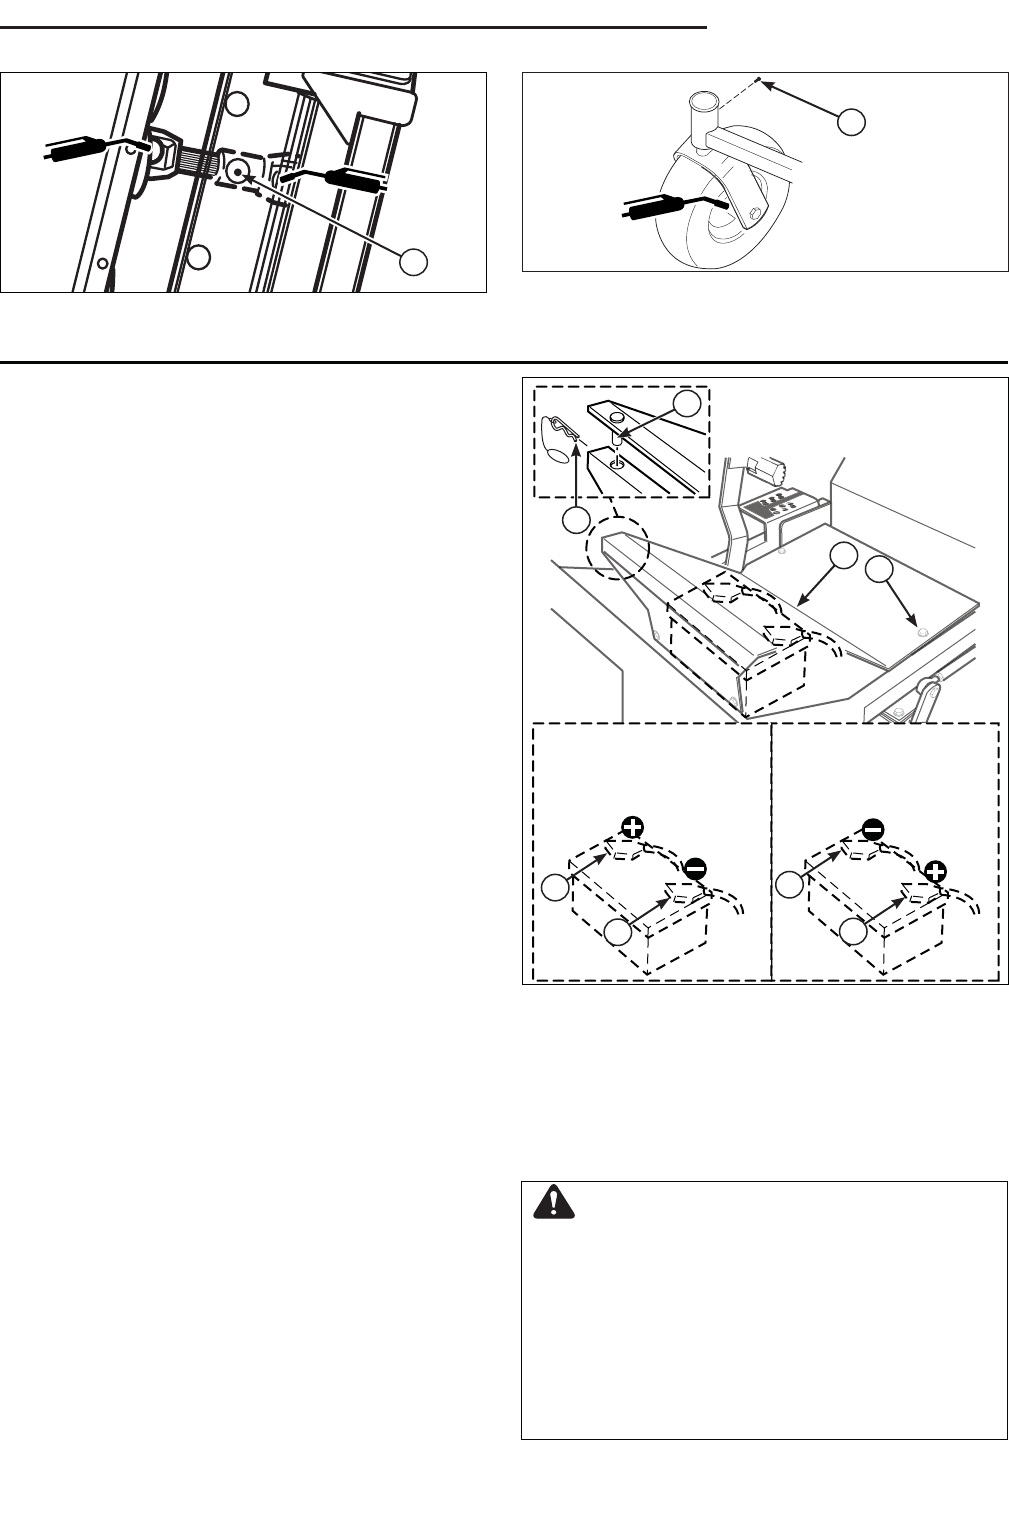
Figure 32. Battery Compartment
A. Positive (+) Cable & Terminal
B. Negative (-) Cable & Terminal
C. Floor pan
D. Floor Pan Retaining Bolt
E. Hair Pin with Lanyards
F.
Floor Pan Retention Pins
WARNING
Be careful when handling the battery. Avoid
spilling electrolyte. Keep flames and sparks
away from the battery.
When removing or installing battery cables,
disconnect the negative cable FIRST and
reconnect it LAST. If not done in this order, the
positive terminal can be shorted to the frame by
a tool.
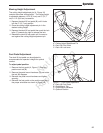
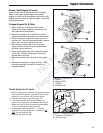
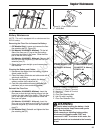
Figure 31. Front Caster & Wheel
A. 1/4-28 Bolt
A
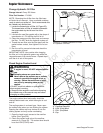
Figure 30. Drive Shaft (Bottom side of unit shown)
A. Plug
A
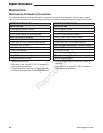
Regular Maintenance
B
A
B
A
C
D
F
E
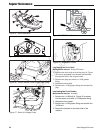
3TNM68 Models: (S/N:
2014889976 & Below)
3TNM68 Models: (S/N:
2014887977 & Above);
3TNM72: All
Not for
Reproduction