


54 – English
(d)
(p)
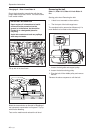
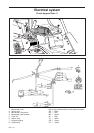
IMPORTANT INFORMATION
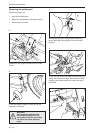
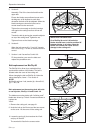
On a BioClip 90 and all 103 units the
blades should have a relative position 90°
between blades. In all other cases the
blades can collide and cause serious
damage to the cutting unit.
5. Version 2:
Assembly: First fit the lower belt and then the
upper belt.
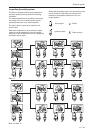
Ensure the blades are positioned as set out in
the diagram, at 90 degrees to each other,
otherwise the belts must be adjusted. When the
blade bearings are loose the belts can be
moved around to the next tooth.
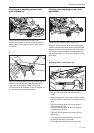
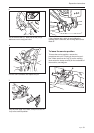
Tighten the nuts enough so that the bearings
rest against the cutting hood but still can be
moved.
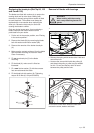
Tension the belt by turning the eccentric adjuster
on top of the cutting hood. Tighten the nut.
Tighten all nuts on the blade bearings.
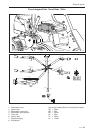
6. Version 2:
When the belt moves (d) = 7 mm/1/4" inwards
with a force of (p) = 10 N/2 lb, the belt tension is
correct.
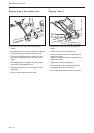
7. Version 1 and 2 as well as Combi 103:
Fit the protective cover over the belts and
replace the parallelism arm.
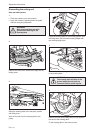
Belt replacement on BioClip 90
The BioClip 90 is driven by a toothed belt that
synchronises rotation of the blades. The belt is
located under the cover of the cutting unit.
When changing the belt on BioClip 90, follow the
above description, items 1-7 for version 2.
NOTE!
BioClip 90 only has 1 belt, tension (d) = 8 mm/5/16",
(p) = 7 N/1,5 lb.
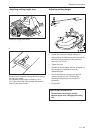
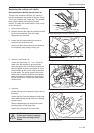
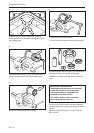
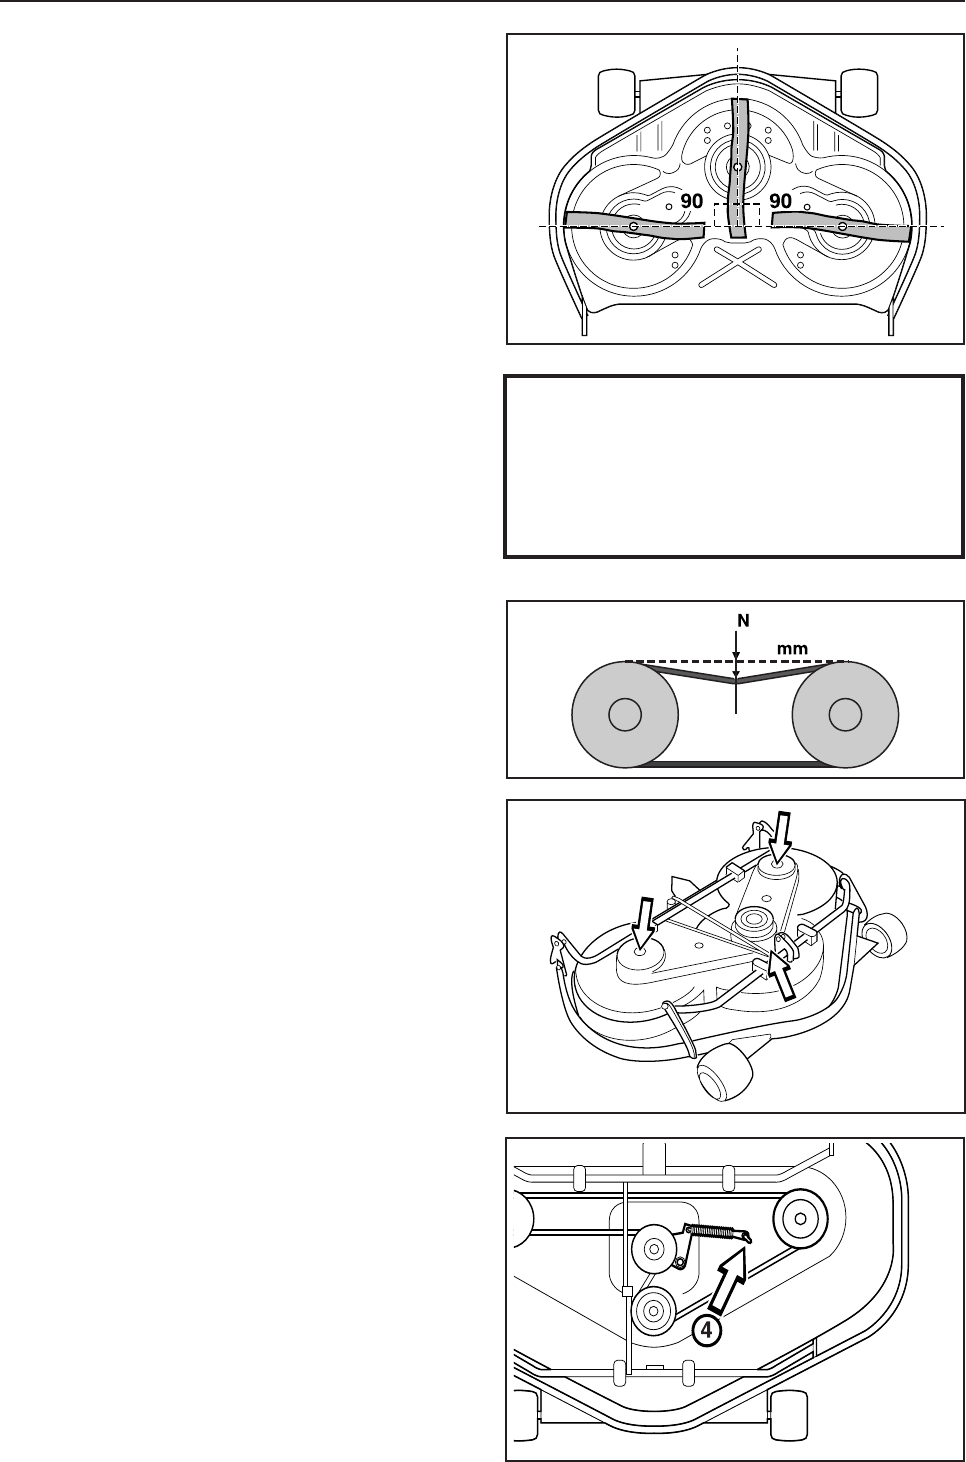
Belt replacement on the mowing deck with side
or rear ejection, BioClip 112 and Combi 112
The blades on mowing decks with ”collision-proof”
blades are driven by a V-belt. Proceed as follows to
replace the
V-belt:
1. Remove the cutting unit, see page 31.
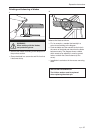
2. Undo the bolt on the lift strut and the two screws
on the cover. Lift the cover off the cutting unit.
3. Loosen the spring (4) that tensions the V-belt
and pry off the belt.
The new belt is fitted in the reverse order.
Reparation instructions