


English – 55
2B
3
4
4
6
2A
7
8
5
2
1
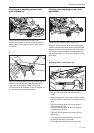
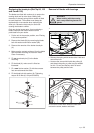
Reparation instructions
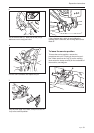
Removal of blades with bearings
Unscrew the screw which holds the blade and
remove the screw, washer and blade.
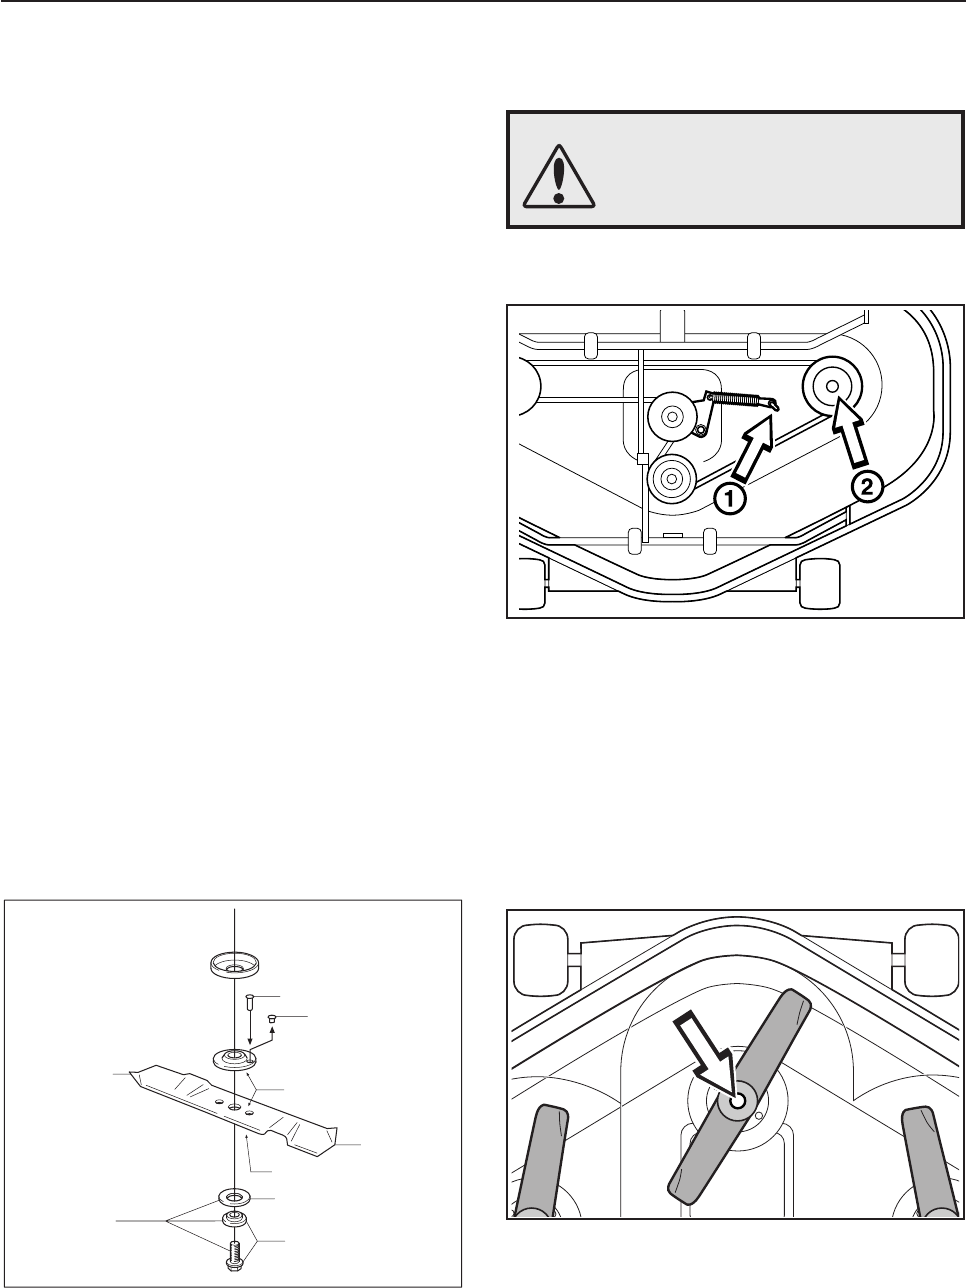
• Release the spring which tensions the V-belt and
twist off the belt.
• Unscrew the screw which holds the pulley (2)
and detach the pulley, a puller may be needed
for this. Do not lose the key which is found
between the pulley and the axle.
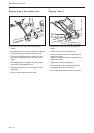
WARNING!
When working with the mowing
deck, use protective glasses and
gloves.
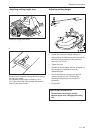
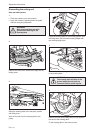
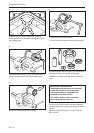
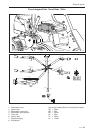
Replacing the break-pin (BioClip 90, 103
and Combi 103)
The blades are fitted with a shear pin to protect the
mowing deck and its drive when colliding with
obstacles. A domed, spring friction washer is fitted
to each blade bolt. The washer must always be
replaced with a new washer when replacing the
shear pin. Otherwise the break-pin can break
causing the blades to collide.
Only use original spare parts. A set containing a
blade, break-pin and friction washer can be
purchased from your dealer.
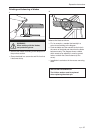
1. Put the unit in the service position, see “Placing
in the service position”.
2. Remove the blade (2A) by removing the blade
bolt with washer and friction washer (2B).
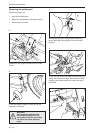
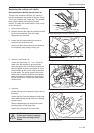
3. Remove the remains of the broken break-pin
(3).
4. Make sure the contact surfaces (4) on the blade
and the blade mounting are free from metal.
Clean if necessary.
5. Fit one new break-pin (5) in the blade
mounting.
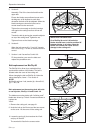
6. Fit the blade (6), make sure it is fitted as
illustrated.
7. Fit a new friction washer (7) with the concave
face turned towards the blade.
8. Fit the blade bolt with washer (8). Tightening
torque 45-50 Nm (4,5-5 kpm/32-36 lbft)