1) Unpack components and verify contents. LST120/LST220 contains (1) trimmer, (1) black handle, (1) guard, (1) battery (LST120) or
(
2) batteries (LST220), and (1) charger. NOTE: LST120 contains one battery.
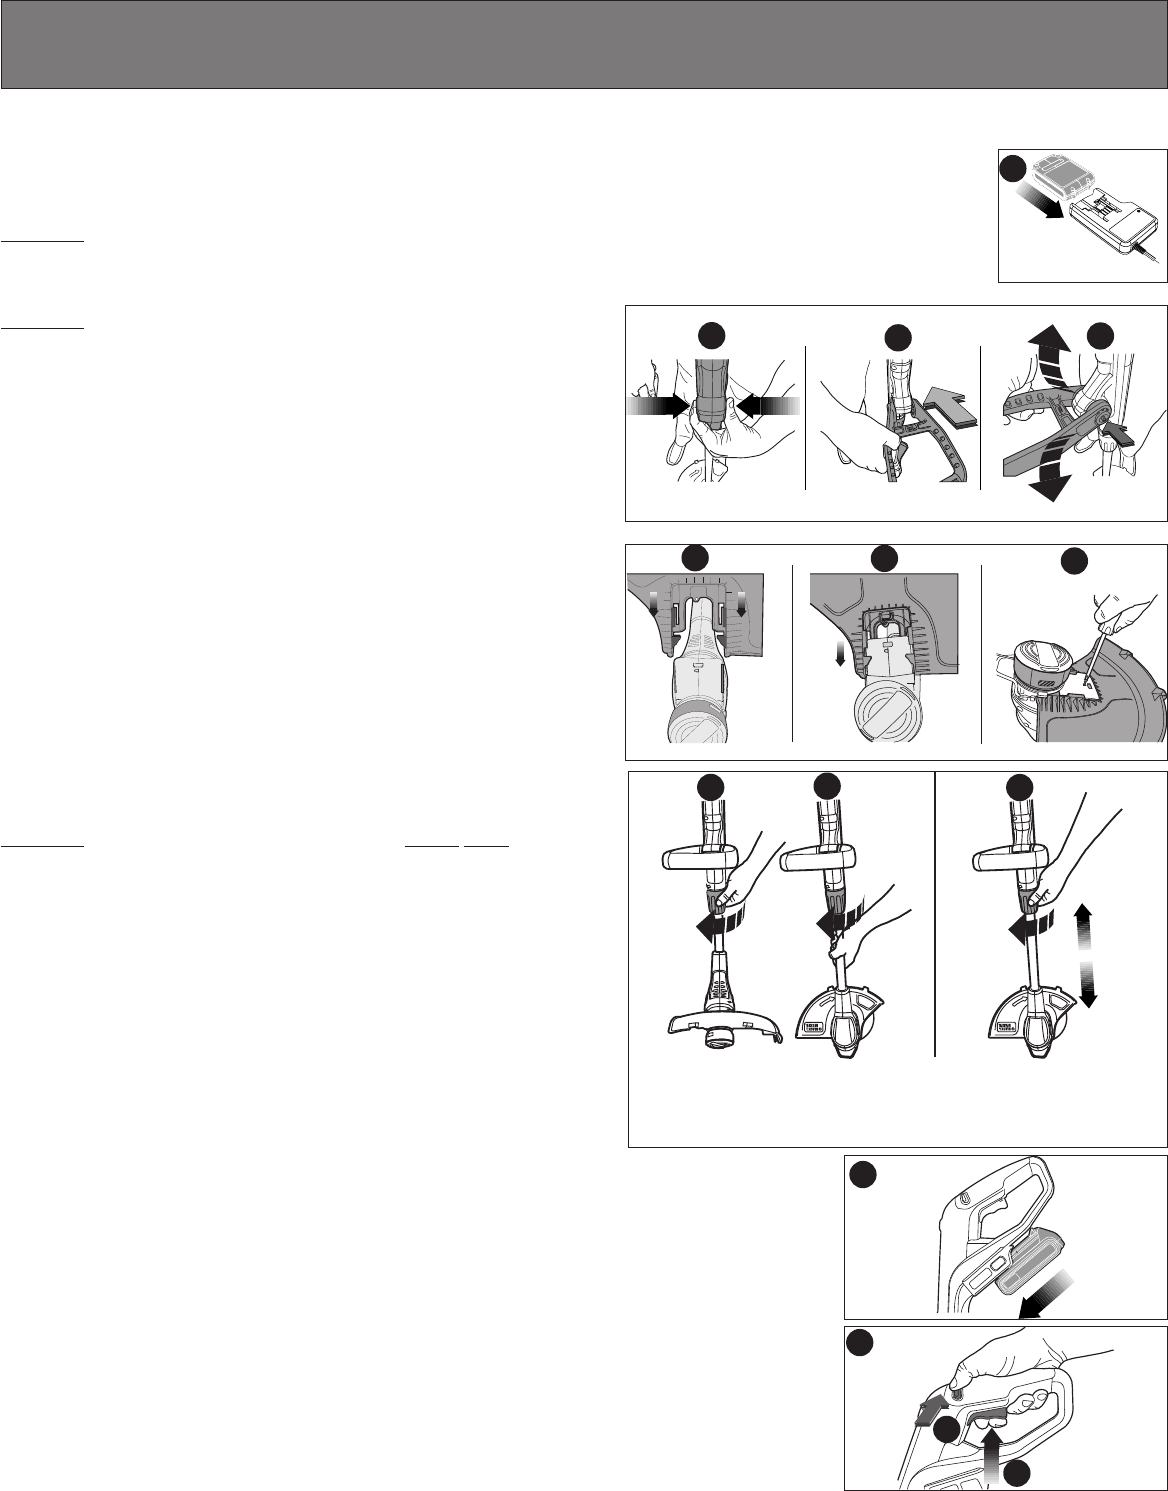
2) Place batteries on charge.
I
mportant
:
Charge both packs for at least 8 hours to ensure a full charge is delivered to the battery. During charging the
green LED will appear. When charging is complete the green LED will go off.
3) Install the handle.
Important
: The black auxiliary handle must be installed with the
Black & Decker logo facing up.
• Press in on the buttons on both sides of the upper housing (B1).
• Partially push the handle on so that it will hold the buttons in when you re-
lease them with your hand (B2).
• Push the handle completely onto the housing and position it slightly until it
“snaps” into place (B3).
Note: If the handle is installed upside down, the adjustment button will not
engage. To remove the handle, insert a nail or screwdriver into the small hole
on the side of the handle, push in the spring loaded button on the opposite
side of the handle, and remove the handle from the trimmer body.
4) Install the guard.
Turn the trimmer upside down so that you are looking down at the spool cap.
• Turn the guard upside down and slide it onto the orange tab below the
motor housing as shown (C1). Make sure the tabs on the guard engage the
ribs on the motor housing as shown in C2.
• Continue to slide the guard on until you hear it “snap” into place.
• Using a phillips screwdriver, insert the guard screw to complete the guard
assembly (C3).
5) Remove the tape from the line and cutting blade on the guard.
6) Adjust the mode and height.
Important
: The trimmer ships in the box set in the edging mode.
• To switch the trimmer back into trimming mode, loosen the black collar
located at the top of the aluminum pole (D1).
• Rotate the pole 180°. There is a position stop at 180° to indicate you are in
trimming mode (D2).
• You may also adjust the height of the trimmer to a comfortable operating
height when the collar is loose (D3).
• Tighten the collar when the trimmer is at the desired height and mode.
7) Once the batteries are charged, slide the battery into the trimmer area as shown.
8) Depress the lock off button (as shown here) in either direction and simultaneously pull the trigger.
You do not need to continue to depress the lock off button during operation.
If you have additional questions or need help, please call Black & Decker at
1-800-544-6986 from
8 a.m. to 5 p.m. EST Mon. - Fri.
Please check instruction manual for full instructions and warnings.
QUICK START GUIDE - LST120/LST220
RECHARGEABLE LITHIUM STRING TRIMMER
8 hours
8 heures
8 horas
Edge mode
Mode de coupe-
bordures
Modo de bordeado
Trim mode
Mode de taillage
Modo de poda
1
2
A
C1
C2
C3
D1
D2
D3
E
F
B1
B2
B3